Contents
When preparing your outdoor storage shed for winter, it’s crucial to balance proactive maintenance with smart storage solutions. Before the cold sets in, take a critical look at your shed’s vulnerabilities and reinforce them against the elements. From safeguarding against leaks to optimizing ventilation, each step plays a vital role in ensuring your stored items remain intact. But what about the lesser-known tips that could make all the difference? Stay tuned as we uncover the remaining secrets to winterizing your outdoor storage shed effectively.
Key Takeaways
- Insulate walls and roof to retain heat and prevent freezing pipes.
- Check for leaks and repair gaps in walls and windows.
- Use weatherstripping on doors to keep cold air out.
- Clear gutters and ensure proper drainage around the shed.
- Store items off the ground to prevent moisture damage.
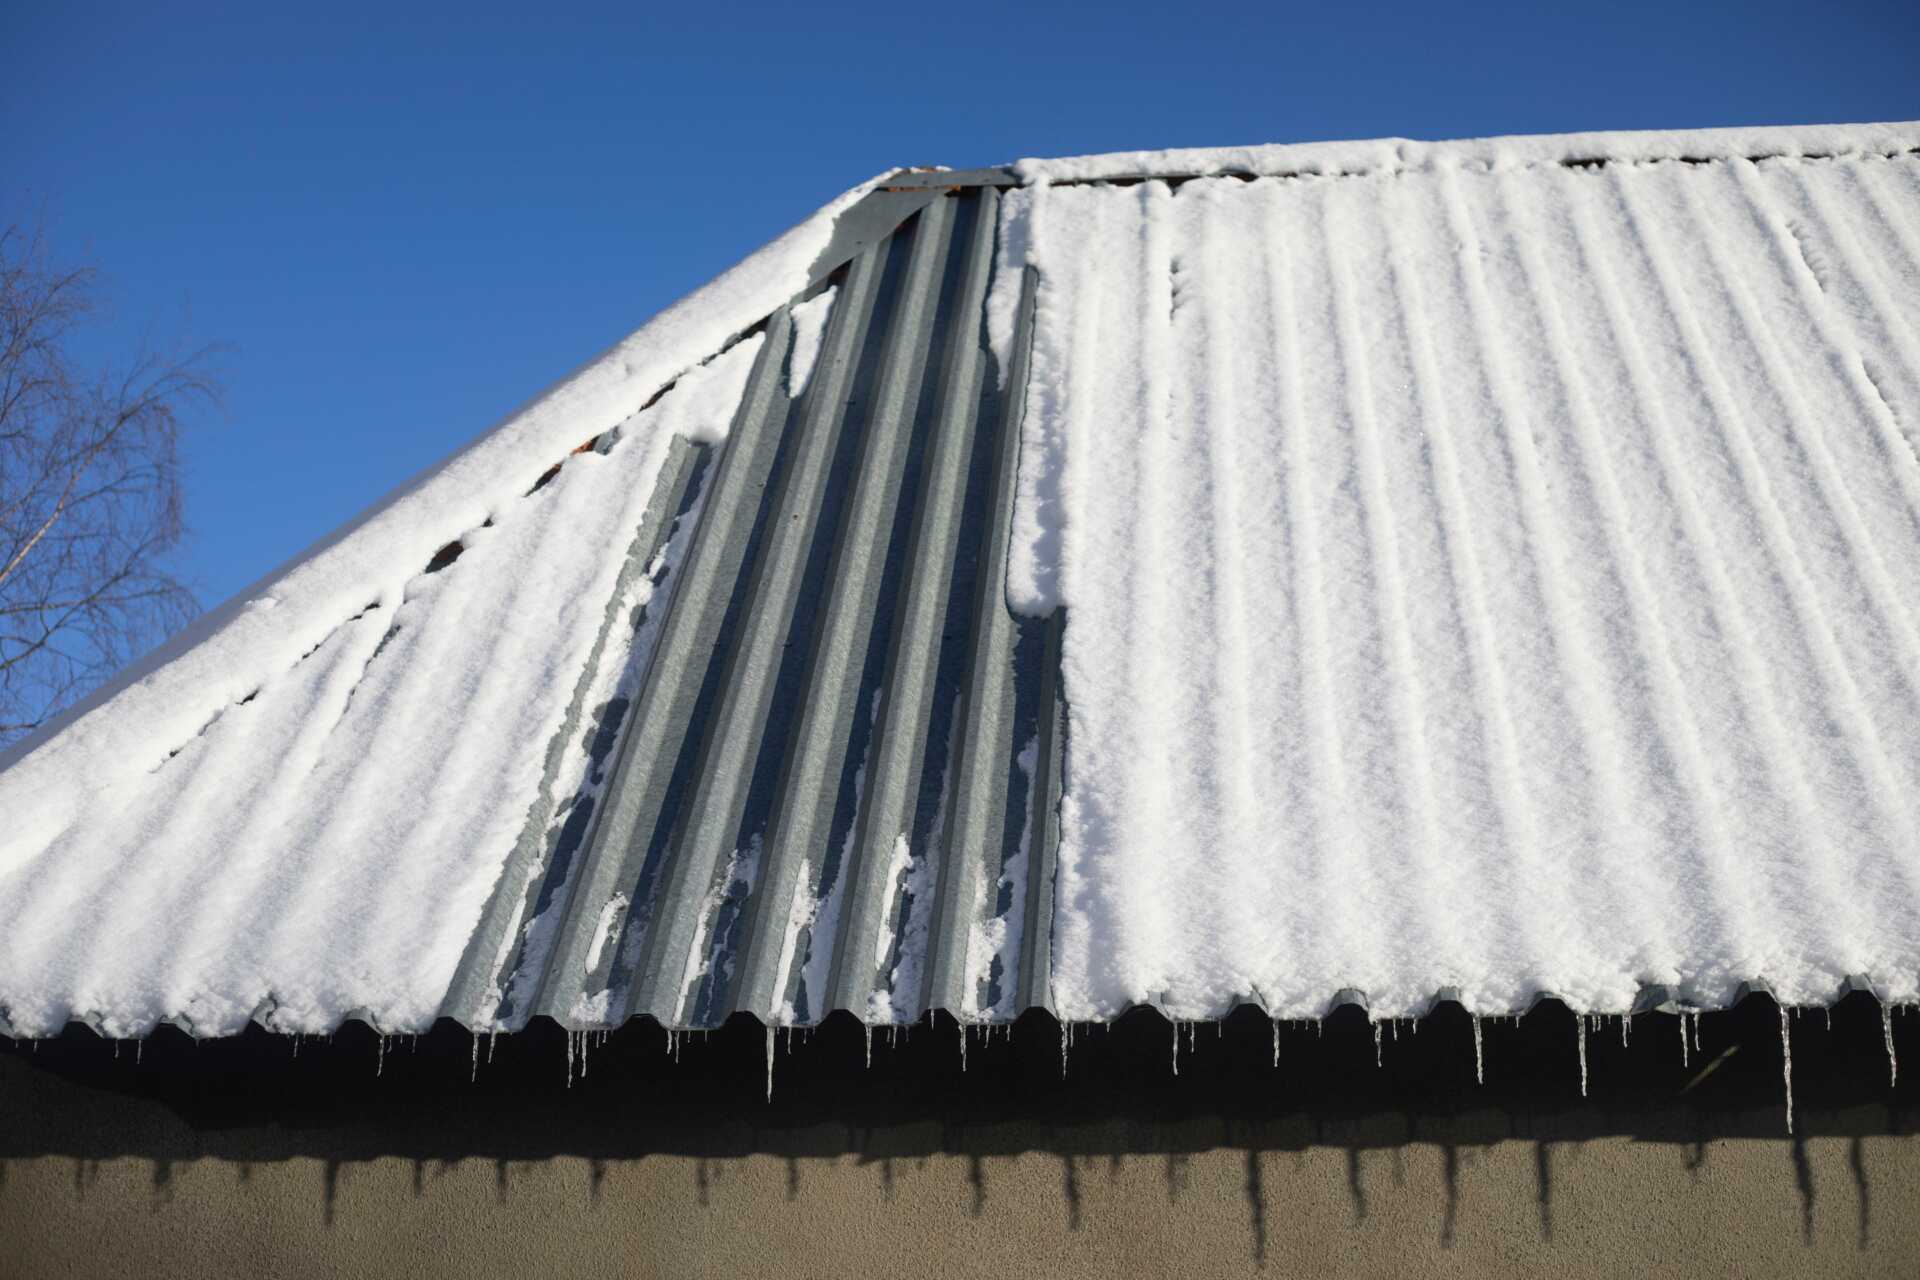
Inspect Roof for Leaks
Check the roof of your outdoor storage shed thoroughly for any signs of leaks before winter sets in. Leak prevention is crucial in maintaining the integrity of your shed. Start by inspecting the shingles or roofing material for any cracks, missing pieces, or signs of wear and tear. Replace or repair damaged areas to ensure a watertight seal.
Additionally, check for any debris such as leaves or branches that may have accumulated on the roof, as these can trap moisture and lead to leaks.
Roof maintenance is a key part of winterizing sheds. Consider applying a waterproof sealant to the roof to provide an extra layer of protection against snow and rain. This can help prevent water from seeping into the shed and causing damage to your stored items. Make sure to choose a high-quality sealant that’s suitable for the material of your roof.
Incorporating waterproofing techniques into your roof maintenance routine can go a long way in protecting your outdoor storage shed during the winter months. By being proactive and addressing any potential leaks before they become a problem, you can ensure that your shed remains a secure and dry space for your belongings.
Seal Cracks and Gaps
Inspect your outdoor storage shed for any cracks and gaps that need to be sealed to prevent cold air and moisture from entering. Properly sealing these openings can help maintain a warmer and drier environment inside your shed during the winter months. Here are some DIY projects and insulation options to help you prevent drafts and ensure your shed is well-insulated:
| DIY Projects | Insulation Options |
|---|---|
| Weatherstripping doors | Fiberglass batts |
| Caulking windows | Foam board |
| Adding insulation | Reflective insulation |
| Installing door sweeps | Insulating paint |
| Sealing foundation gaps | Spray foam |
Clear Gutters and Drains
Ensure proper drainage by clearing out gutters and drains to prevent water buildup and potential damage to your outdoor storage shed during the winter months. Proper drainage maintenance is crucial in preventing water damage and maintaining the structural integrity of your shed.
Start by inspecting your gutters for any debris such as leaves, twigs, or dirt that may be blocking the flow of water. Use a sturdy ladder and gloves to carefully remove the debris and ensure that water can freely flow through the gutters.
Additionally, inspect the downspouts to make sure they’re clear of any obstructions. You can use a plumber’s snake or a pressure washer to clear any clogs that may have formed. Keeping the downspouts clear will help direct water away from your shed’s foundation, preventing potential flooding and water damage.
Regular roof inspections are also essential in maintaining proper drainage. Check for any signs of damage, such as missing or broken shingles, cracks, or leaks. Addressing these issues promptly can prevent water from seeping into your shed and causing structural damage.
Protect Against Rodents
To safeguard your outdoor storage shed from potential damage and contamination, it’s essential to implement effective rodent protection measures. Rodents can cause havoc by gnawing on items, leaving droppings, and potentially damaging the shed’s structure.
To prevent such issues, consider utilizing a combination of rodent prevention techniques and natural deterrents. Start by inspecting the shed for any holes or cracks that could serve as entry points for rodents. Seal these openings with steel wool or caulk to block their access. Additionally, place traps strategically around the shed, focusing on areas where rodents are likely to travel. Opt for snap traps or electronic traps for effective results.
For a natural approach to rodent deterrent, consider using strong-smelling substances like peppermint oil, cloves, or ammonia. Soak cotton balls in these scents and place them in corners or near entry points to discourage rodents from entering. Another natural solution is to plant mint or lavender around the shed, as rodents tend to avoid these fragrances.
Regularly inspect and reset traps as needed and replenish natural deterrents to ensure their effectiveness throughout the winter. By combining rodent prevention methods with natural solutions, you can protect your outdoor storage shed from unwanted guests and potential damage during the colder months.
Check Weather Stripping
When preparing your outdoor storage shed for winter, start by inspecting the existing weather stripping. Look for any signs of wear or damage, as these can compromise the shed’s insulation.
To ensure a tight seal against cold weather, replace any worn weather stripping and apply new weather stripping where needed.
Inspect Existing Weather Stripping
Inspecting the existing weather stripping on your outdoor storage shed is essential to ensure protection against harsh winter elements. As part of your winterizing checklist, weather stripping maintenance plays a crucial role in keeping your shed insulated and free from drafts.
Begin by examining the weather stripping around the doors and windows for any signs of wear and tear. Look for cracks, gaps, or areas where the stripping has become loose or detached. This process will help you identify areas that may need attention before the cold weather sets in.
To inspect the weather stripping effectively, run your hand along the edges of the doors and windows to feel for any air leaks. If you notice any drafts or gaps, it may be time to consider replacing or repairing the weather stripping to maintain a secure seal.
Replace Worn Weather Stripping
How can you effectively determine if the weather stripping on your outdoor storage shed needs to be replaced?
Weatherstripping maintenance is crucial for keeping your shed insulated and protected from the elements. To assess if replacement is necessary, look for signs of wear such as cracking, peeling, or gaps that allow drafts to enter your shed.
Here are some tips to guide you through the process:
Check for Visible Damage: Inspect the weather stripping for any visible signs of wear and tear.
Test for Drafts: On a windy day, feel around the edges of your shed door for any drafts coming through.
Measure Effectiveness: Compare your current energy bills with previous ones to see if there’s been an increase, indicating a potential issue with the weather stripping.
Research Cost-Effective Options: Look into DIY weather stripping installation techniques or consider hiring professional services for a more comprehensive solution.
Consider Long-Term Benefits: Investing in quality weather stripping now can save you money on heating costs in the long run.
Apply New Weather Stripping
To ensure your outdoor storage shed remains well-insulated and protected, the next step is to check the existing weather stripping and apply new weather stripping as needed. Weatherstripping materials such as foam, rubber, or vinyl are commonly used for this purpose. When selecting weather stripping, ensure it’s durable and suitable for the specific conditions your shed faces.
The installation process is straightforward and can be completed with basic tools like a utility knife and adhesive. Start by cleaning the edges of the door or windows where the weather stripping will be applied. Measure and cut the stripping to fit each side precisely, removing any old stripping beforehand.
Press the new weather stripping firmly into place, ensuring a snug seal to prevent drafts and moisture from entering.
Maintain Proper Ventilation
Proper ventilation in your outdoor storage shed is essential to prevent moisture buildup and maintain the condition of your belongings. To ensure your shed stays in top shape, follow these tips:
Regularly Inspect Vents:
Check that all vents are clear of debris and obstruction. Proper airflow is crucial for moisture control and preventing mold growth.Install Ventilation Fans:
Consider adding ventilation fans to improve airflow. This can help regulate temperature and humidity levels, keeping your items safe from dampness.Use Moisture Absorbers:
Place moisture absorbers like silica gel or desiccants inside the shed to reduce excess humidity. This simple step can protect your belongings from moisture damage.Seal Cracks and Gaps:
Inspect the shed for any cracks or gaps that could let cold air in. Proper sealing not only helps with energy efficiency but also prevents moisture from seeping in.Consider a Dehumidifier:
If you live in an area with high humidity, investing in a dehumidifier for your shed can be beneficial. It helps maintain optimal moisture levels and protects your stored items.
Store Seasonal Items Properly
When storing seasonal items in your outdoor shed, it’s crucial to keep things organized to easily locate what you need later.
Utilize climate-appropriate storage solutions to protect your belongings from harsh weather conditions.
Following these item organization tips will help you maintain a tidy and efficient storage space throughout the winter months.
Item Organization Tips
Ensure your seasonal items are stored in a manner that preserves their quality and makes them easily accessible when needed.
When organizing your outdoor storage shed for winter, consider the following tips:
Shelving Options: Utilize sturdy shelves to maximize vertical space and keep items off the ground.
Labeling System: Clearly label bins or containers to easily identify the contents without rummaging through everything.
Bins vs. Hooks: Decide whether to use storage bins for smaller items or hooks for hanging larger tools like rakes and shovels.
Storage Layout: Arrange items based on frequency of use, with seasonal items placed towards the back and frequently used tools at the front.
Weatherproofing: Store items in weatherproof containers or plastic bins to protect them from moisture and pests.
Climate-Appropriate Storage Solutions
Consider utilizing climate-appropriate storage solutions to ensure your seasonal items are properly preserved during the winter months. Begin by using insulating materials such as foam boards or weather stripping to seal any gaps in your shed, keeping the cold air out and maintaining a stable temperature inside.
Moisture control is crucial; use a dehumidifier or moisture-absorbing products to prevent mold and mildew growth on your belongings.
To prevent pests from invading your storage space, employ pest prevention methods like sealing cracks, setting traps, or using natural deterrents like cedar blocks or essential oils.
Structural reinforcement is also essential; check for any signs of damage or weakness in the shed’s walls, roof, or foundation, and make necessary repairs to ensure the structure can withstand winter weather conditions.
Recap
Now that you have winterized your outdoor storage shed, envision a cozy retreat for your belongings that is safe and secure from the harsh winter elements.
The roof is sealed tight, gutters clear, rodents kept at bay, and ventilation maintained.
Your seasonal items are neatly stored, organized, and labeled for easy access.
With these tips, your shed is ready to withstand the winter months and keep your belongings protected. Enjoy peace of mind knowing your storage shed is well-prepared for whatever winter brings.