Contents
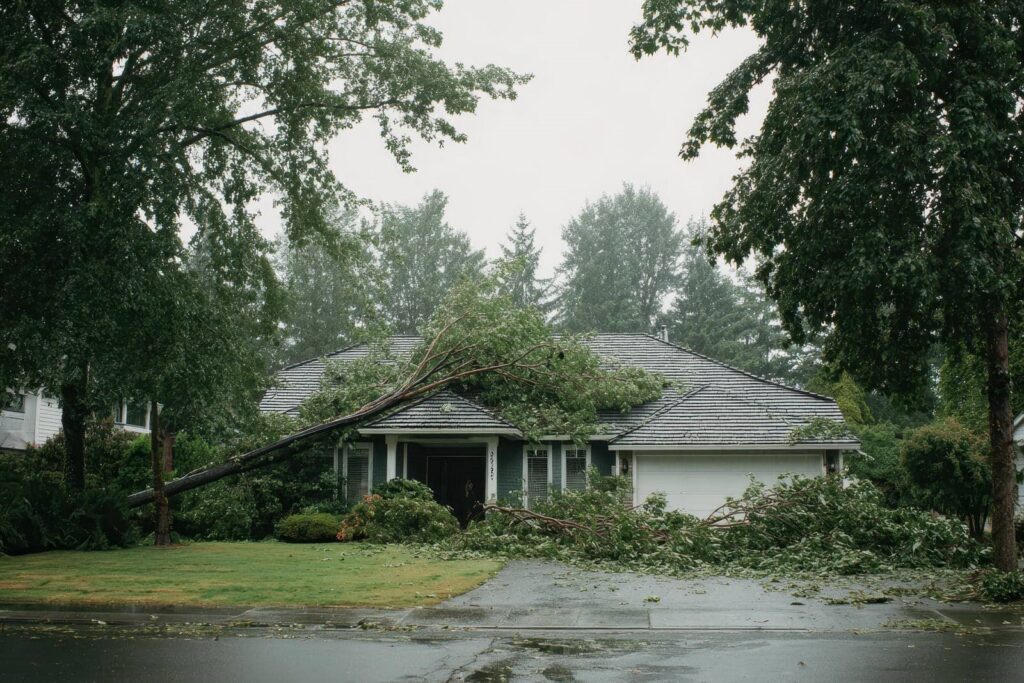
Imagine you’ve just discovered a roof leak that’s caused mold to spread in your attic. Addressing this issue requires a systematic approach to ensure safety and effectiveness. First, you’ll need to assess the damage and take necessary precautions to protect yourself. Once you understand the extent of the problem, you can move on to containing the area. Knowing the essential steps for mold removal can make all the difference in preventing future growth.
Key Takeaways
- Inspect the affected area for water intrusion signs and document your findings during the damage assessment.
- Ensure safety by wearing protective gear and conducting a hazard assessment for risks like mold spores.
- Contain the mold-affected area with plastic sheeting and remove all contaminated materials safely.
- Clean and disinfect surfaces using effective solutions, focusing on high-touch areas and ensuring thorough drying.
- Monitor humidity levels and implement preventive measures to avoid future mold growth, such as using dehumidifiers and ensuring proper ventilation.
Assessing the Damage
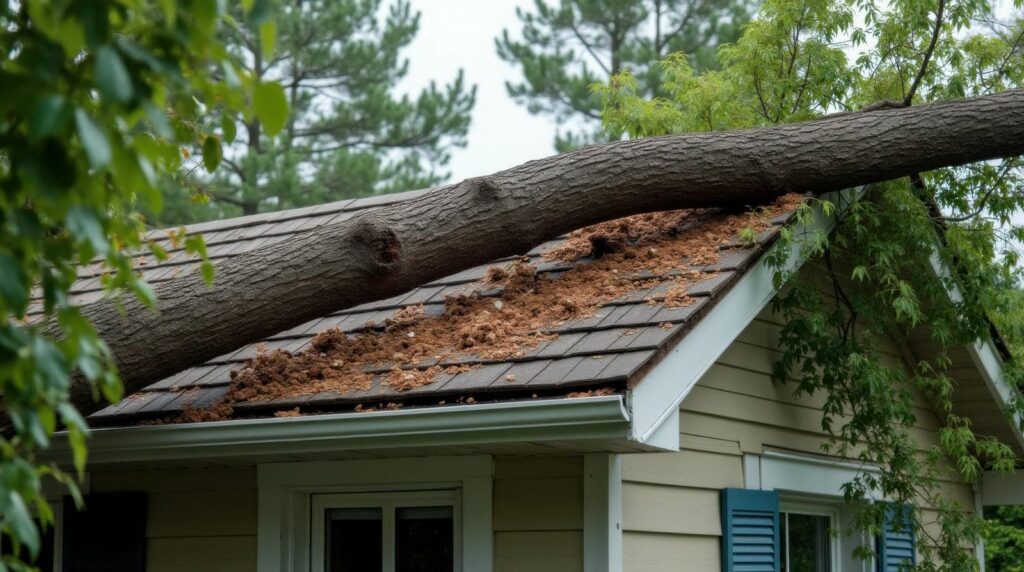
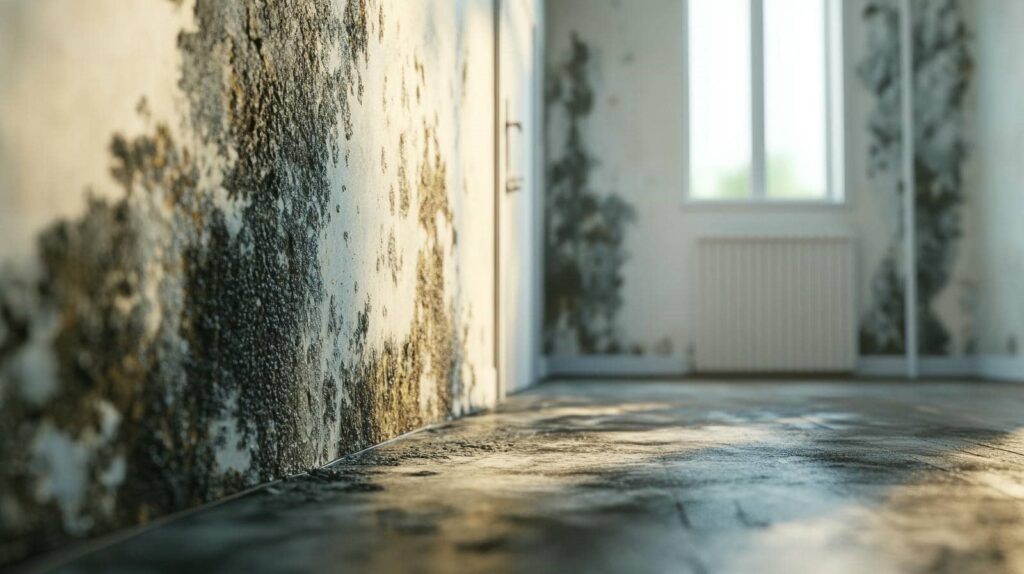
When you discover a roof leak, it’s essential to assess the damage promptly to prevent further complications. Start by inspecting the affected area, looking for signs of water intrusion—stains, sagging ceilings, or mold growth.
Conduct a thorough damage assessment, documenting everything you find. Use a moisture meter to perform a moisture evaluation, determining the extent of water saturation in materials like drywall or insulation.
Pay close attention to hidden areas, such as attics or behind walls, where moisture can linger undetected. Identify the source of the leak to address it effectively and prevent future issues.
Additionally, check for compromised structural elements, as prolonged exposure can lead to significant damage. Understanding the severity of the situation helps in planning your next steps and fosters a sense of community, as you engage with professionals or neighbors who may assist in the repair process.
Ensuring Safety Precautions
After evaluating the damage from a roof leak, the next step involves implementing safety precautions to protect yourself and others during the mold removal process.
Start with a thorough hazard assessment of the affected area. Identify potential risks, including exposure to mold spores and structural instability.
Next, equip yourself with appropriate safety gear. Wear N95 respirators to filter out harmful particles, gloves to protect your skin, and goggles to shield your eyes from irritants.
Consider using protective clothing, like coveralls, to minimize skin exposure.
Ensure proper ventilation in the workspace by opening windows and using fans if necessary.
If the mold growth is extensive, you might want to consult professionals.
By prioritizing safety gear and conducting a diligent hazard assessment, you’ll create a safer environment for yourself and anyone involved in the mold removal process.
Your commitment to safety helps foster a sense of community and responsibility.
Containing the Affected Area
To effectively manage mold removal, it’s crucial to contain the affected area immediately. Start by identifying the boundaries of the mold growth. Use mold containment methods, such as sealing off the area with plastic sheeting.
Create temporary barriers to prevent spores from spreading to unaffected spaces. Confirm you tape the edges securely to minimize airflow between zones.
Next, close windows and doors to limit air movement. If possible, use a negative air pressure machine to filter air and keep it contained. This method helps capture mold spores before they escape into other parts of your home.
Don’t forget to wear proper protective gear, like gloves and masks, while working in the area. Taking these steps will safeguard you and create a sense of community effort in tackling this issue.
Removing Affected Materials
Begin by evaluating and carefully removing any materials that have been affected by mold, such as drywall, insulation, or carpeting.
Start with mold identification techniques to pinpoint contaminated areas. Use a utility knife to cut out affected drywall, ensuring you extend a few inches beyond visible mold to eliminate hidden spores.
For insulation, carefully peel away and dispose of any damp or moldy sections, as these can harbor spores that spread throughout your home.
Follow material disposal guidelines by sealing all removed materials in plastic bags to prevent cross-contamination. Label the bags clearly and dispose of them according to local regulations, which may include taking them to a designated waste facility.
Always wear protective gear, including gloves and masks, to safeguard your health during this process.
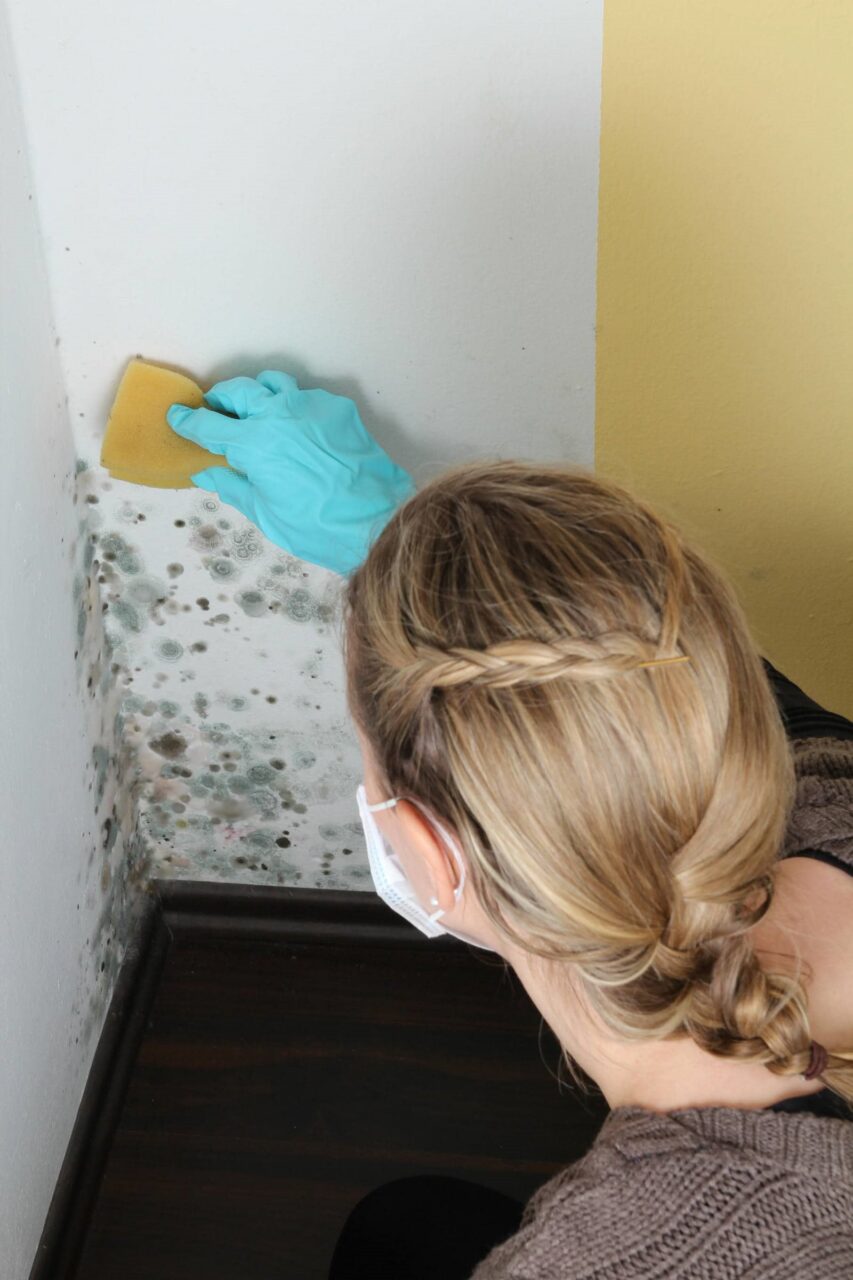
Cleaning and Disinfecting Surfaces
Once you’ve removed affected materials, it’s essential to clean and disinfect all surfaces thoroughly.
You’ll want to use effective cleaning solutions specifically designed to eliminate mold spores, followed by proper disinfection techniques to ensure a safe environment.
Pay careful attention to high-touch areas and porous materials, as these can harbor lingering contaminants.
Effective Cleaning Solutions
When dealing with mold after roof leaks, selecting effective cleaning solutions is essential for removing visible growth and preventing future outbreaks. You should prioritize eco-friendly solutions that are safe for your home and family. Consider using mold-resistant products that inhibit future growth.
Here’s a table to guide your choices:
| Solution Type | Example | Benefits |
|---|---|---|
| Vinegar | White vinegar | Natural, kills most molds |
| Hydrogen Peroxide | 3% solution | Disinfects, eco-friendly |
| Baking Soda | Sodium bicarbonate | Absorbs moisture, deodorizes |
| Borax | Borax powder | Mold-resistant, safe for the home |
| Essential Oils | Tea tree oil | Natural antifungal properties |
Using these solutions will help you maintain a mold-free environment.
Proper Disinfection Techniques
To effectively disinfect surfaces after mold removal, you must follow a systematic approach that ensures all affected areas are thoroughly treated.
Start by selecting appropriate cleaning agents, such as bleach or hydrogen peroxide, known for their mold-killing properties. Dilute these agents according to manufacturer instructions to ascertain safety and effectiveness.
Next, apply your chosen cleaning solution to surfaces using a spray bottle or cloth, ensuring even coverage. Allow the solution to sit for the recommended time to facilitate proper disinfection.
Afterward, scrub surfaces to remove any remaining mold spores, then rinse with clean water.
Finally, dry the area completely to prevent future mold growth. Employing these disinfection methods will help maintain a safe and healthy environment in your home.
Drying the Area Thoroughly
After addressing surface cleaning and disinfecting, your next priority is to dry the area thoroughly.
Quick action is essential to prevent mold growth, so you’ll need effective tools like dehumidifiers and fans to expedite the drying process.
Additionally, regularly monitoring humidity levels will help ensure the environment remains inhospitable to mold.
Importance of Quick Action
Though you may be enthusiastic to address visible damage, the importance of quick action in drying the area thoroughly can’t be overstated.
Swiftly managing moisture is essential for mold health; mold can begin to develop within 24 to 48 hours of water exposure. Start by removing any standing water and ensuringproper ventilation to facilitate drying.
Use fans and dehumidifiers to reduce humidity levels, as stagnant air can exacerbate mold growth. Remember, leak prevention starts with addressing the source of moisture promptly.
Tools for Effective Drying
Having the right tools on hand is crucial for effectively drying areas affected by roof leaks.
Start with dehumidifier options; choose a unit with sufficient capacity based on the space size. For smaller areas, a portable model may suffice, while larger spaces require industrial-grade units.
Pair your dehumidifier with the right air mover types to enhance airflow. High-velocity fans are ideal for directing air across damp surfaces, expediting evaporation. Additionally, consider using a combination of axial and centrifugal fans for versatile drying.
Confirm that airflow reaches all corners of the room to prevent moisture pockets. By strategically utilizing these tools, you’ll create an environment conducive to thorough drying, greatly reducing mold growth risk.
Monitoring Humidity Levels
Once you’ve set up your dehumidifiers and fans for effective drying, monitoring humidity levels becomes an essential next step.
To ensure ideal drying, use humidity sensors and moisture meters to monitor air and material moisture content. Ideally, indoor humidity should be kept below 60%. Regularly check readings, adjusting your equipment as needed to maintain this level.
Pay close attention to areas that may not dry as quickly, like corners or behind furniture. This methodical approach helps prevent mold growth and fosters a healthier environment.
Preventing Future Mold Growth
To effectively prevent future mold growth after addressing roof leaks, it’s essential to focus on moisture control and proper ventilation.
Start by confirming your home uses mold-resistant materials, such as treated wood and specialized paints, in areas prone to dampness. This step considerably reduces the likelihood of mold taking hold.
Next, maintain humidity control by using dehumidifiers in humid areas like basements and bathrooms. Aim to keep indoor humidity levels between 30% and 60%.
Regularly check and clean gutters to prevent water from accumulating, and verify proper drainage around your foundation.
Additionally, enhance airflow by installing exhaust fans in kitchens and bathrooms. Open windows when the weather permits to promote fresh air circulation.
Regular inspections and prompt repairs of leaks will ensure that any moisture issues are addressed quickly.
Frequently Asked Questions
How Long Does Mold Removal Typically Take?
Mold removal typically takes anywhere from a few days to a week, depending on the extent of mold growth and the removal techniques used. It’s essential to address the issue promptly to prevent further complications.
Can I Remove Mold Myself or Should I Hire a Professional?
You can tackle DIY mold removal if it’s minor, but hiring professional services ensures meticulousness and safety. Professionals have advanced tools and expertise, which minimize health risks and ensure extensive remediation, fostering a healthier living environment.
What Are the Health Risks Associated With Mold Exposure?
Exposure can trigger mold symptoms like respiratory issues, including asthma and allergies. Understanding these risks can help you prioritize your health and create a safe living environment.
How Can I Tell if Mold Is Completely Removed?
To ensure mold is completely removed, conduct thorough visual inspections and schedule mold testing. Look for any signs of discoloration or musty odors, and confirm with professionals that air quality meets safety standards before deeming the area clear.
Will Homeowner’s Insurance Cover Mold Removal Costs?
Like a knight in shining armor, your homeowner’s insurance might save the day. However, coverage limits vary by policy, so review your terms carefully to determine if mold removal costs are included in your coverage.
Recap
In the battle against mold, think of yourself as a vigilant gardener tending to your home. Just as you’d prune away dead branches to let sunlight in, you’ve assessed, contained, and removed the threats lurking in your space. By cleaning and drying thoroughly, you’re nurturing a healthy environment, preventing mold from taking root again. Keep a watchful eye on humidity, ensuring your home remains a flourishing sanctuary, free from the shadows of mold’s return.