Contents
When it rains, it pours, and sometimes, it reveals a leak in your roof. But fret not; armed with the right techniques, you can tackle this challenge head-on. From pinpointing the elusive source of the leak to mastering the art of sealant application, each step plays an essential role in ensuring a dry and secure home. So, before you grab that ladder and ascend to roof level, let’s uncover the crucial techniques that will empower you to conquer roof leaks like a pro.
Key Takeaways
- Inspect the roof for damage and water stains regularly.
- Use appropriate safety gear and work with a partner.
- Gather necessary tools and quality repair materials.
- Locate the source of the leak using various methods.
- Clean and prepare the repair area before starting.
Identifying Roof Leak Signs
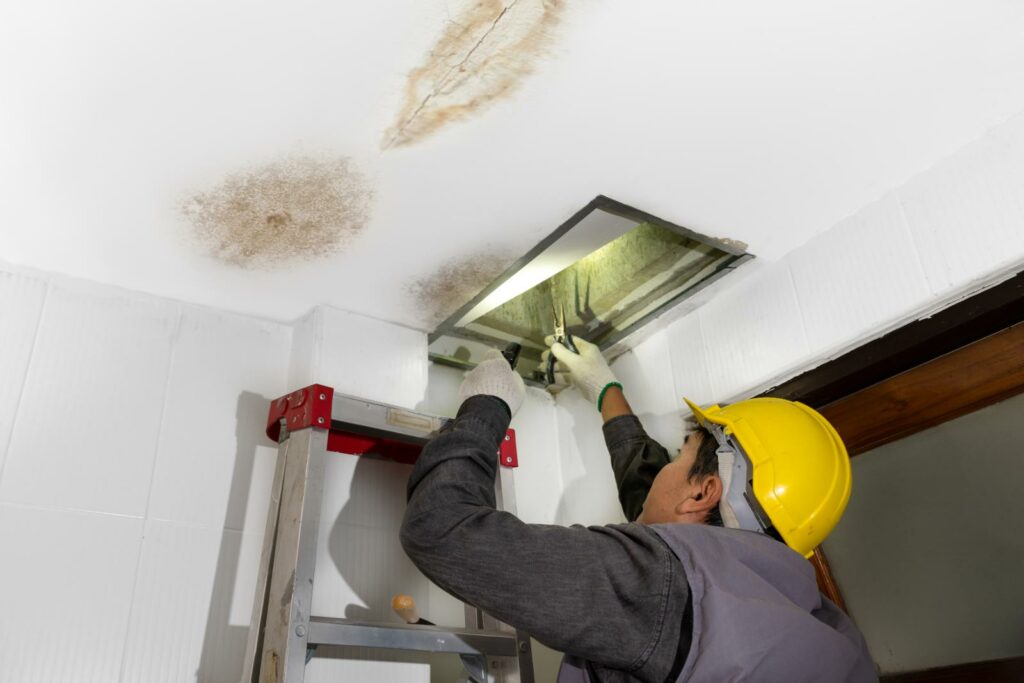
To detect potential roof leaks early, regularly inspect your roof for any visible signs of damage or water stains. Conduct a thorough roof inspection by visually scanning for missing, cracked, or curling shingles. Check for any areas where the roof may be sagging or showing signs of wear and tear. Leaks can also occur around chimneys, vents, or skylights, so make sure these areas are properly sealed and free of any cracks or gaps. Look for signs of water stains on your ceiling or walls inside your home, as these can indicate a roof leak.
During your roof inspection, pay close attention to the condition of the flashing around your roof’s edges, valleys, and joints. Damaged or improperly installed flashing can be a common source of leaks. Additionally, check for any debris buildup on your roof, as this can trap moisture and lead to leaks over time.
Safety Precautions Before Repair
Before initiating any roof leak repair work, make sure you have taken necessary safety precautions to protect yourself and prevent any potential accidents. Ensuring your safety is paramount when dealing with roof repairs.
Here are some essential safety measures to contemplate:
Safety gear essentials: Wear appropriate safety gear such as non-slip shoes, gloves, safety glasses, and a hard hat to protect yourself from potential hazards.
Precautionary measures: Always work with a partner for assistance, especially when working on elevated surfaces. Communicate effectively to avoid accidents.
Emergency response planning: Have a plan in place in case of emergencies. Make sure someone knows you’re working on the roof and establish a way to contact them if needed.
Hazard awareness: Be mindful of potential hazards like electrical wires, weak roof structures, or slippery surfaces. Inspect the area thoroughly before starting any repair work.
Proper ladder usage: Use a sturdy and secure ladder with someone holding the base for extra stability. Ensure the ladder reaches well above the roof edge for safe access.
Gathering Necessary Tools and Materials
When gathering the necessary tools and materials for your roof leak repair, make sure you have everything readily accessible and organized for a smooth and efficient repair process. Start by considering material selection and budget planning. Choose quality materials that are suitable for your roof type and climate conditions while staying within your budget. Research the best options to guarantee long-lasting results without breaking the bank.
Next, focus on tool organization and safety gear acquisition. Proper tool organization is key to avoiding unnecessary delays during the repair. Gather tools such as a ladder, hammer, nails, roofing cement, flashing, and a trowel. Ensure all tools are in good working condition and easily accessible. Don’t forget about safety gear acquisition. Invest in items like gloves, safety goggles, and non-slip footwear to safeguard yourself during the repair process.
Locating the Source of the Leak
Start by examining the interior of your home for any visible signs of water stains or dripping water to pinpoint the source of the roof leak. This initial step is important in identifying where the water is penetrating your roof structure.
Here are some expert tips to help you effectively locate the source of the leak:
- Check the attic: Look for signs of water intrusion, mold, or mildew.
- Inspect the ceilings and walls: Water stains or discoloration can indicate the path of the leak.
- Examine the roof from the exterior: Look for damaged, missing, or deteriorating shingles.
- Use a hose to simulate rain: Have someone spray water on the roof while you observe inside for any new signs of leakage.
- Consider hiring a professional: If you’re unable to locate the source of the leak, a roofing contractor can provide specialized leak detection services and recommend repair strategies tailored to your roof’s needs.
Cleaning and Preparing the Repair Area
To properly address the roof leak, begin by thoroughly cleaning and preparing the repair area for effective and lasting results. Surface preparation is vital to guarantee that the repair materials adhere properly and that the fix lasts.
Start by removing any debris, dirt, or loose particles from the area around the leak. Use a broom or brush to sweep away dirt and grime, and consider using a pressure washer for stubborn stains or moss growth. After cleaning, allow the area to dry completely before proceeding with the repair.
Once the surface is clean and dry, inspect it for any signs of damage, such as cracks, holes, or deteriorated areas. Depending on the type of roof you have, you may need specific repair materials such as roofing cement, sealant, or patches. Make sure you have all the necessary materials on hand before starting the repair to avoid interruptions.
Properly cleaning and preparing the repair area sets the stage for a successful fix that will help protect your home from further water damage.
Choosing the Right Repair Method
Choose the appropriate repair method carefully to effectively address the roof leak and prevent further damage to your home. When deciding on the right approach, consider factors such as the extent of the damage, the type of roofing material, and your comfort level with DIY projects. Here are some essential aspects to keep in mind:
Repair material selection: Different types of roofing materials require specific repair materials. Make sure you choose the right sealant or patching material that’s compatible with your roof to achieve a lasting fix.
Leak detection techniques: Before proceeding with the repair, accurately pinpoint the source of the leak. Utilize methods such as visual inspection, water testing, or infrared technology to identify the exact location that needs attention.
Roof slope and accessibility: Take into account the slope of your roof and how accessible the repair area is. Some methods may be more suitable for steep roofs or hard-to-reach spots.
Weather conditions: Consider the weather conditions when planning your repair. It’s best to work on a dry day to make sure the repair materials adhere properly and to avoid accidents.
Budget and time constraints: Evaluate your budget and the time you can dedicate to the repair. Some methods may require more resources and time investment than others.
Applying Sealant or Patching Material
When addressing a roof leak, the application of sealant or patching material plays an essential role in effectively sealing the damaged area and preventing further water infiltration. Sealant application is a common method used to seal small cracks or gaps in the roof. Before applying the sealant, make sure the area is clean and dry to promote adhesion. Use a caulking gun to apply the sealant evenly along the damaged area, creating a tight seal. Check the manufacturer’s instructions for specific drying times.
Patching techniques involve using materials like roofing cement or roof patches to cover larger damaged areas. Roofing cement can be applied with a trowel, filling in holes, or covering seams to prevent leaks. Roof patches, typically made of metal or roofing material, provide a durable solution for more extensive damage. Be certain the patch extends beyond the damaged area to create a secure seal. Press the patch firmly into place and apply roofing cement around the edges for added protection. These techniques can effectively address roof leaks and prevent further water damage.
Securing Shingles or Roofing Material
When securing shingles or roofing material, it’s essential to pay attention to proper alignment to guarantee a tight seal. Utilize effective material fastening techniques to enhance the longevity of your roof.
Additionally, applying sealant correctly can provide an added layer of protection against leaks.
Shingle Alignment Tips
Need guidance on ensuring proper alignment when securing shingles or roofing material on your roof? Proper shingle alignment is vital for maintaining the integrity of your roof.
Here are some essential tips to help you achieve precise alignment:
- Start Square: Begin each row of shingles by ensuring they’re aligned perfectly straight.
- Use Chalk Lines: Marking chalk lines can act as a guide for laying down shingles evenly.
- Check Overhang: Make sure each shingle overhangs consistently along the roof edge.
- Nail Placement: Position nails correctly, ensuring they’re secure but not overdriven.
- Regular Inspection: Perform routine checks to spot any misaligned or damaged shingles promptly.
Following these tips won’t only enhance your roof’s appearance but also contribute to its longevity.
Material Fastening Techniques
To ensure the proper installation of shingles or roofing material, mastering effective material fastening techniques is essential for the longevity and durability of your roof. When securing shingles, verify material compatibility and select the appropriate fasteners for a secure fit.
| Material Compatibility | Fastener Selection |
|---|---|
| Check if the shingles are suitable for your climate. | Utilize corrosion-resistant fasteners. |
| Ensure the underlayment matches the shingle type. | Choose fasteners with proper length and diameter. |
| Confirm the compatibility of any adhesives used. | Consider the material of the roof deck. |
| Inspect the condition of existing materials. | Opt for fasteners recommended by the manufacturer. |
| Seek professional advice for complex material combinations. | Avoid overdriving or underdriving the fasteners. |
Sealant Application Methods
Ensure a secure and lasting installation of shingles or roofing material by mastering effective sealant application methods. Proper sealant coverage and techniques for adhesion are vital for preventing roof leaks. Here are five essential tips to guarantee a successful sealant application:
Clean Surface: Thoroughly clean the area where the sealant will be applied to ensure maximum adhesion.
Apply Evenly: Use a caulking gun for consistent and even application of the sealant along seams and edges.
Overlap Seams: Overlap shingles or roofing material at seams before applying a sealant to create a watertight barrier.
Press Firmly: Press down firmly on the shingles or roofing material after applying sealant to enhance adhesion.
Inspect Regularly: Regularly inspect the sealant for any signs of wear or damage to prevent potential leaks.
Conducting a Post-Repair Inspection
When conducting a post-repair inspection of your roof, it’s essential to check for any remaining leaks to confirm that the repair was successful.
Assess the quality of the repair work done and verify that your roof is now completely water-tight.
These steps will help you validate that your roof is secure and protected from future water damage.
Check for Leaks
After completing the roof leak repair, thoroughly inspect the repaired area to make certain no leaks persist. Here are some essential steps to help you check for leaks effectively:
- Visual Inspection: Look for any signs of water damage, such as water stains or mold growth.
- Check Seals and Joints: Inspect all seals and joints to guarantee they’re intact and properly sealed.
- Run Water Test: Pour water over the repaired area and check for any water seepage inside.
- Use Flashlight: Shine a flashlight in the attic or ceiling to identify any water leaks.
- Monitor Over Time: Keep an eye on the repaired area over the next few days to confirm the leak is fixed.
Assess Repair Quality
To evaluate the quality of the repair, thoroughly examine the repaired area using a systematic approach that ensures all aspects of the fix are scrutinized. Start by checking for any signs of water intrusion, such as dampness, discoloration, or mold growth.
Look closely at the repaired area both from the inside and outside, making sure that there are no visible cracks, gaps, or loose materials. Verifying effectiveness also involves confirming that the repaired section blends seamlessly with the surrounding roofing materials.
Pay attention to the overall integrity of the repair to determine if it provides a durable and long-lasting solution. By conducting a thorough repair evaluation, you can confirm that the leak is properly addressed, preventing further damage to your roof.
Verify Water Tightness
Verify the water tightness of the repair by conducting a thorough post-repair inspection, meticulously checking for any signs of leakage or water penetration. To confirm the effectiveness of the repair, follow these essential steps:
Water Testing: Conduct a detailed water test to simulate various weather conditions and identify any potential leaks.
Leak Verification: Carefully inspect the repaired area for any signs of water infiltration, such as damp spots or discoloration.
Sealant Integrity: Check the integrity of any sealants used during the repair to confirm they’re still secure and watertight.
Flashing Examination: Inspect the flashing around the repaired area to verify that it’s correctly installed and sealed.
Interior Inspection: Check the interior of your property for any signs of water damage, indicating a leak that may not be visible from the outside.
Preventative Maintenance Tips
For best roof maintenance, consistently inspecting and addressing small issues promptly can prevent larger problems from arising. Regular roofing maintenance is key to leak prevention and extending the lifespan of your roof.
Start by visually examining your roof for any missing, cracked, or damaged shingles. Replace these promptly to avoid water seepage. Clearing debris such as leaves, branches, and dirt from your roof and gutters is essential to prevent water buildup and potential leaks.
Inspect flashing around chimneys, vents, and skylights for any signs of damage or deterioration and repair as needed. Additionally, check for any signs of algae or moss growth, as these can trap moisture and lead to roof damage over time.
Trim overhanging tree branches to prevent them from rubbing against the roof and causing abrasions. By following these preventative maintenance tips, you can keep your roof in excellent condition and minimize the risk of leaks and costly repairs.
Recap
By following the essential techniques outlined in this guide, you can successfully repair roof leaks and prevent future damage to your home.
Remember, regular maintenance and prompt attention to leaks are key to ensuring a watertight roofing system.
So, ask yourself, isn’t it worth investing a little time and effort now to avoid costly repairs down the road?
Stay proactive and protect your home from the elements with these DIY tips.


