Contents
To master the art of drywall taping, you must refine your technique with precision and attention to detail. From selecting the right tools and materials to perfecting your taping and mudding skills, each step plays a vital role in achieving a flawless finish. By following these top 5 tips, you can elevate your drywall taping game and guarantee professional results that will impress even the most discerning eye. So, are you ready to take your drywall skills to the next level and unleash your inner perfectionist?
Key Takeaways
- Use high-quality joint compounds for professional results.
- Feather edges for seamless blending.
- Work in small sections for better control.
- Apply a thin first coat of compound for mudding.
- Ensure a smooth finish before painting.
Proper Tools and Materials
To master drywall taping effectively, make sure you have the proper tools and materials ready before starting the project. Tool maintenance is important for a smooth taping job. Confirm your taping knives are clean and free of any dried compound from previous use. A quick wipe with a damp cloth and some mild soap can do wonders. Check that the blades are sharp to prevent tearing the tape or leaving rough edges. Keep your mud pan clean to avoid any debris mixing with your joint compound.
When it comes to material selection, opt for a high-quality joint compound to achieve a polished finish. Lightweight joint compound is easier to work with and sands down smoothly. Make sure you choose the right type of drywall tape for your project. Paper tape is ideal for inside corners, while fiberglass mesh tape works well for butt joints and flat seams. Consider using setting-type compounds for the first coat as they dry hard and are less prone to shrinking.
Preparing the Drywall Surface
Make sure the drywall surface is smooth and free of any imperfections before proceeding with the taping process. Proper surface preparation is key to achieving a professional finish on your drywall. Start by inspecting the entire surface for any bumps, ridges, or gouges. Use a putty knife to fill in any holes or cracks with joint compound, and allow it to dry completely before proceeding.
Sanding plays an important role in achieving a smooth surface for taping. Use a fine-grit sandpaper to gently sand the entire drywall surface, focusing on areas where the joint compound was applied. Be sure to wear a dust mask to protect yourself from inhaling the fine particles. After sanding, wipe down the surface with a damp cloth to remove any dust and let it dry completely before moving on to the taping stage.
Common mistakes in surface preparation include insufficient filling of gaps or holes, which can lead to visible imperfections after taping. Another trouble area to watch out for is uneven sanding, which can result in a bumpy finish once the taping is complete.
Take your time to ensure the surface is properly prepared before moving forward with the taping process for best results.
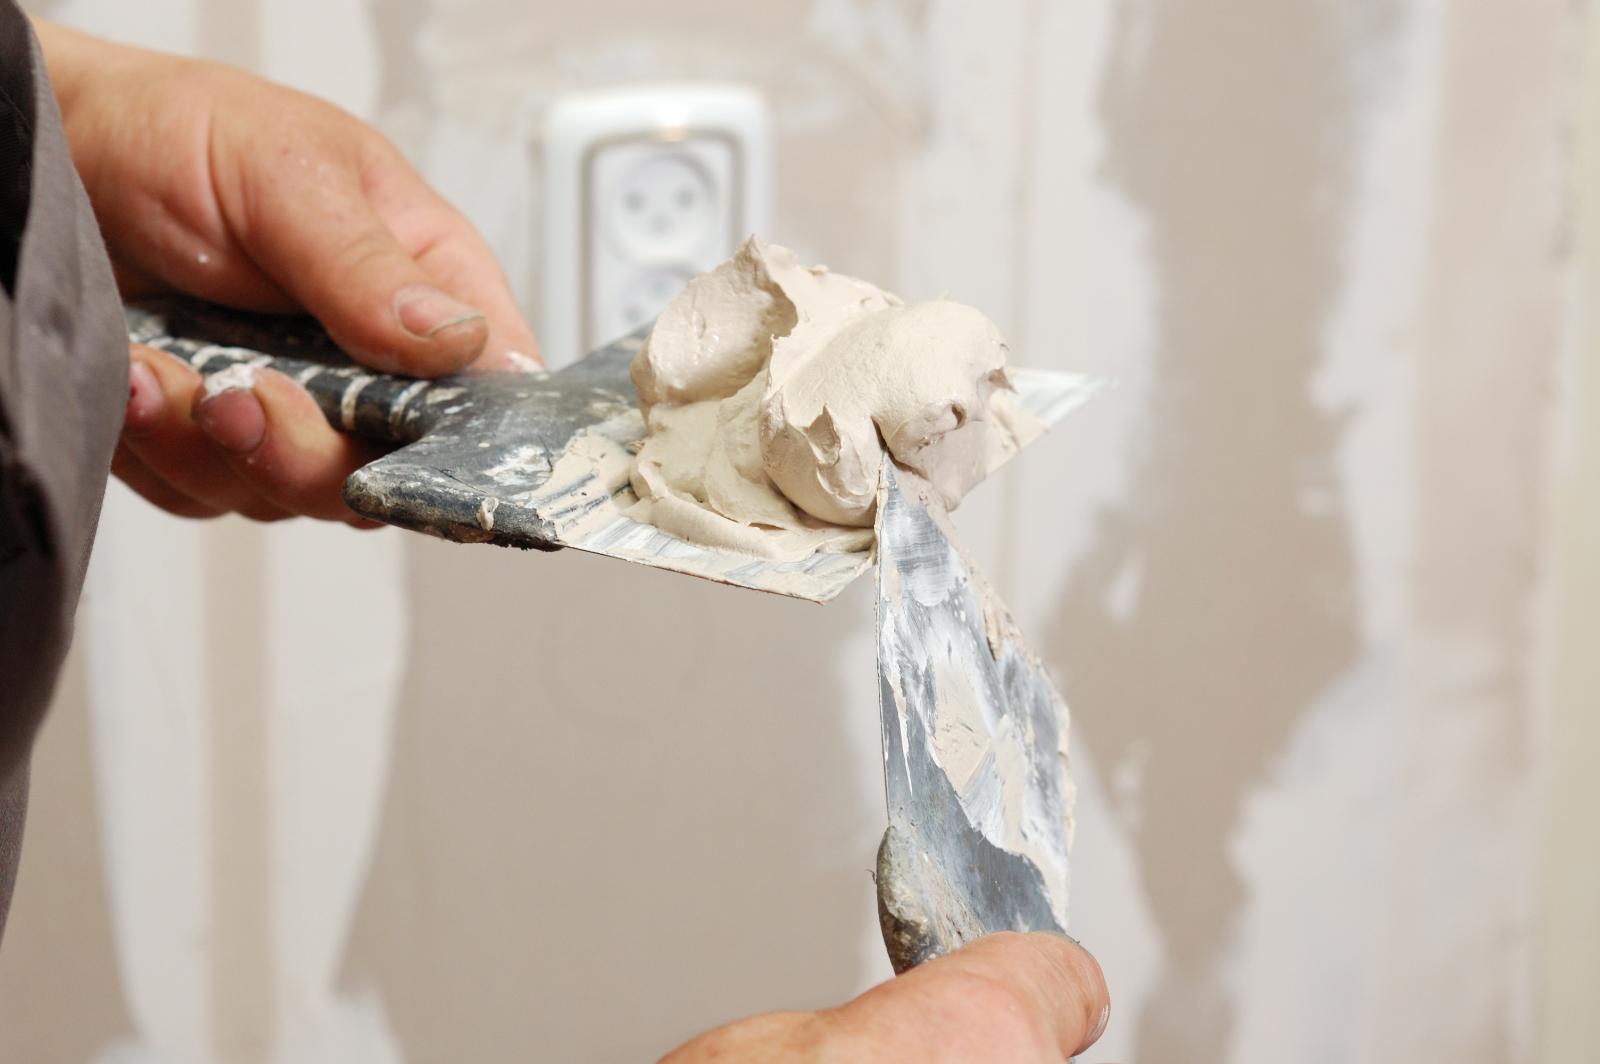
Applying the Joint Compound
Start by mixing the joint compound to a smooth consistency before applying it to the drywall surface. Achieving the right importance is vital for taping efficiency and a clean application. Use a mixing paddle attached to a drill to blend the compound until it’s free of lumps and easy to spread.
When applying the joint compound, use a taping knife to scoop out a portion and spread it evenly over the taped seams. Apply gentle pressure to guarantee a smooth finish that will contribute to professional results. Remember to feather the edges to blend the compound seamlessly with the drywall surface.
Work in small sections to maintain control over the application and ensure even coverage. Keep the layer thin to prevent excess buildup that can lead to uneven surfaces and extended drying times.
As you progress, periodically step back to inspect your work from different angles and lighting conditions. This will help you identify any imperfections that need to be addressed before the compound dries.
Taping and Mudding Techniques
Confirm that the drywall tape is embedded smoothly along the seams before proceeding with the mudding process. When it comes to taping and mudding techniques, attention to detail is key for achieving a flawless finish on your drywall surfaces.
Here are some expert tips to help you master the art of taping and mudding:
Taping tricks
Use a drywall knife to press the tape into the joint compound, ensuring it adheres well.
Apply a thin layer of joint compound before laying the tape to help it stick better.
Cut the tape to the desired length before applying it to the seams for a neater finish.
Feather the edges of the tape with the joint compound to blend it seamlessly into the surface.
Mudding methods
Start with a thin layer of joint compound, known as the first coat, to cover the tape and smooth out any imperfections.
For the subsequent coats, gradually widen the mudded area to blend the edges and create a smooth connection.
Sand lightly between each coat to remove any bumps or ridges for a smooth surface.
Use a bright light source at a low angle to highlight any imperfections that need further mudding or sanding.
Sanding and Finishing Touches
Smooth out any remaining imperfections on the drywall surface by carefully sanding and applying the final finishing touches. When it comes to sanding techniques, it’s important to use fine-grit sandpaper to avoid damaging the drywall. Begin by lightly sanding the taped areas in a circular motion, gradually expanding your reach to blend the edges with the rest of the wall. Remember to wear a dust mask and protective eyewear to shield yourself from fine particles.
After sanding, focus on polishing surfaces to achieve a smooth finish. Use a damp cloth to wipe away any dust left from sanding. Inspect the drywall for any visible imperfections, such as bumps or uneven areas. Apply a thin layer of joint compound to fill in these imperfections, feathering the edges to seamlessly blend with the surrounding surface. Once the compound dries, sand the area again gently to ensure a flush finish.
To add the final touches, consider using a drywall primer before painting to enhance the durability and appearance of the surface. This step can help the paint adhere better and provide a more professional-looking finish. Take your time during this stage to make sure that the drywall is smooth and flawless, ready for the finishing coats of paint.
Review
In the world of drywall taping, attention to detail is the key to achieving a flawless finish. Just like a skilled artist meticulously crafts a masterpiece, mastering the art of taping requires precision, patience, and the right tools.
By following these top 5 tips, you can elevate your drywall taping game and create smooth, unbroken walls that will leave a lasting impression.
Remember, perfection lies in the details.