Contents
When preparing your outdoor storage shed for the winter season, it is crucial to ensure it is properly winterized. From inspecting for leaks and damages to organizing its contents efficiently, there are various essential steps you should take to protect your shed and its belongings from the harsh winter elements. By following these best tips for winterizing outdoor storage sheds, you can safeguard your items and maintain the shed’s integrity throughout the colder months.
Key Takeaways
- Seal windows and doors to prevent drafts and maintain shed temperature.
- Ensure proper insulation to minimize heat loss and protect against cold.
- Regularly clean gutters, inspect for damage and consider guards to prevent clogs.
- Declutter, organize and seal entry points to prevent pests and maintain shed efficiency.
- Maintain ventilation, monitor humidity, and prevent mold growth for shed longevity.
Inspect for Leaks and Damage
Before winter sets in, thoroughly examine your outdoor storage shed for any signs of leaks or damage that could potentially worsen during the colder months. Ensuring the structural integrity of your shed is crucial for leak prevention and maintaining a secure storage space.
As part of your winterizing checklist, here are some maintenance tips to help you prepare your shed for the upcoming season.
Start by checking the roof for any missing or damaged shingles that might lead to leaks. Repairing these issues promptly can prevent water from seeping into your shed and damaging your belongings. Additionally, inspect the walls and flooring for any cracks or holes that could let cold air or moisture in. Sealing these gaps with caulk or weatherstripping can help maintain a more stable temperature inside the shed.
Next, examine the doors and windows for gaps or drafts. Properly sealing these openings can prevent leaks and improve the shed’s energy efficiency. A well-insulated shed will help protect your items from extreme temperatures and humidity fluctuations during the winter months.
Seal Windows and Doors
To winterize your outdoor storage shed effectively, start by inspecting for drafts around windows and doors.
Take the time to weatherstrip the doors to prevent cold air from seeping in, and use caulk to seal any gaps in the window seams.
Ensuring that your shed is properly sealed will help maintain a stable temperature inside and protect your belongings from harsh winter conditions.
Inspect for Drafts
Check all windows and doors in your outdoor storage shed for drafts, as sealing them properly can help keep the interior warm and protect your belongings from moisture during the winter months. Inspecting for drafts is crucial for maintaining energy efficiency and ensuring that your shed is adequately insulated.
Start by visually examining the windows and doors for any visible gaps or cracks. Use weatherstripping or caulking to seal any areas where cold air could seep in. This simple step can make a significant difference in retaining heat and preventing moisture build-up inside the shed.
Additionally, consider adding insulation around windows and doors to further enhance energy efficiency. Foam sealant or weather-resistant insulation strips can be effective in filling gaps and improving the overall insulation of your shed.
Weatherstrip Doors
Inspecting and weatherstripping doors is a crucial step in sealing windows and doors to enhance insulation and protect your outdoor storage shed during the winter months.
To start, check the weatherstripping around your shed doors for any signs of wear or damage. If you notice any gaps or cracks, replace the weatherstripping to prevent cold air from seeping in and warm air from escaping.
Additionally, consider adding door sweeps to the bottom of the doors to create a tighter seal against the floor, further improving insulation.
When weatherproofing entryways, focus on sealing any gaps between the door frame and the shed structure. Use caulking or foam sealant to fill in these spaces and prevent drafts. This simple step can make a significant difference in maintaining a consistent temperature inside the shed.
Remember that insulating floors can also help retain heat and protect your belongings from the cold. By addressing these areas, you can effectively weatherstrip your doors and enhance the overall insulation of your outdoor storage shed for the winter season.
Caulk Window Seams
Consider applying a high-quality caulking sealant to effectively seal the window seams and doors of your outdoor storage shed for optimal winterization. Caulking is a simple yet effective way to prevent cold air from seeping in and warm air from escaping, helping to maintain a consistent temperature inside the shed.
To ensure a proper seal, clean the window seams and door frames thoroughly before starting the caulking process. Use caulk application techniques like applying a continuous bead along the seams and smoothing it out with a caulk tool or your finger for a neat finish.
Choosing weatherproofing materials designed for outdoor use and energy efficiency is crucial for this DIY project. Look for caulking sealants specifically labeled for windows and doors, as they’re formulated to withstand various weather conditions. Properly sealed window seams and doors not only enhance the shed’s energy efficiency but also protect it from moisture and drafts.
Dedicate some time to caulk your shed’s window seams and doors to create a cozy and well-insulated space for your belongings during the winter months.
Clean Gutters and Downspouts
Ensure that all debris such as leaves and twigs are removed from the gutters and downspouts of your outdoor storage shed to prevent clogs and water damage during the winter months.
Keeping your gutters and downspouts clean is crucial for maintaining the integrity of your outdoor storage shed. Here are some essential tips to help you prevent clogs and ensure proper maintenance:
Regular Cleaning: Make it a routine to check and clean your gutters and downspouts at least twice a year, ideally before winter sets in. This will help prevent blockages and allow for smooth water flow.
Inspect for Damage: During your cleaning routine, take the time to inspect the gutters and downspouts for any signs of damage, such as cracks or loose connections. Repairing these issues promptly will help avoid more significant problems down the line.
Install Gutter Guards: Consider installing gutter guards to help keep debris out of your gutters while still allowing water to flow through. This can be a practical long-term solution to prevent clogs and reduce the frequency of cleanings.
Check Insulation
Check the insulation in your outdoor storage shed to ensure it’s intact and provides adequate protection from the cold.
Seal any gaps or holes tightly to prevent drafts and heat loss.
Consider using weather stripping around doors and windows to further improve insulation efficiency.
Inspect Shed Insulation
Examine the shed insulation to identify any signs of wear or damage that may compromise its effectiveness in keeping your items safe from the winter elements. Upgrading insulation can significantly enhance the shed’s energy efficiency, ensuring that your belongings remain protected from harsh weather conditions.
When inspecting the shed insulation, pay attention to the following:
Check for Gaps: Inspect the insulation for any gaps or spaces where cold air could seep in and warm air could escape, compromising energy efficiency.
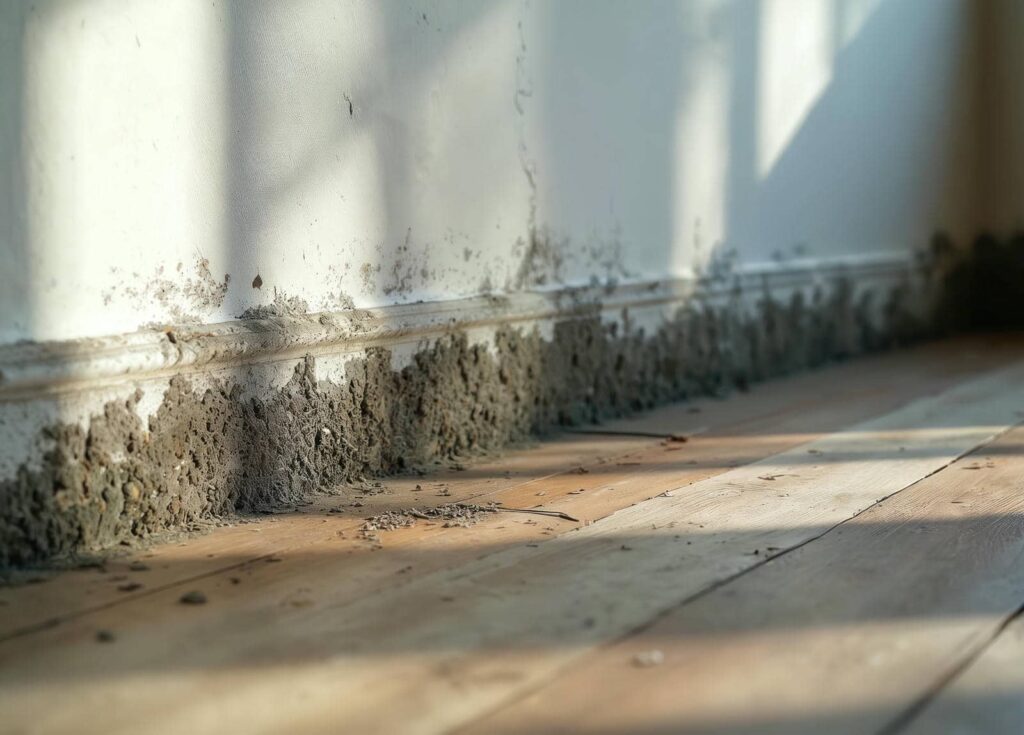
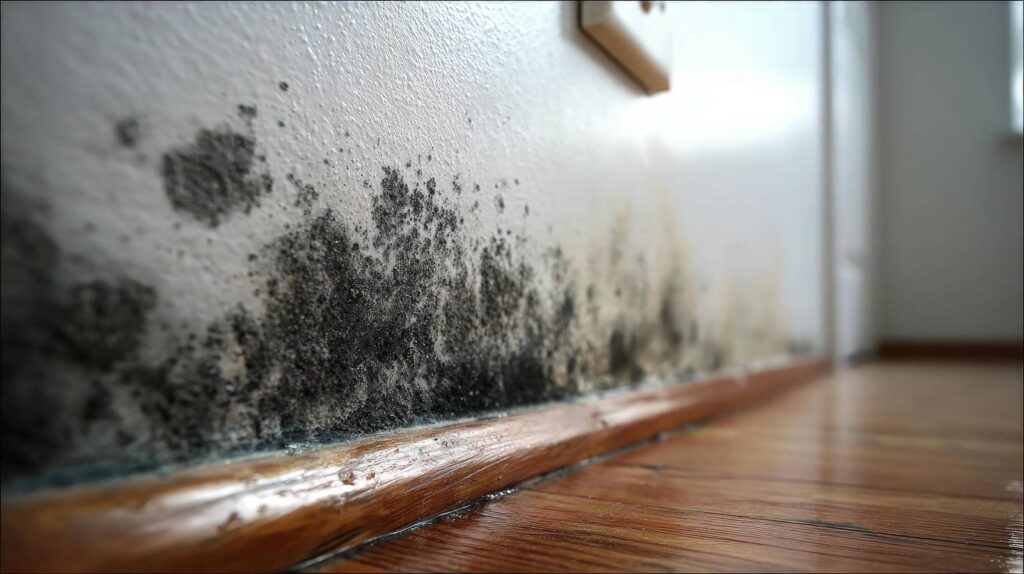
Look for Moisture: Moisture can reduce the insulation’s effectiveness and lead to mold or mildew growth. Make sure to address any moisture issues promptly.
Evaluate Insulation Thickness: Thicker insulation provides better protection against extreme temperatures. Consider upgrading to thicker insulation for improved energy efficiency and enhanced winter storage capabilities.
Regularly checking and maintaining shed insulation is crucial for preserving the condition of your stored items and optimizing energy efficiency during the winter months.
Seal Gaps Tightly
To ensure optimal insulation effectiveness and energy efficiency in your outdoor storage shed, sealing any gaps tightly is imperative to prevent heat loss and maintain a stable environment for your stored items during the winter months.
Inspecting your shed for any openings, cracks, or crevices that could allow cold air to seep in is crucial. By using materials like caulk, weatherstripping, or expanding foam, you can effectively seal these gaps.
Not only does this help in retaining heat, but it also aids in pest prevention. Rodents and insects often seek shelter in warm spaces during the winter, and by sealing off entry points, you can reduce the likelihood of unwanted visitors in your shed.
Furthermore, sealing gaps tightly contributes to overall energy efficiency, ensuring that your shed remains at a consistent temperature without excessive energy consumption.
Use Weather Stripping
Ensure optimal insulation effectiveness and energy efficiency in your outdoor storage shed by utilizing weather stripping to seal gaps and maintain a stable environment during the winter months. Weatherstripping is a simple yet effective way to keep your shed cozy and free from unwanted intruders like pests. Here are three reasons why using weather stripping is essential for winterizing your outdoor storage shed:
Energy Efficiency: By sealing off any gaps with weather stripping, you can prevent warm air from escaping and cold air from seeping in, thus reducing the need for excessive heating and ultimately saving on energy costs.
Pest Prevention: Weather stripping helps create a barrier that deters pests such as rodents and insects from entering your shed, keeping your belongings safe and secure.
Improved Insulation: Properly sealing gaps with weather stripping not only enhances energy efficiency but also ensures that your shed maintains a consistent temperature, protecting your stored items from extreme weather conditions.
Organize and Declutter
Start by removing any items that are no longer needed or used in your outdoor storage shed to create more space and make it easier to access the essentials. Decluttering is the first step to organizing your shed effectively. Consider using storage solutions such as shelves, hooks, and bins to maximize the space and keep everything in order. Utilize clear bins or label boxes to easily identify what’s stored inside.
Group similar items together to streamline your storage system. Vertical storage options like pegboards can help save floor space and keep tools and equipment within reach.
Implement decluttering techniques like the ‘keep, donate, toss’ method. Keep items that you use frequently or hold sentimental value, donate things that are in good condition but no longer needed, and toss items that are broken or beyond repair.
Create designated zones for different categories of items, such as gardening tools, sports equipment, or seasonal decorations. This will not only make finding things easier but also help maintain a tidy shed throughout the winter.
Regularly assess and reorganize your shed to prevent clutter from building up again. By organizing and decluttering your outdoor storage shed, you’ll create a space that’s functional, efficient, and welcoming.
Protect Against Pests
Guard your outdoor storage shed against unwanted pests by implementing effective prevention strategies. Keeping pests out of your shed is crucial to maintaining the integrity of your belongings and the shed itself. Here are some practical tips to help you protect against pests:
Pest Control Routine: Establish a regular pest control routine by using appropriate methods such as setting traps, using natural repellents, or hiring professional exterminators. Regularly inspect your shed for signs of pests like droppings, gnaw marks, or nests.
Rodent Proofing: Seal any entry points that rodents could use to gain access to your shed. Check for gaps in the walls, windows, doors, and vents. Use materials like steel wool, caulk, or foam insulation to block these entryways effectively.
Maintenance: Keep your shed well-maintained to prevent pest infestations. Trim overhanging branches that could provide easy access to rodents. Store firewood away from the shed, as it can attract pests. Regularly clean the shed, removing any debris or clutter that could serve as hiding spots for pests.
Maintain Proper Ventilation
To maintain proper ventilation in your outdoor storage shed during winter, regularly check and clear any vents or openings to ensure adequate airflow and prevent moisture buildup. Proper ventilation is crucial for preventing mold, mildew, and musty odors in your shed.
Here are some ventilation tips to help you winterize your shed effectively:
Clear Vents and Openings: Remove any debris, snow, or ice blocking vents or openings to allow for proper air circulation. This will help prevent condensation and moisture accumulation inside the shed.
Install Ventilation Systems: Consider installing vents or a small exhaust fan if your shed lacks proper airflow. This can help regulate temperature and humidity levels, reducing the risk of damage to your stored items.
Position Items Carefully: When storing items in your shed, avoid blocking vents or air pathways. Keep items at least a few inches away from walls to promote air movement and prevent potential mold growth.
Monitor Humidity Levels: Use a hygrometer to track humidity levels inside the shed. If humidity levels are consistently high, additional ventilation or a dehumidifier may be necessary.
Secure Outdoor Furniture
Ensure that your outdoor furniture is properly secured to prevent damage or displacement during winter weather conditions. Protecting your outdoor furniture from the harsh elements is essential for prolonging its lifespan.
Here are some practical tips to help you secure your outdoor furniture effectively:
Furniture Protection: Invest in high-quality winter covers specifically designed to shield your outdoor furniture from snow, rain, and wind. These covers provide an additional layer of protection against moisture and frost, helping to prevent rust and decay.
Outdoor Furniture Storage: During the winter months, consider storing your outdoor furniture in a shed or garage. This will not only protect it from extreme weather conditions but also prolong its durability. If indoor storage isn’t possible, arranging your furniture in a covered area can also help shield it from the elements.
Moisture Control: To prevent moisture buildup, ensure that your outdoor furniture isn’t in direct contact with the ground. Placing furniture on top of wooden pallets or using furniture risers can help improve air circulation and reduce the risk of mold or mildew growth.
Monitor for Moisture
To effectively protect your outdoor furniture from the damaging effects of winter weather, it is important to monitor for moisture accumulation regularly. Moisture can lead to mold, mildew, and damage to your belongings. Here are some key strategies to control moisture in your outdoor storage shed:
| Dehumidifier Placement | Moisture Control | Air Circulation |
|---|---|---|
| Consider placing a dehumidifier in your shed to help regulate moisture levels. Ensure the dehumidifier is placed in a central location for maximum effectiveness. | Regularly check for any signs of moisture buildup and address them promptly. Use moisture-absorbing products like silica gel packets to help control humidity levels. | Create proper ventilation by installing vents or leaving windows slightly open. This allows for air circulation, reducing the likelihood of moisture accumulation. |
Final Thoughts
Now that you’ve winterized your outdoor storage shed, you can relax knowing your belongings are protected from the harsh winter weather.
By taking these simple steps, you can ensure your shed remains in top condition and ready for use when spring arrives.
Stay proactive and enjoy a worry-free winter season!


