Contents
If you’ve noticed your garage door making strange noises or not functioning as smoothly as it used to, don’t fret just yet. There are some quick and easy tips you can implement to address common issues and make sure your garage door operates at its best. By following these simple guidelines, you can potentially save yourself time and money while also avoiding unnecessary stress. So, why not try these suggestions and see the difference they can make in your garage door’s performance?
Key Takeaways
- Lubricate moving parts regularly with silicone-based lubricant.
- Check and tighten hardware, focusing on rollers, tracks, cables, and springs.
- Test garage door balance by disconnecting the opener.
- Replace weatherstripping when worn to maintain energy efficiency.
- Troubleshoot remote control issues by checking batteries and resetting them.
Check Garage Door Tracks
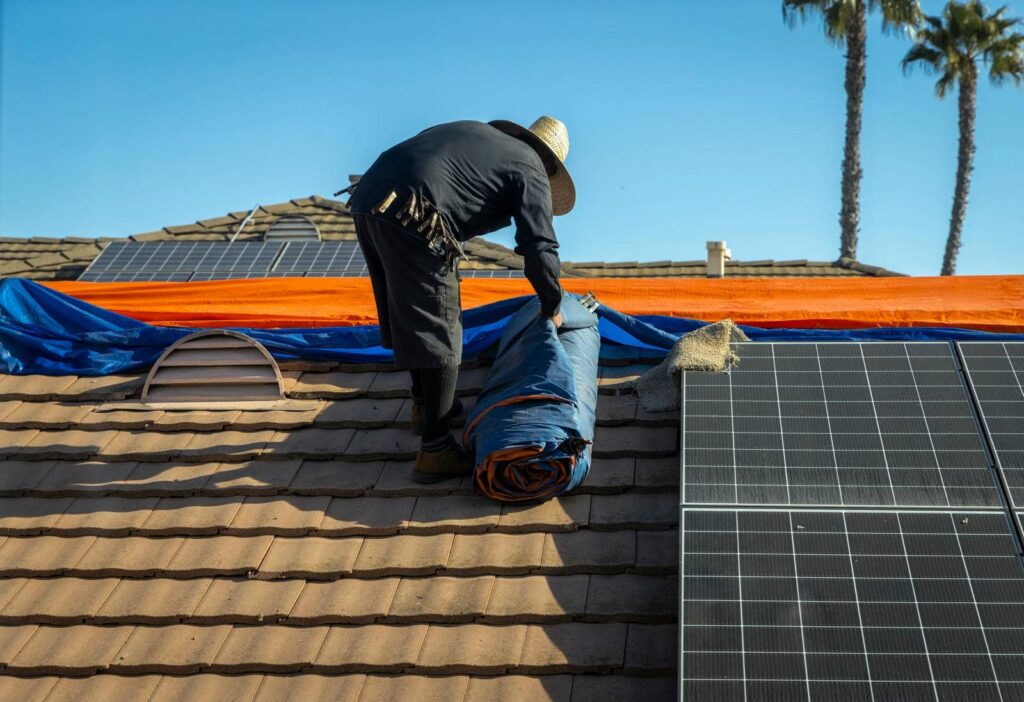
To ensure smooth operation, inspect the garage door tracks for any obstructions or misalignments. Proper garage door maintenance is crucial to make sure your door functions correctly and lasts longer. Start by visually examining the tracks on both sides of the door. Look for any debris, such as dirt, rocks, or even small objects that may be blocking the path. Clear out any obstructions you find to prevent them from interfering with the door’s movement.
Next, check the alignment of the tracks. Misaligned tracks can cause the door to operate inefficiently or even get stuck. Use a level to see if the tracks are perfectly vertical along the entire height of the door. If you notice any deviations, loosen the screws holding the tracks in place and gently tap them back into alignment. Once the tracks are straight, tighten the screws back securely.
Regularly inspecting and maintaining your garage door tracks will help prevent issues and ensure your door operates smoothly. By taking these simple steps, you can contribute to the longevity of your garage door and avoid costly repairs down the line.
Lubricate Moving Parts Regularly
To keep your garage door operating smoothly, it’s important to lubricate its moving parts regularly. Proper lubrication technique involves applying the recommended lubricants to guarantee durability and prevent wear and tear.
Proper Lubrication Technique
Regularly lubricating the moving parts of your garage door is essential to ensure smooth and efficient operation. Proper application of lubricant is crucial to ensuring the longevity of your garage door components.
To start, make sure to use a silicone-based lubricant for optimal results. Begin by applying a small amount of lubricant to the hinges, springs, rollers, and tracks. Remember, less is more in this case; over-lubricating can attract dirt and grime, causing more harm than good.
Focus on the metal parts that rub against each other during the door’s movement, as these areas are prone to friction. Be thorough but precise in your application, ensuring that all necessary parts receive adequate lubrication.
Recommended Lubricants for Durability
For peak durability and performance, selecting the right lubricant for your garage door’s moving parts is crucial. When it comes to lubricating your garage door, choosing the appropriate lubricant can make a significant difference in its longevity and smooth operation. There are various lubricant types available, such as silicone-based or lithium-based lubricants, specifically designed for garage doors.
To make sure of effective application, focus on the rollers, hinges, tracks, and springs, as these are the parts that benefit most from proper lubrication. Regularly lubricating these components can prevent rust, reduce friction, and prolong the lifespan of your garage door system.
When it comes to storing your lubricant, make sure to keep it in a cool, dry place away from direct sunlight. Check the shelf life of the lubricant and replace it if it has expired to ensure optimal performance.
Inspect and Tighten Hardware
Check that all hardware components on your garage door are securely fastened by regularly inspecting and tightening them as needed. Making sure that the hardware is well-maintained is vital for the smooth operation and longevity of your garage door.
To prevent rust and prolong the life of your hardware, consider applying a rust-prevention lubricant during maintenance checks. This simple step can save you from costly repairs down the line.
When inspecting the hardware, look out for loose bolts, screws, or hinges. Use proper tools such as a socket wrench or screwdriver to tighten any loose hardware to keep everything secure. Make sure to pay attention to the rollers, tracks, cables, and springs, as these are essential components that need to be in good condition for the garage door to function correctly.
Regular DIY maintenance of your garage door hardware ensures its proper functioning and enhances your garage’s safety. By taking the time to inspect and tighten the hardware; you’re actively contributing to the overall upkeep of your garage door.
Test Garage Door Balance
To ensure proper functioning and longevity of your garage door, it’s essential to test its balance periodically. Balance testing ensures that the door operates smoothly and reduces strain on the opener and other components. An unbalanced door can lead to premature wear and tear, affecting the overall performance of the system.
To test the balance of your garage door, begin by disconnecting the automatic opener. Manually lift the door halfway and release it. A well-balanced door will stay in place, while an imbalanced one will either rise or fall. If your door shows signs of imbalance, it may be due to worn springs or cables. These are repair techniques best handled by professionals due to the high tension involved.
Adjusting the tension on the springs or replacing worn-out cables should only be done by trained technicians to prevent injuries. Ignoring balance issues can lead to further damage and safety hazards.
Regular maintenance and prompt repairs will extend the life of your garage door and keep it operating smoothly. By prioritizing balance testing and addressing any repair needs promptly, you ensure a functional and safe garage door for years to come.
Replace Weatherstripping as Needed
Inspect your garage door weatherstripping for signs of wear and tear.
Measure and cut the new weatherstripping to fit the dimensions of your garage door.
Install the fresh weatherstripping to guarantee a proper seal and insulation.
Check for Wear
Ensuring that your garage door weatherstripping is in good condition is crucial by visually inspecting it for signs of wear and tear. Common issues to look out for include cracks, tears, or gaps in the weatherstripping. If you notice any of these problems, addressing them promptly is vital to prevent further damage and maintain the energy efficiency of your garage.
Repairing minor wear on your weatherstripping can be a simple task that you can easily tackle on your own. Start by cleaning the area thoroughly to remove any dirt or debris that may be affecting the seal.
Next, measure the damaged section and cut a replacement weatherstripping to the appropriate size. Finally, carefully attach the new weatherstripping using adhesive or screws as needed.
Measure and Cut
Check the damaged section of the weatherstripping and measure it accurately before proceeding to cut a replacement to ensure a proper fit. Precision cutting is essential to make sure the repair is smooth. Use a sharp utility knife or scissors to cut the new weatherstripping material with clean, straight lines following the measurements taken.
When measuring the weatherstripping, be meticulous in noting the exact dimensions needed. Accurate measuring will prevent having to redo the cutting process and ensure a snug fit once installed.
Double-check your measurements before making any cuts to avoid errors leading to poorly fitting weatherstripping.
Install New Weatherstripping
When replacing weatherstripping, make sure to achieve a necessary fit by securely affixing the new material along the designated area. To start, measure the length needed accurately and cut the weatherstripping material to size. Make certain that the garage door is clean and dry before installing the new weatherstripping to promote better adhesion. Consider weatherstripping material options like vinyl, rubber, or foam, choosing one that suits your climate and budget.
For best weatherstripping installation tips, start at one end of the garage door and gradually press the material into place along the edge, ensuring a snug fit without stretching it. Trim any excess material carefully to prevent gaps or overlaps.
Regular weatherstripping maintenance is essential to prolong its lifespan; inspect for wear and tear and replace as needed. Repair techniques such as resealing with adhesive or adding caulking can help enhance the effectiveness of the weatherstripping.
Clean and Maintain Garage Door
Regular cleaning and maintenance are crucial to maintaining your garage door in peak condition. By following simple steps, you can guarantee your garage door stays functional and looks great for years to come. Here are some expert tips to help you clean and maintain your garage door effectively:
| Cleaning Tips | Maintenance Tips |
|---|---|
| Regularly wash your garage door with a mild detergent and water to remove dirt and grime. | Inspect the weatherstripping around the door for any signs of wear and tear. Replace if necessary to uphold insulation. |
| Avoid using harsh chemicals or abrasive materials that could damage the door’s finish. | Check the garage door’s paint for any chips or peeling. Touch up with paint to prevent rust. |
| Clean the tracks and rollers with a cloth to remove debris that could affect the door’s operation. | Lubricate moving parts such as hinges, springs, and rollers with a silicone-based lubricant to keep them running smoothly. |
| Ensure the garage door opener is free of dust and dirt by wiping it down regularly. | Test the balance of the door by disconnecting the opener and manually lifting it. Adjust if it doesn’t stay halfway open. |
| Trim any overhanging tree branches near the garage door to prevent damage and debris from falling onto it. | Inspect the cables for any fraying or wear. Replace them if needed to prevent accidents. |
Troubleshoot Remote Control Issues
If your garage door remote isn’t working, start by checking the batteries, as they may need replacement.
Next, try resetting the remote control to see if that resolves the issue.
If the problem persists, you may need to reprogram the remote device to sync it back with the garage door opener.
Check Remote Batteries
Make sure that your garage door remote is functioning properly by checking and replacing the batteries as needed. Weak batteries can lead to a poor, remote signal, causing issues with opening and closing your garage door.
Follow these quick steps to guarantee your remote is in top condition:
Check Battery Levels: Verify the current state of your batteries by opening the remote and inspecting them. If they appear corroded or low on power, replace them with fresh ones.
Use High-Quality Batteries: Opt for reputable battery brands to make certain a strong and consistent power supply for your remote.
Realign Remote Signal: In some cases, a weak signal could be due to misalignment. Try repositioning the remote or standing closer to the garage door when operating it.
Test Remote Functionality: After replacing the batteries, test the remote to see if the signal strength has improved and if the garage door responds promptly to commands.
Reset Remote Control
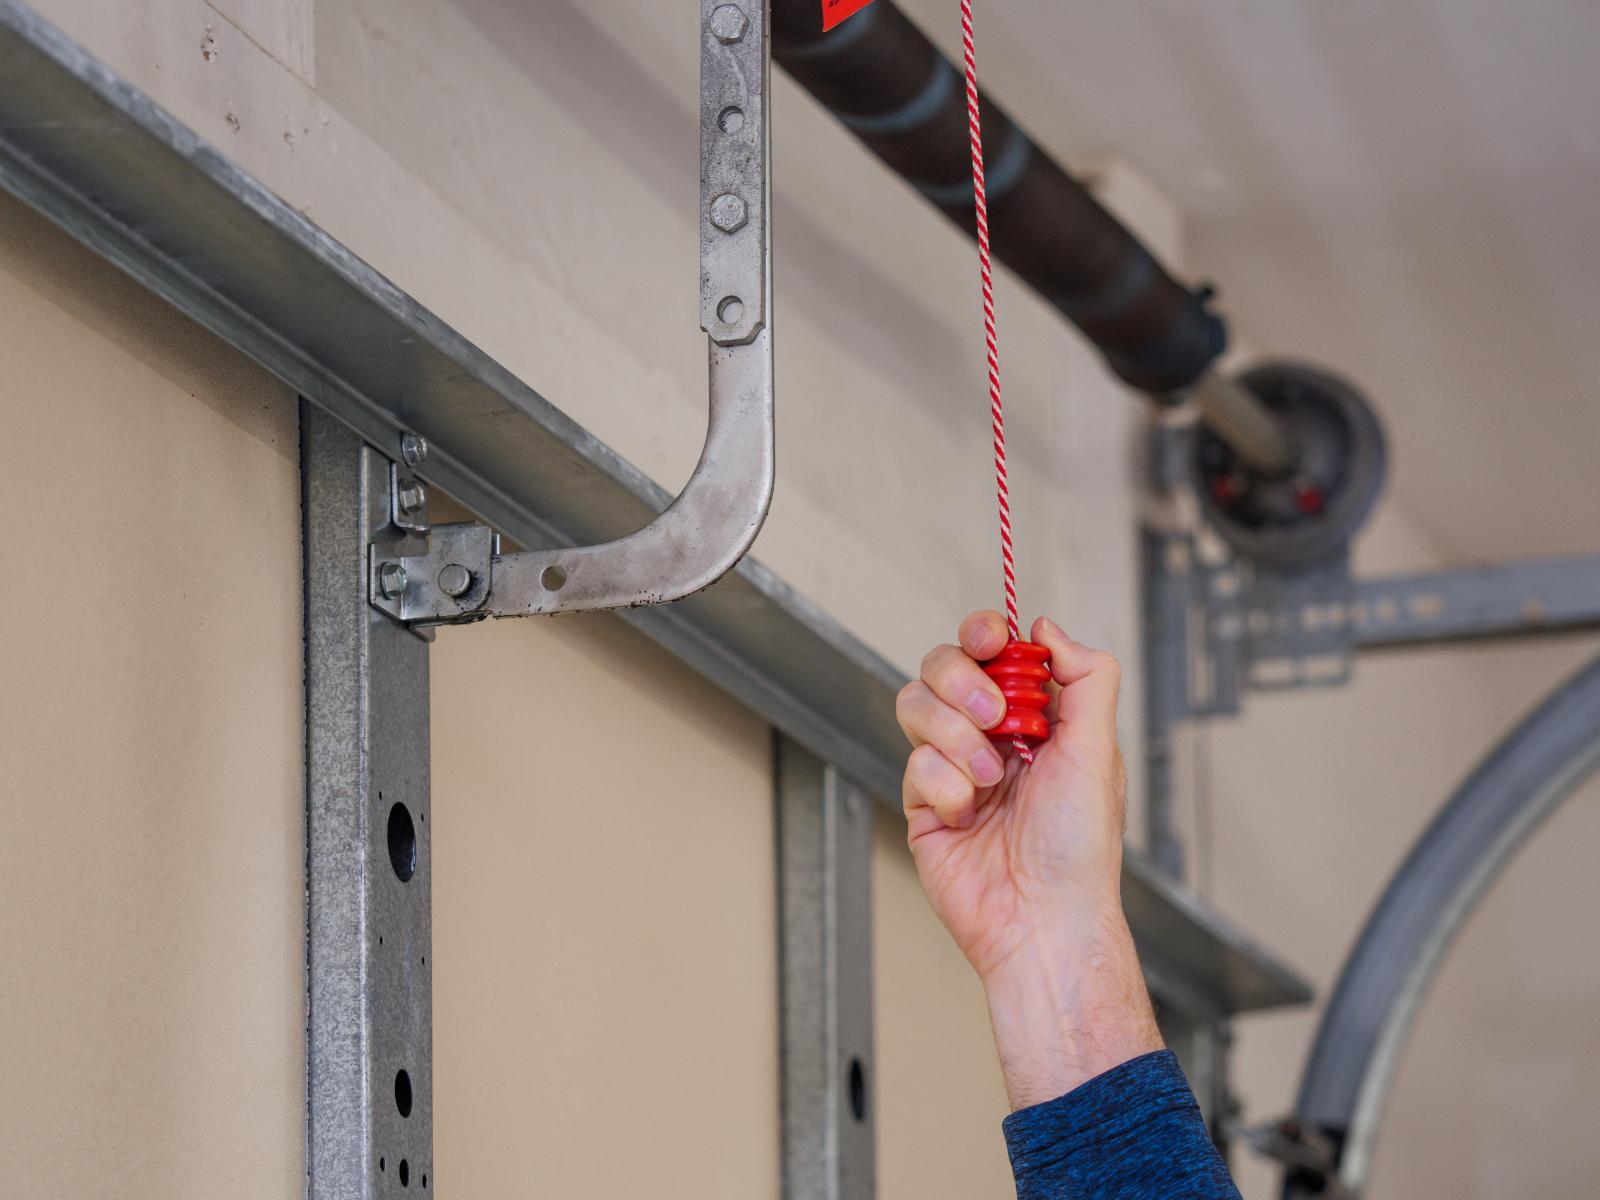
When troubleshooting remote control issues, consider resetting the remote as a first step to resolve any connectivity problems. Begin by removing the batteries from the remote transmitter and waiting for about 30 seconds before reinserting them. This simple action can often help reset the remote and establish a fresh connection with the garage door opener.
If resetting the remote doesn’t solve the issue, check for signal interference that may be causing disturbances in the communication between the remote and the opener. Common sources of interference include other electronic devices or metal objects near the garage door. Try moving these potential obstructions out of the way to improve the signal reception.
Additionally, if the remote control continues to malfunction, consider replacing the batteries with new ones. Weak batteries can cause inconsistent performance and hinder the remote’s ability to transmit signals effectively.
Reprogram Remote Device
To troubleshoot remote control issues, consider reprogramming the remote device to ensure proper functionality and connectivity with your garage door opener. Follow these steps to reprogram your remote:
Locate the ‘Learn’ Button: Find the ‘Learn’ button on your garage door opener. It’s usually located near the antenna wire.
Clear Existing Programming: Press and hold the ‘Learn’ button until the indicator light blinks to clear out any existing programming.
Program the Remote: Press the button on your remote that you want to use to control the door. You should see the indicator light on the opener flash.
Test the Remote: Check if the remote now operates the garage door. If not, repeat the programming steps.
Reprogramming your remote can often resolve issues with connectivity and ensure smooth operation.
If problems persist, check the batteries in your remote and make sure they’re functional.
Adjust Garage Door Opener Settings
Adjusting the settings on your garage door opener can help ensure the smooth and efficient operation of your door. Two key adjustments to focus on are sensor alignment and testing remote range.
To guarantee your garage door functions properly, start by checking the alignment of the sensors located near the bottom of the door tracks. These sensors prevent the door from closing if an object or person is detected in the way. Make sure the sensors are facing each other directly and are clean from any debris that could obstruct their view. If they’re misaligned, gently adjust them until they’re pointing directly at each other. This simple adjustment can prevent unnecessary door reversals and ensure your garage door operates smoothly.
Another important aspect to take into account is testing the range of your garage door opener remote. Stand at various distances from the door and test if the remote can effectively open and close the door. If you notice any issues with the range, replace the remote batteries and try again. If problems persist, consider reprogramming the remote according to the manufacturer’s instructions.
Fix A Noisy Garage Door
Addressing a noisy garage door can enhance the overall functionality and peace in your home. A noisy garage door can be a nuisance, but fortunately, there are simple steps you can take to quiet it down and improve your living environment.
Here are some expert tips to help you fix a noisy garage door:
Lubricate Moving Parts: Regularly lubricating the hinges, rollers, and springs can greatly reduce noise levels and prevent wear and tear on your garage door components.
Tighten Hardware: Check and tighten any loose nuts, bolts, or screws on your garage door and its track. Loose hardware can cause vibrations and increase noise.
Install Garage Door Insulation: Adding insulation to your garage door can’t only reduce noise but also improve energy efficiency by regulating the temperature inside your garage.
Consider DIY Garage Door Painting: A fresh coat of paint not only enhances your garage’s curb appeal but can also dampen vibrations and reduce noise levels.
Safety Precautions for DIY Repairs
For DIY garage door repairs, prioritize safety by following these essential precautions. When engaging in DIY repairs, it’s important to use proper safety equipment to mitigate potential hazards. Always wear protective gear such as gloves and safety glasses to shield yourself from debris and sharp edges. Additionally, consider using ear protection if your repair involves loud noises or machinery.
Before starting any repair work, disconnect the power source to the garage door opener to prevent accidental activation. This simple step can avoid serious injuries or accidents while you work on the door. Moreover, make sure that the door is in the closed position and secure it with locking pliers or clamps to prevent it from unexpectedly opening or closing during the repair process.
When working on garage door springs or cables, exercise extreme caution as they’re under high tension and can cause severe injuries if mishandled. If you’re unsure about how to deal with these components, it’s best to seek professional assistance to avoid any potential risks.
Additionally, always read the manufacturer’s instructions and follow safety guidelines specific to your garage door model to ensure a safe repair experience. Remember, your safety should always be the top priority when undertaking DIY garage door repairs.
Wrap-Up
As you continue to maintain your garage door with these quick and easy repair tips, think of it as giving your car a regular tune-up to keep it running smoothly.
Just like a well-oiled machine, your garage door will operate efficiently and last longer with proper care.
So take a few minutes each month to check, lubricate, and tighten, and you’ll avoid costly repairs down the road.
Your garage door will thank you for it!