Contents
As you wade through the aftermath of water damage in your home, moving through the process of repair may seem like traversing uncharted waters. However, with a systematic approach and attention to detail, you can steer your way towards restoration. But what vital steps should you take to maneuver this DIY water damage repair journey smoothly and effectively? Stay tuned for essential guidance on how to tackle each phase of the restoration process with confidence and precision.
Assessing the Water Damage
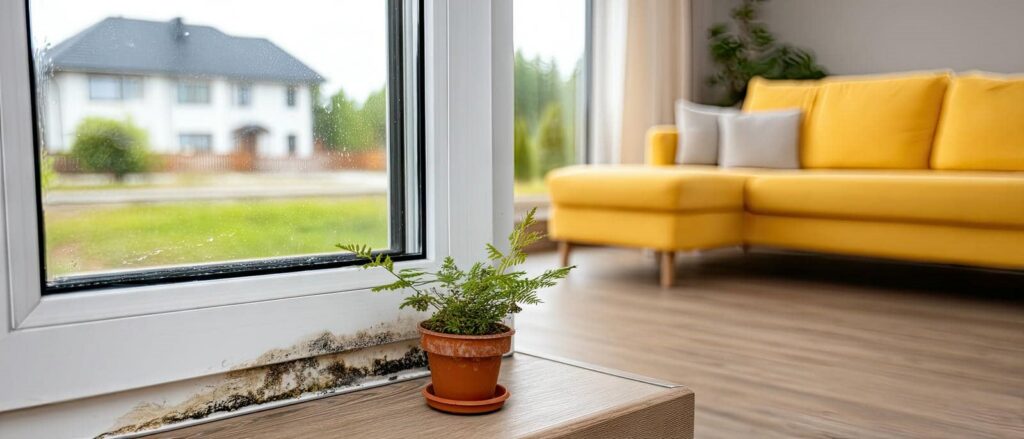
When it comes to evaluating water damage in your home, the first step is to carefully inspect all affected areas. Start by examining the walls, floors, and ceilings for any signs of water stains, discoloration, or swelling. Check for musty odors, as they can indicate hidden moisture issues. Look for any bubbling or peeling paint, as this could be a result of water damage. Pay close attention to areas near plumbing fixtures, as leaks often occur there.
Next, assess the furniture, carpets, and personal belongings in the affected areas. Furniture may show signs of water damage, such as warping or mold growth. Carpets can retain moisture and become a breeding ground for mold and mildew. Inspect your personal items for any water damage, such as dampness, mold, or discoloration.
Don’t forget to check the insulation and ventilation systems in your home. Water damage can compromise insulation, making it less effective and potentially leading to higher energy bills. Confirm that your ventilation systems are working properly to prevent moisture buildup and mold growth.
Lastly, inspect the exterior of your home for any signs of water damage, such as clogged gutters or damaged roof shingles. These issues can lead to water infiltration and damage to the interior of your home.
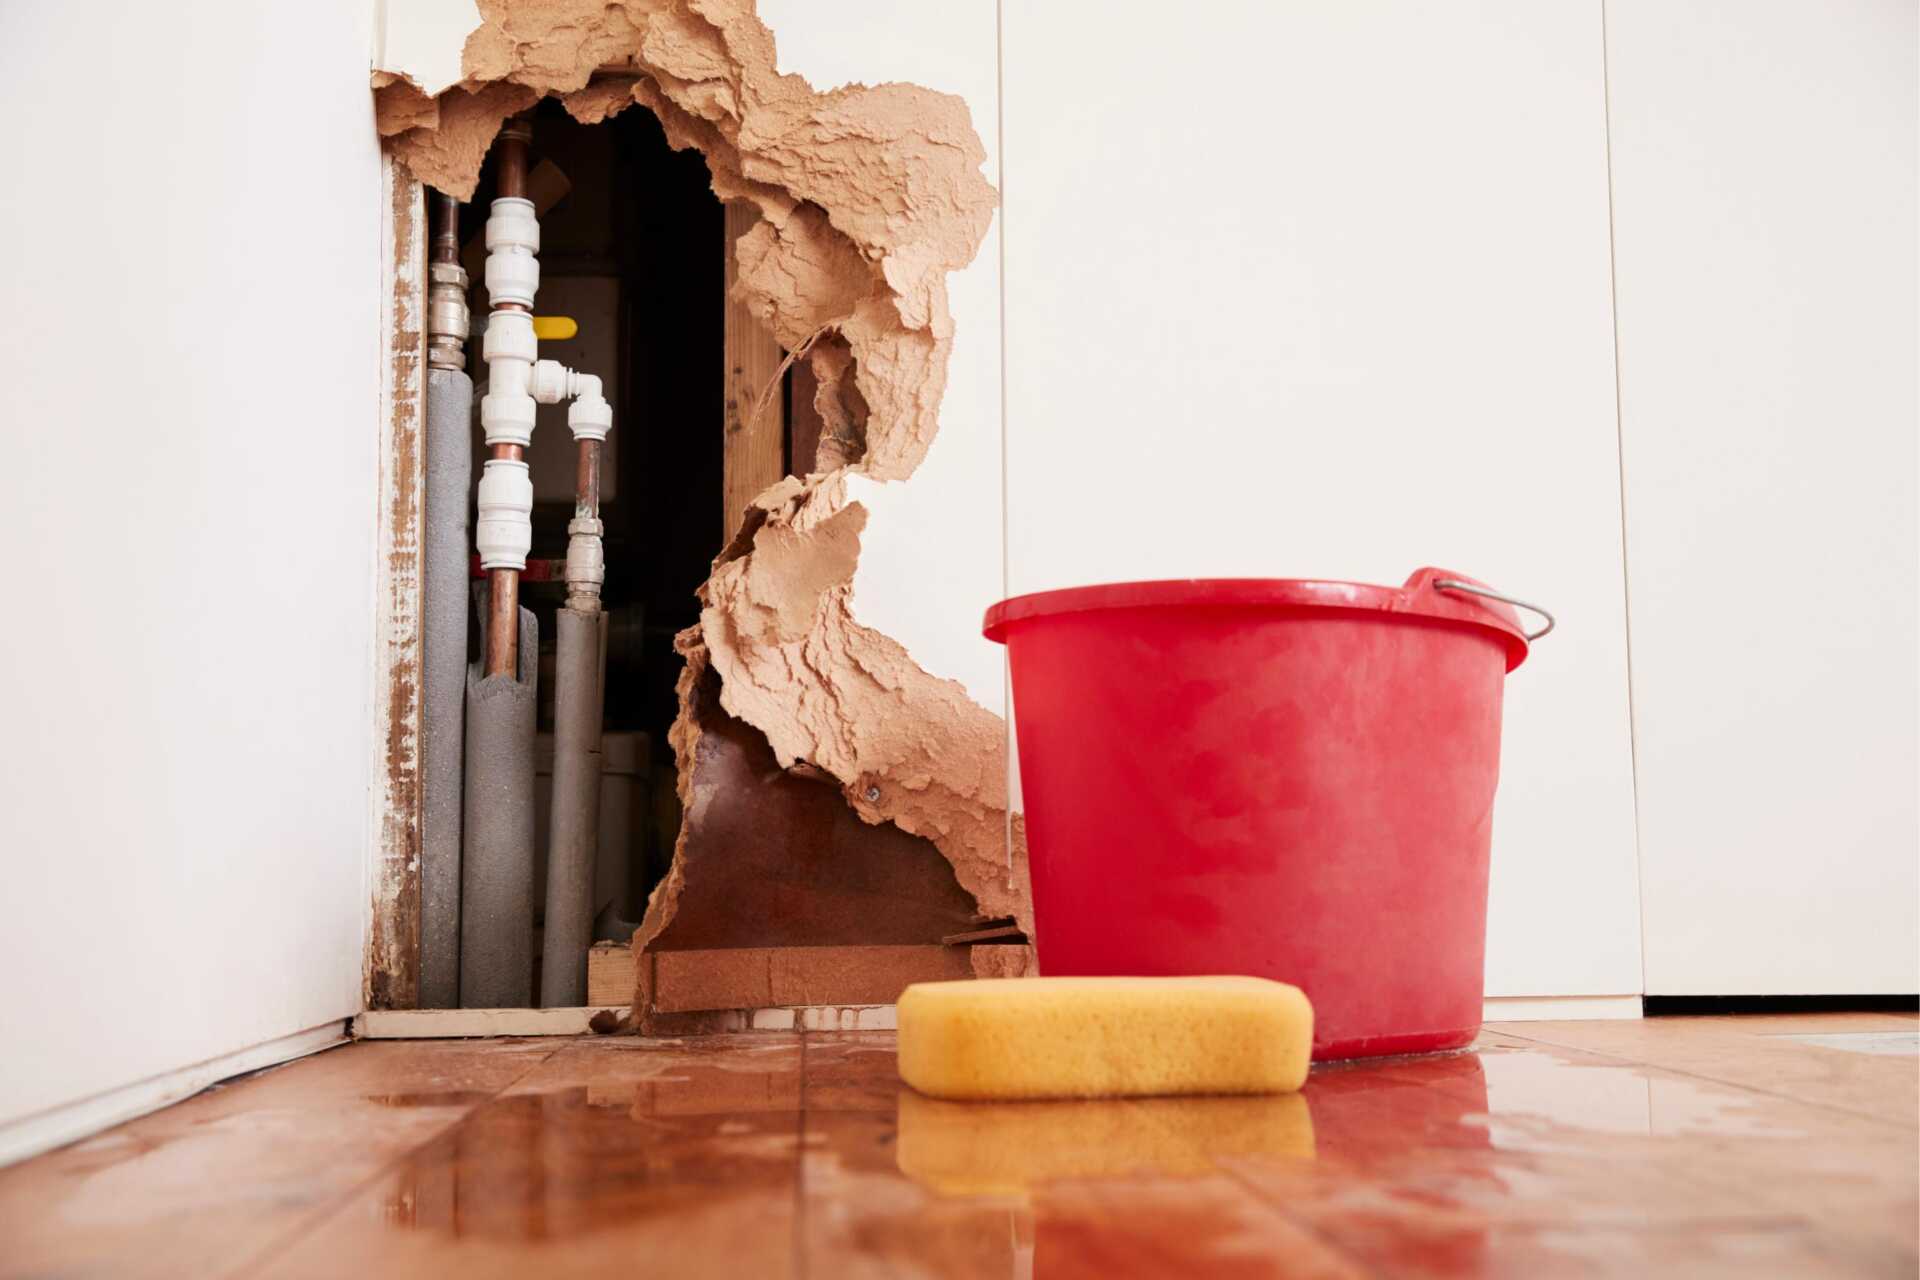
Turning Off the Water Source
To effectively address water damage in your home, the primary first step is to promptly turn off the water source causing the issue. Here’s how you can do it:
Locate the Main Water Shut-Off Valve: Typically, the main shut-off valve is situated near the water meter where the main water line enters your home. It’s vital to know its location beforehand to act swiftly in case of a water emergency.
Turn Off the Water: Once you’ve located the main shut-off valve, turn it clockwise to shut off the water flow. This will halt any further water from entering your home, preventing additional damage.
Check for Individual Shut-Off Valves: Apart from the main shut-off valve, many fixtures and appliances have individual shut-off valves. If the water damage is localized, you can turn off the water supply to that specific area without interrupting water flow to the rest of the house.
Removing Wet Materials
Now, it’s important to address the process of removing wet materials in water damage repair.
Start by carefully evaluating water-damaged items to determine salvageable versus unsalvageable materials.
Next, properly dispose of irreparable items and focus on drying out the remaining items to prevent further damage and mold growth.
Assessing Water-Damaged Items
How do you go about evaluating water-damaged items and efficiently eliminating wet materials in order to mitigate further damage and restore your space? When facing water damage, it’s essential to assess the extent of the damage and act promptly to prevent mold growth and structural issues. Here’s how you can tackle this task:
Inspect the Damage: Begin by carefully examining all items and materials affected by water. Look for signs of water saturation, mold growth, or structural weakness.
Prioritize Removal: Identify items that are beyond repair or pose a risk to your health and safety. Start by eliminating these items first to prevent further damage and contamination.
Use Proper Techniques: When removing wet materials, make sure you follow recommended safety guidelines. Use appropriate tools like gloves, masks, and protective clothing to handle potentially hazardous materials properly.
Properly Disposing of Materials
Examining and evaluating water-damaged items is essential in determining the extent of the damage and deciding on the next steps.
When it comes to properly disposing of materials affected by water damage, it’s vital to prioritize safety and thoroughness. Begin by wearing protective gear such as gloves and masks to prevent any potential health hazards.
Sort through the wet items, starting with those that are beyond repair or heavily contaminated. Dispose of these items following local regulations for hazardous waste if necessary.
For salvageable items, consider whether they can be dried and cleaned successfully or if they pose a risk of mold growth. Remember that porous materials like carpets, upholstery, and drywall are often challenging to fully restore and may need to be discarded.
Be cautious not to mix damaged items with unaffected ones to prevent cross-contamination. Properly disposing of water-damaged materials is an essential step in the restoration process to maintain a safe and healthy environment.
Drying Out Remaining Items
To effectively address water damage, the next significant step is drying out the remaining items by promptly removing wet materials from the affected area. This critical process will help prevent further damage and mold growth. Here are three key steps to efficiently dry out the remaining items:
Remove Wet Carpets and Rugs: Start by taking out any soaked carpets or rugs from the area. Roll them up carefully to prevent spreading water to unaffected areas. If possible, take them outside to dry in the sun.
Clear Out Damaged Furniture: Move any wet furniture out of the affected area. This includes sofas, seats, and other furnishings that have been exposed to water. Wipe them down and allow them to dry thoroughly to prevent mold and mildew.
Ventilate the Area: Open windows and use fans to improve air circulation in the affected space. This will help speed up the drying process and reduce humidity levels, aiding in preventing mold growth.
Extracting Standing Water
After a water damage incident, one of the crucial steps in the restoration process is extracting standing water from the affected area. To effectively remove standing water, begin by using a wet/dry vacuum. This powerful tool is specifically designed to handle wet conditions and can quickly suck up large volumes of water. Start by focusing on the areas with the most significant water accumulation, working your way towards drier spots. Be thorough in your approach, ensuring all visible water is extracted.
For areas where the water is too deep for a wet/dry vacuum to handle, consider using a submersible pump. These pumps are designed to remove large quantities of water efficiently. Place the pump at the lowest point of the flooded area and allow it to drain the water into a nearby drain or outside. Monitor the pump regularly to prevent it from running dry.
Once the majority of the standing water has been removed, use towels, mops, and squeegees to soak up any remaining moisture. Pay close attention to corners and crevices where water may have accumulated. Properly disposing of the extracted water is crucial to prevent further damage or mold growth. By effectively extracting standing water, you lay a solid foundation for the next steps in the water damage repair process.
Drying Out the Area
Now that you have successfully extracted the standing water from the affected area, the next vital step in the water damage repair process is drying out the space thoroughly. Properly drying the area is important to prevent further damage and mold growth. Here are three key steps to effectively dry out the water-damaged area:
Improve Air Circulation: Open windows and doors to enhance air circulation within the space. You can also use fans and dehumidifiers to help speed up the drying process. Make sure to position fans towards the wet areas and leave them running until everything is completely dry.
Eliminate Wet Materials: Remove any damp carpets, rugs, or furniture from the affected area. These items can trap moisture and impede the drying process. Place them outside to dry or dispose of them if they can’t be salvaged.
Inspect walls and baseboards for water damage and remove any affected materials.- Monitor the Progress: Keep a close eye on the drying process. Check the moisture levels regularly using a moisture meter. Ensure that the area is drying properly and there are no signs of excess moisture. It’s important to continue monitoring even after the visible water is gone to prevent mold growth and further damage.
Preventing Mold Growth
Prevent mold growth by thoroughly drying the water-damaged area to ensure a successful water-damage repair process. Mold can start growing within 24-48 hours after water damage, so it’s vital to act fast. Here are some steps to prevent mold growth:
How to Prevent Mold Growth
| Step | Description | Importance |
|---|---|---|
| Remove standing water | Use a wet vacuum or mop to extract water from floors. Consider renting industrial fans for faster drying. | Eliminates excess moisture, hindering mold growth. |
| Dehumidify the area | Use dehumidifiers to reduce humidity levels to below 60%. This inhibits mold spores from spreading. | Creates an environment inhospitable to mold growth. |
| Inspect hidden areas | Check walls, ceilings, and under carpets for hidden moisture. Use moisture meters to detect water pockets. | Ensures all damp spots are thoroughly dried. |
Repairing Damaged Drywall
When repairing damaged drywall, start by patching small holes with spackling or joint compound, ensuring a smooth finish.
Apply joint compound over the patched areas, feathering the edges to blend harmoniously with the surrounding wall.
Once dry, sand the area gently to create a polished surface before painting to match the existing wall color.
Patching Small Holes
To effectively mend small holes in drywall, start by gathering the necessary materials: spackling paste, a putty knife, sandpaper, and a moist cloth.
Inspect the Hole: Before beginning the patching process, check the hole is clean and free from any loose debris or old filler material.
Apply Spackling Paste: Use the putty knife to fill the hole with spackling paste, making sure it’s slightly overfilled to account for shrinkage as it dries.
Smooth and Finish: Once the paste is dry, gently sand the area to create a smooth surface. Wipe away any dust with a moist cloth to prepare the patch for painting.
Patching small holes in drywall is a simple task that can make a significant difference in the appearance of your walls. By following these steps with attention to detail, you can smoothly repair small imperfections and contribute to the overall maintenance and aesthetic appeal of your home.
Applying Joint Compound
Repairing damaged drywall involves applying joint compound to restore the structural strength and smooth surface of the wall. To start, make sure the area is clean and dry before beginning.
Use a putty knife to apply the joint compound over the damaged area, spreading it evenly to create a polished finish. Apply pressure while smoothing out the compound to ensure it sticks well to the wall.
For larger damaged sections, you may need multiple layers, allowing each layer to dry completely before adding the next one.
Once the joint compound is applied, let it dry according to the manufacturer’s guidelines. This step is vital to ensure a solid and long-lasting repair.
After the compound has dried, check the area for any imperfections or uneven spots. Sand down any rough edges gently with sandpaper to achieve a sleek surface.
Applying joint compound is a crucial step in restoring your damaged drywall, providing a base for a flawless repair that blends harmoniously with the rest of your wall.
Sanding and Painting
After applying the joint compound to repair the damaged drywall, the next important steps involve sanding and painting to achieve a smooth finish. Here’s what you need to do:
Sanding:
- Use fine-grit sandpaper to sand down the dried joint compound until it’s smooth and level with the surrounding wall.
- Be gentle to avoid creating uneven spots or damaging the repaired area.
- Wipe down the sanded area with a damp cloth to remove dust and debris before proceeding to painting.
Priming:
- Apply a coat of primer over the repaired area to make sure the paint adheres evenly and prevents the joint compound from absorbing moisture.
- Let the primer dry completely according to the manufacturer’s instructions before moving on to painting.
Painting:
- Select a paint color that matches the rest of the wall and apply it evenly over the primed area using a roller or brush.
- Allow the paint to dry completely before considering a second coat if necessary.
- After the final coat dries, inspect the area to ensure a smooth blend with the surrounding wall.
Restoring Electrical Systems
When addressing the restoration of electrical systems following water damage, it’s essential to prioritize safety and thoroughness. Before starting any work on electrical components, confirm that the power is turned off at the main breaker to prevent any risk of electrocution. It’s vital to approach electrical repairs with caution and respect for the potential dangers involved.
Start by evaluating the extent of the damage to the electrical systems. Look for any visible signs of water infiltration, such as water stains, corrosion on wires, or damaged outlets. If you notice any of these issues, it’s best to consult with a professional electrician to handle the repairs safely.
Once you have identified the damaged areas, begin by drying out the affected electrical components using a combination of fans and dehumidifiers. Make sure everything is completely dry before attempting any repairs or restoring power to the system.
Inspect all wiring for signs of corrosion and damage. Any compromised wires should be replaced to ensure the safety and functionality of the electrical system. Be thorough in your inspection to catch any potential hazards that may have arisen from the water damage.
Inspecting for Structural Damage
When examining for structural damage after water infiltration, start with a comprehensive visual inspection to identify any apparent signs of decay.
Next, test the stability of the architecture by looking for drooping floors, tilting walls, or ceiling fissures.
Evaluating possible hazards involves determining the scope of the damage and the essential measures to ensure the structural soundness of the building.
Visual Inspection for Damage
How do you determine if your property has sustained structural harm from water? When evaluating water damage, a visual inspection is essential to identify potential structural issues. Here are three key signs to watch out for:
Drooping or Curved Ceilings: Check for any areas where the ceiling seems to be drooping or curved. This could suggest water damage that has compromised the structural strength of the ceiling.
Fissures in Walls or Foundation: Inspect the walls and foundation for any fissures, as water damage can weaken these structures over time. Look for both vertical and horizontal fissures that may indicate underlying damage.
Bent or Curved Floors: Walk around your property and pay attention to any areas where the floor seems uneven, bent, or curved. Water damage can cause floors to swell or curve, indicating potential structural issues.
Testing for Stability
To assess the stability of a structure and inspect for potential structural damage caused by water, a thorough evaluation focusing on key indicators is essential. When testing for stability, check for signs like sagging ceilings, warped walls, or uneven floors. Use a flashlight to look for water stains, mold growth, or any visible cracks. Here is a table outlining key areas to inspect during the stability assessment:
| Key Area | What to Look For | Action Needed |
|---|---|---|
| Ceilings | Sagging or water stains | Reinforce or replace |
| Walls | Warping, discoloration, or mold growth | Dry, repair, or replace |
| Floors | Unevenness or soft spots | Repair or replace |
Assessing Potential Risks
As you progress with the water damage repair process, the next critical step is evaluating potential risks, specifically inspecting for structural damage. Here’s how you can assess the extent of the damage and ensure the safety of your home:
Look for Visible Signs: Start by visually inspecting the affected areas for any visible signs of structural damage. This may include drooping ceilings, twisted walls, or bulging floors. Pay close attention to any cracks or openings that have formed.
Check for Moisture: Use a moisture meter to detect any hidden pockets of water that could be causing damage to the structure. Damp areas can lead to mold growth and jeopardize the integrity of your home’s foundation.
Assess Foundation Stability: Examine the foundation of your home for any cracks or shifts. These issues could indicate serious structural damage that requires immediate attention. If you notice any concerning signs, it’s best to consult a professional for further evaluation.
Final Cleaning and Restoration
During the final cleaning and restoration phase of water damage repair, meticulous attention to detail is crucial to ensure that the affected area is thoroughly sanitized and restored to its pre-damaged state. Begin by removing any remaining debris, such as damaged furniture or materials, to create a clean workspace.
Next, thoroughly clean and disinfect all surfaces with a mixture of water and bleach to prevent mold growth and maintain a safe environment. It’s imperative to pay close attention to hidden or hard-to-reach areas where moisture may linger, such as under flooring or inside walls.
After cleaning, allow the area to dry completely before starting any restoration work. This may involve using dehumidifiers or fans to expedite the drying process and prevent further damage.
Once dry, assess the extent of any structural damage and make repairs as necessary. Replace or repair damaged drywall, flooring, or insulation to restore the area to its original condition.
Conclusion
DIY water damage repair can be a manageable process if approached systematically. By following the step-by-step guide outlined above, you can effectively address water damage in your home and prevent further issues such as mold growth and structural damage. Remember to act quickly and efficiently to minimize the impact of water damage on your property.