Contents
When encountering water damage on your drywall, expert advice can make a significant difference in the repair outcome. Understanding the seriousness of the damage, proper preparation, and meticulous repair techniques are vital for a successful restoration. From evaluating the initial signs to the finishing touches, each step plays a pivotal role in achieving a smooth and durable repair. Stay tuned to discover the detailed insights that will help you navigate this demanding task with confidence and efficiency.
Assessing Water Damage Severity
Evaluating the seriousness of water damage is essential in determining the necessary steps for effective drywall repair. When appraising the seriousness of water damage on your drywall, there are key indicators to look out for.
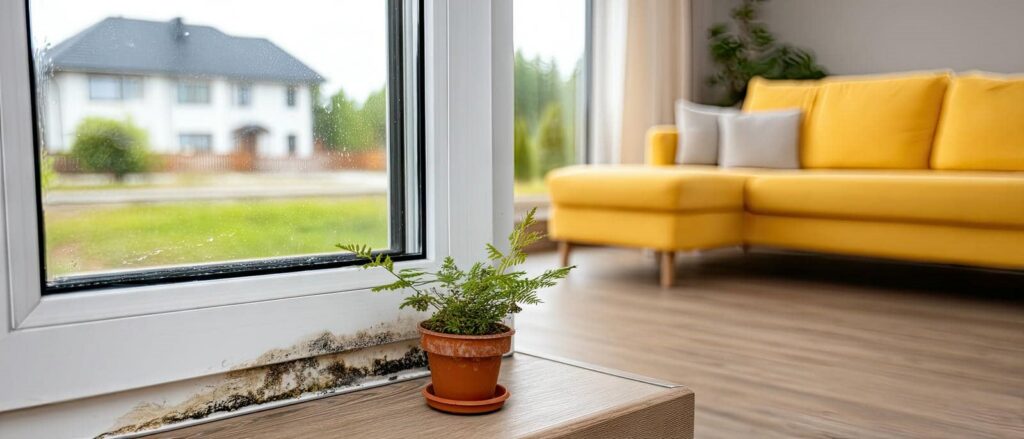
One of the first signs of water damage is discoloration on the walls. This can manifest as dark spots, yellowing, or bubbling paint or wallpaper. These areas often feel soft or damp to the touch, indicating saturation.
Another vital aspect to take into account is the extent of the damage. Is the water damage localized to a small area, or has it spread across multiple walls or floors? The spread of water damage can greatly impact the repair process.
Additionally, the source of the water damage plays an important role. Is it from a burst pipe, a leaky roof, or flooding? Identifying and resolving the source is crucial to prevent future damage.
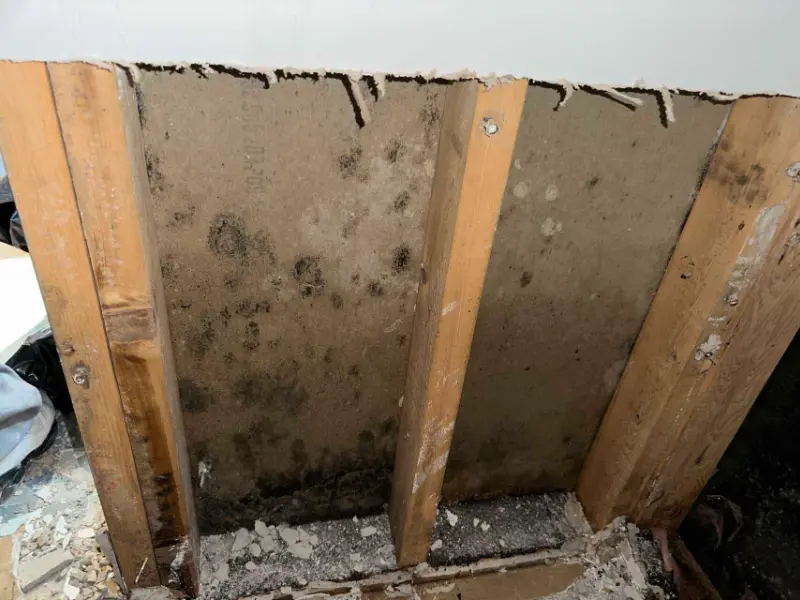
Furthermore, the duration of exposure to water is a key factor in evaluating the severity of the damage. The longer the drywall remains wet, the higher the likelihood of mold growth and structural weakening. Mold can pose health risks and require specialized remediation.
Preparing the Damaged Drywall
Evaluating the seriousness of water damage on your drywall will guide you in the process of preparing it for repair. Before delving into fixing the damaged drywall, take a moment to assess the extent of the damage to make sure you have a clear plan of action.
Here are three key steps to help you prepare the damaged drywall effectively:
Eliminate any Wet Materials: Begin by eliminating any wet materials, such as insulation or baseboards, near the damaged drywall. This will prevent further water absorption and mold growth.
Dry the Area Thoroughly: Use fans and dehumidifiers to dry out the affected area completely. It’s vital to make sure that there’s no moisture left in the walls before proceeding with any repairs.
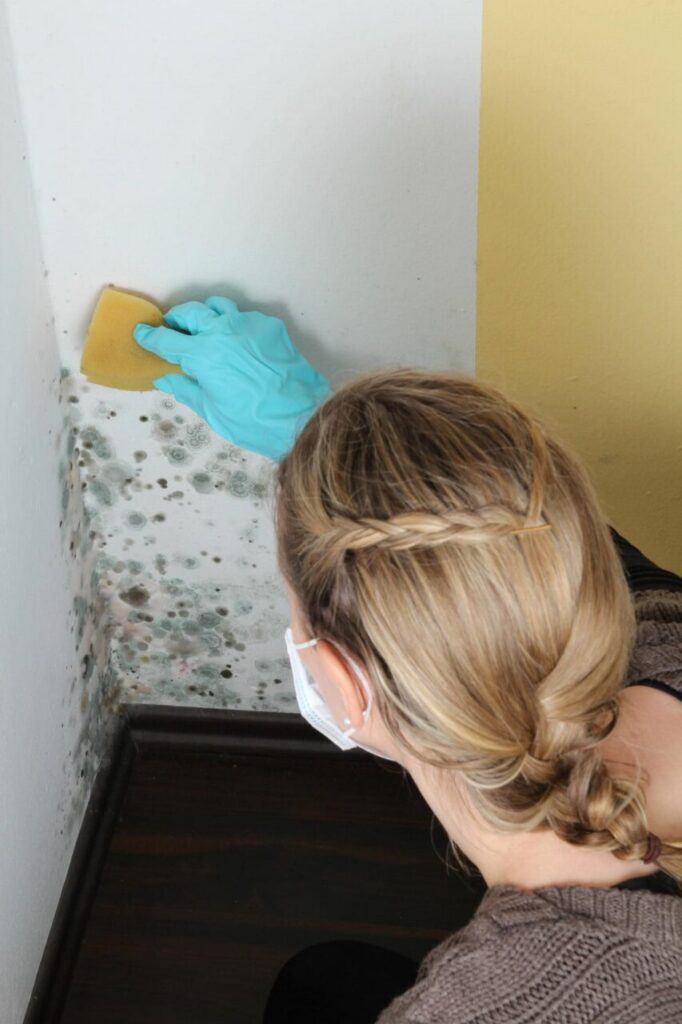
Sanitize the Area: Once the area is dry, sanitize it using a mixture of water and bleach to kill any mold or mildew that may have started to develop. Make sure to wear protective gear such as gloves and a mask when handling cleaning solutions.
Repairing Cracks and Holes
To effectively address fractures and gaps in your damaged plasterboard, it’s essential to approach the repair process methodically and efficiently. Begin by clearing out any debris or loose material from the damaged area. Use a utility blade to create a neat, uniform edge around the gap or fracture. This step ensures a smoother repair process and helps the patch adhere better.
For small openings, such as nail holes, a lightweight spackling paste can be used. Fill the opening with the spackling paste using a putty blade, then even it out uniformly.
For larger openings, it’s advisable to use a plasterboard repair kit. These kits typically contain a self-adhesive patch that covers the opening, joint compound and a putty blade. Apply the patch, cover it with joint compound, feather the edges to blend with the surrounding wall, and let it dry as per the manufacturer’s instructions.
Fractures in plasterboard can be fixed using a flexible patching paste. Apply the paste along the fracture, making sure it fills the gap. Smooth out the excess paste and let it dry completely.
Sand the area gently to create a smooth finish before priming and painting.
Drying and Priming the Surface
Having thoroughly fixed the cracks and holes in your damaged plasterboard, the next important step is to make sure the surface is dried and primed effectively. Proper drying and priming are essential to ensure the longevity and quality of your drywall repair. Here’s what you need to do:
Drying the Surface: After repairing the cracks and holes, allow sufficient time for the fixed areas to dry completely. Use fans or dehumidifiers to speed up the drying process. It’s crucial to verify that there’s no moisture left in the plasterboard before proceeding to the priming stage.
Priming the Surface: Once the fixed areas are fully dry, apply a high-quality primer to the entire surface. Priming helps seal the drywall, creating a smooth base for the paint to adhere to. Select a primer specifically formulated for drywall repairs to achieve the best results.
Applying Multiple Coats: Depending on the extent of the water damage and the type of primer used, you may need to apply multiple coats. Follow the manufacturer’s instructions for drying times between coats to achieve a uniform and well-primed surface.
Finishing Techniques and Painting
For a professional finish to your water-damaged drywall repair project, mastering the finishing techniques and painting process is essential. Once the drywall has been properly dried and primed, it’s time to focus on achieving a smooth and polished look. Here are some expert tips to guide you through the finishing and painting stage:
Finishing Techniques and Painting Tips
| Step | Description | Tips |
|---|---|---|
| 1. Apply Joint Compound | Use a taping knife to apply joint compound over the seams and let it dry. | Feather out the edges for a smooth integration. Sand lightly between coats for a flawless finish. |
| 2. Sanding | Sand the dry joint compound until it’s smooth and level with the rest of the wall. | Use a sanding block and gradually increase the grit of sandpaper for a refined result. |
| 3. Priming and Painting | Apply a coat of primer to seal the repaired area, then paint to match the wall. | Use high-quality paint and feather the edges to blend smoothly with the existing wall color. |
Review
Overall, expert tips for water damage drywall repair are essential for ensuring a successful and long-lasting restoration process. For example, a homeowner in Florida experienced severe water damage to their drywall after a hurricane. By following the proper steps of evaluating the damage, preparing the area, repairing cracks and holes, and finishing with quality paint, they were able to restore their walls to their original condition and prevent any future issues.