Contents
When faced with mold growth after water damage, you need to act promptly and efficiently to restore your home’s safety and integrity. Imagine having a sudden pipe burst in your basement, leading to mold creeping up the walls. But fear not, as there are proven methods available to tackle this issue effectively. By following a systematic approach and implementing the right strategies, you can ensure a thorough mold removal process. Ready to discover the key steps to take for successful mold remediation?
Assessing the Mold Infestation
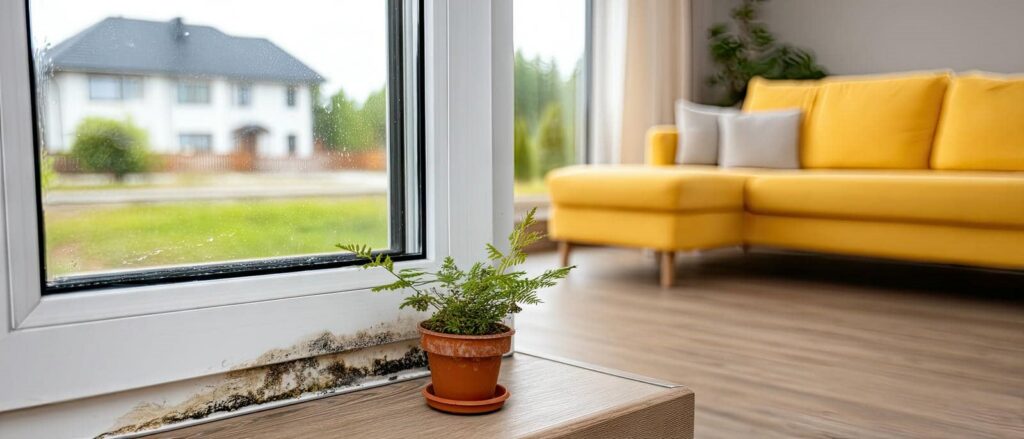
To effectively address mold infestations after water damage, the first significant step is evaluating the extent of the contamination. Begin by visually inspecting the affected areas, paying close attention to places where water has accumulated or where moisture is present. Mold typically thrives in damp, dark environments, so be thorough in your evaluation.
Look for visible signs of mold growth, such as black or green spots on walls, ceilings, or floors. Additionally, use a moisture meter to detect any hidden pockets of moisture that could be promoting mold growth.
Once you have identified the areas affected by mold, assess the size of the infestation. Is it confined to a small section of a room, or has it spread to multiple areas? This information will help determine the scale of remediation needed. Take note of any materials that may be harboring molds, such as carpets, drywall, or insulation, as these may need to be removed and replaced.
Furthermore, consider the type of mold present. While all molds should be removed, some varieties, such as black mold, can pose more significant health risks. If you’re uncertain about the type of mold you’re dealing with, it’s advisable to consult with a professional to ensure proper identification and removal. Remember, a thorough evaluation is essential for effectively addressing mold infestations and preventing future issues.
Identifying the Water Source
When identifying the water source that led to the mold infestation, it’s essential to conduct a thorough examination of the affected area. Begin by inspecting the common culprits such as leaky pipes, roof leaks, or flooding. Check for any visible signs of water intrusion, like damp walls, ceilings, or floors. Use a moisture meter to detect hidden water sources behind walls or under flooring. Remember, mold thrives in damp environments, so locating and addressing the water source is pivotal to preventing future mold growth.
Look for condensation on windows, pipes, or walls, as this could indicate high humidity levels promoting mold growth. Be sure to check areas prone to water accumulation, like basements, crawl spaces, and attics. If you find standing water, address it immediately to prevent mold from spreading further.
If the water damage is due to a leak, fix it promptly to prevent recurring mold issues. Sometimes, the source may be less obvious, requiring professional assistance to identify and rectify the problem effectively.
Keep in mind that addressing the water source is just as vital as removing the mold itself to secure a long-lasting solution. By diligently identifying and resolving the water source, you can effectively combat mold growth and create a healthier living environment.
Containment and Ventilation Strategies
To effectively address mold growth after water damage, it’s important to implement proper containment measures and ventilation strategies.
Containment measures such as sealing off the affected area with plastic sheeting help prevent the spread of mold spores to other parts of the property.
In conjunction with containment, ensuring proper ventilation using techniques like air scrubbers and dehumidifiers is essential for removing excess moisture and improving air quality.
Effective Containment Measures
During mold removal after water damage, the implementation of effective containment measures is crucial to prevent the spread of spores and ensure a safe working environment. To achieve this, it’s vital to establish physical barriers using plastic sheeting to isolate the contaminated area. Ensure that the barriers are securely taped to floors, ceilings, and walls to create a contained workspace.
Additionally, negative air pressure machines equipped with HEPA filters should be utilized to maintain air quality by capturing airborne mold spores within the contained area. Seal off any vents, ducts, or other openings that could allow spores to escape to unaffected areas.
Moreover, it’s essential to equip workers with personal protective equipment such as N95 respirators, gloves, and goggles to prevent exposure to mold spores during the removal process. Regularly wet wiping surfaces within the containment area and misting with a biocide solution can further control the spread of mold.
Proper Ventilation Techniques
As you focus on containing the mold-infested area, it’s vital to think about proper ventilation techniques to complement your containment strategies effectively. Proper ventilation plays a critical role in mold removal by helping to reduce moisture levels and prevent the spread of spores.
To achieve this, make sure that the affected area is well-ventilated by opening windows and using fans to promote air circulation. Additionally, consider using dehumidifiers to decrease humidity levels, creating an environment where mold finds it hard to thrive.
It’s essential to exhaust air to the outdoors rather than recirculating it within the space to prevent mold spores from settling in other areas. By implementing these ventilation techniques alongside your containment measures, you can enhance the efficiency of your mold removal efforts and create a healthier indoor environment.
Removing Affected Materials Safely
When removing materials impacted by mold after water damage, it’s important to prioritize safety and precision. Mold can release harmful spores into the air, which can pose health risks if inhaled. Before starting the removal process, make sure you’re equipped with protective gear such as gloves, goggles, and a mask to prevent exposure to mold spores.
Begin by carefully inspecting the affected materials to assess the extent of the damage. Items that are extensively damaged or can’t be thoroughly cleaned should be disposed of properly. Use plastic bags to seal and contain the mold-infested materials before disposing of them to prevent the spread of spores.
Next, use a damp cloth to gently wipe away any visible mold growth on surfaces. Be cautious not to scrub vigorously, as this can release more spores into the air.
For porous materials like drywall or insulation that are heavily affected by mold, it’s best to remove and replace them to ensure the complete removal of mold spores.
Remember to clean the affected area thoroughly after removing materials to eliminate any remaining mold spores. Use a HEPA vacuum to capture any airborne spores and then disinfect the area with a mixture of water and detergent. Following these steps diligently will help secure a safe and effective removal of mold-infested materials.
Applying Mold Remediation Techniques
To effectively address mold growth during remediation, it’s vital to implement proven techniques that target and eliminate the mold at its source. Mold remediation involves a series of precise steps to ensure a thorough removal process.
The first step is containment, where the affected area is sealed off to prevent the spread of mold spores to clean sections of the property. This containment is critical in preventing cross-contamination.
Next, the actual removal of mold begins. This process often involves scrubbing affected surfaces with specialized cleaning agents designed to eliminate mold spores. In some cases, porous materials like drywall may need to be removed and replaced to fully eradicate the mold. After removal, the area is carefully dried to prevent any remaining spores from regrowing.
Air filtration systems are commonly used during mold remediation to capture mold spores that may be circulating in the air. These HEPA filters are highly effective in trapping even the smallest particles, ensuring a thorough cleaning process.
Once the remediation is complete, it’s crucial to address the root cause of mold growth, such as fixing leaks or improving ventilation. Regular inspections and maintenance can help prevent future mold issues and maintain a healthy living environment for you and your family.
Drying and Dehumidifying the Area
Following the successful removal of mold through meticulous remediation methods, the next vital step in the process is thoroughly drying and dehumidifying the affected area. This step is pivotal in preventing the regrowth of mold and ensuring the restoration of a healthy indoor environment.
To start, ensure proper ventilation by opening windows and using fans to increase air circulation. This aids in the evaporation of moisture trapped in walls, ceilings, and floors. Additionally, running a dehumidifier helps to extract excess moisture from the air, further accelerating the drying process.
Focus on removing any remaining water or damp materials promptly. Use towels, mops, or wet vacuums to soak up water from surfaces. Pay close attention to hidden areas like behind cabinets or under carpets, as moisture in these spots can promote mold growth.
Monitor the humidity levels in the affected area. Ideally, indoor humidity should be kept below 60% to discourage mold growth. Utilize a hygrometer to measure humidity levels accurately and adjust dehumidifiers or ventilation as needed to maintain optimal conditions.
Preventing Future Mold Growth
To prevent future mold growth in your home, focus on implementing moisture control strategies such as fixing leaks promptly and using dehumidifiers in high-humidity areas. Confirm proper ventilation techniques are in place, such as using exhaust fans in kitchens and bathrooms to reduce moisture buildup. Regular inspections and maintenance of plumbing systems, roofs, and HVAC units are essential to catch and address potential water issues before they lead to mold growth.
Moisture Control Strategies
One effective way to prevent future mold growth after water damage is through implementing moisture control strategies. Controlling moisture levels in your home is vital in inhibiting mold growth.
Begin by fixing any leaks in plumbing or roofs promptly to prevent excess water accumulation. Use dehumidifiers to maintain indoor humidity levels below 60%, as high humidity promotes mold growth.
To allow moisture to escape, ensure proper ventilation in areas prone to moisture build-up, such as bathrooms and kitchens. Use exhaust fans while cooking or showering to keep air circulating throughout the house.
Consider using vapor barriers in crawl spaces and basements to prevent moisture from seeping through walls and floors. Regularly inspect and maintain your HVAC system to prevent condensation and mold growth in air ducts.
Proper Ventilation Techniques
Proper ventilation is an essential element in preventing future mold growth in your home. Adequate ventilation helps to control humidity levels and promote air circulation, which is vital in inhibiting mold spores from settling and proliferating.
To improve ventilation, consider installing exhaust fans in high-moisture areas such as bathrooms, kitchens, and laundry rooms. These fans should vent to the outside to prevent moisture from being trapped indoors. Additionally, opening windows and using dehumidifiers can also aid in maintaining proper ventilation levels.
Ensuring that your HVAC system is well-maintained and functioning efficiently is another key aspect of proper ventilation. Regularly changing filters, inspecting ductwork for any blockages or leaks, and scheduling professional HVAC maintenance can all contribute to better air circulation throughout your home.
Regular Inspections and Maintenance
Regular inspections and maintenance play a crucial role in preventing future mold growth in your home. By routinely checking for leaks, condensation, or water damage, you can address potential issues before they escalate into mold problems.
Start with the roof – inspect it for any missing or damaged shingles that could lead to water infiltration. Check gutters and downspouts for blockages that may cause water to seep into walls.
Indoors, inspect plumbing fixtures, appliances, and areas prone to moisture accumulation, like bathrooms and basements. Look for signs of water stains, discoloration, or musty odors, which could indicate hidden leaks.
Keep an eye on humidity levels using a hygrometer and make sure they stay below 60%. Regularly clean and maintain HVAC systems to prevent mold growth in ducts.
Final Thoughts
By following the proven methods outlined for mold removal after water damage, you can effectively address the issue without any complications. You can ensure a clean and mold-free environment with meticulous assessment, identification of water sources, safe removal of mold-affected materials, and proper remediation techniques. Remember, prevention is key to maintaining a healthy living space, so be vigilant in controlling moisture levels to avoid future mold growth.