Contents
When achieving a polished outcome with your drywall projects, it is crucial to remember a few key pointers. From mastering the art of sanding techniques to smoothly blending joint compounds, these top 10 DIY finishing tips can elevate the quality of your work. By understanding the nuances of feathering and tapering and choosing the right tools for the job, you can ensure a professional finish that will leave your space looking flawless. Curious to discover more about these crucial tips?
Key Takeaways
- Choose the right grit sandpaper for a smooth finish.
- Apply joint compound consistently for a uniform surface.
- Master feathering and tapering for seamless transitions.
- Allow ample drying time between compound coats.
- Invest in quality tools for professional results.
Sanding Techniques
To achieve a smooth and flawless finish on your drywall, begin by selecting the appropriate grit sandpaper for the job. Sanding efficiency is vital in achieving a professional look for your walls. When choosing sandpaper, opt for a fine grit between 120 to 150 for initial sanding to smooth out any imperfections. For final sanding before painting, a grit of 180 to 220 is recommended.
Equipment selection plays a key role in the sanding process. A handheld sanding block or pole sander is ideal for larger surface areas, providing even pressure for a consistent finish. Additionally, using a sanding sponge allows for flexibility when sanding corners and edges. These tools enhance precision, ensuring no spot is left untouched.
Dust control is essential during the sanding process to maintain a clean working environment and prevent respiratory issues. Prioritize safety precautions by wearing a dust mask, safety goggles, and gloves to protect yourself. Consider using a vacuum sander or attaching a dust bag to your sanding equipment to minimize airborne particles.
Joint Compound Application
When applying joint compound, ensure a consistent layer thickness to achieve a uniform surface.
Employ smooth finishing techniques to eliminate any imperfections in the compound.
Allow for adequate drying time between coats for best results.
Consistent Layer Thickness
For a professional-looking finish, make sure each layer of joint compound is applied consistently across the drywall surface in terms of thickness. Layer consistency is vital for a polished final result. To guarantee uniformity, use blending techniques such as feathering and tapering at the edges of each layer. This helps create a smooth shift between the compound and the drywall, preventing visible seams or bumps.
Controlling the thickness of each layer is essential for a flawless finish. Utilize finishing tools like taping knives or mud pans to maintain a consistent thickness throughout the application process. Start by applying a thin base layer, gradually building up the thickness with subsequent coats as needed. Avoid uneven distribution of compound, as it can lead to uneven drying and visible imperfections once painted.
Smooth Finishing Techniques
Achieving a smooth finish on drywall requires mastering the application of joint compounds with precision and finesse. When applying joint compound, start by filling in any holes or gaps with a small putty knife. For larger holes, use a mesh drywall tape before applying the compound.
Spread the joint compound evenly over the patched areas, ensuring it’s slightly below the surface of the drywall. Blend the edges of the compound outwards to create a cohesive integration with the surrounding wall.
To achieve a smooth finish, consider the drywall texture you desire. For a completely smooth surface, apply thin layers of joint compound and sand between each coat. Use a sanding block or sandpaper to smooth out any imperfections, working your way from rough to fine grit for a flawless result.
Take your time and pay attention to detail when patching holes and smoothing the joint compound to achieve a professional-looking finish on your drywall.
Proper Drying Time
To ensure proper drying time for joint compound application, following manufacturer recommendations for best results is essential. After you have applied the joint compound to your drywall seams and screws, allow ample time for it to dry thoroughly. Depending on the type of joint compound used and environmental conditions, drying times can vary.
To speed up the drying process, consider using drying hacks such as setting up fans or dehumidifiers to control moisture levels in the room.
Properly dried joint compounds are important for achieving a smooth finish when painting. Rushing this step can lead to visible imperfections in your final paint job. Once the joint compound is completely dry, lightly sand any uneven areas before applying paint.
This attention to detail in the drying process will ensure that your finishing touches, like painting techniques, will result in a professional-looking outcome. Remember, patience and proper moisture control are key when it comes to achieving optimal drying times for your joint compound applications.
Feathering and Tapering
When completing drywall, it’s vital to ensure smooth shifts between layers for a professional look. To achieve this, utilize the feathering technique to blend the edges seamlessly.
Tapering is key to creating a polished finish, making the joints virtually disappear.
Smooth Transitions Between Layers
For professional-looking drywall finishing, ensure smooth shifts between layers by skillfully feathering and tapering the joint compound. When blending edges, make sure that the joint compound is applied gradually, feathering it outwards from the center of the seam.
This technique helps create smooth connections between layers, preventing any visible lines or ridges. To achieve a flawless finish, use a drywall knife to taper the edges of the compound, feathering it gently into the surrounding surface. Pay close attention to the pressure applied to the knife, as too much force can result in a noticeable bulge.
Work in thin layers, building up the compound gradually until the connection between layers becomes indistinguishable. Remember to let each layer dry completely before adding the next one to avoid cracks or imperfections.
Use Feathering Technique
Skillfully feather and taper the joint compound to achieve smooth and uniform connections between layers in drywall finishing. Feathering mistakes can lead to visible lines and uneven surfaces, but with the right techniques, you can master this art.
Here are some advanced feathering tips for flawless results:
Maintain Consistent Pressure: Apply even pressure on the taping knife to create a smooth and gradual blend.
Feather Outward: Start feathering slightly beyond the joint and taper towards the center for a gradual merge.
Use Thin Layers: Apply thin layers of joint compound for easier blending and a smoother finish.
Feathering Mistakes: Correct uneven feathering by sanding lightly and adding more joint compound as needed.
Alternative Techniques: Experiment with different feathering angles and strokes to find what works best for your project.
Troubleshooting common issues like visible lines or rough merges can be challenging, but with practice and attention to detail, you can achieve professional-looking results.
Achieve Seamless Tapering
Master the art of achieving smooth tapering by skillfully blending feathering and tapering techniques in drywall finishing. When it comes to taping techniques, smooth connections are vital for creating a professional look. Begin by applying joint compound along the tapered edge with a taping knife, feathering it outwards to create a gradual blend. Use long, smooth strokes to ensure the integration is flawless.
After the compound has dried, sand the area lightly to achieve a polished surface.
For the finishing touches, pay attention to detail. Check the tapering by running your hand over the area to detect any imperfections. If needed, apply an additional coat of joint compound and feather it out further to refine the taper. Sand lightly between coats for a flawless finish.
Proper Tool Selection
Selecting the right tools is essential for achieving a professional finish when working on drywall. Proper tool selection not only makes the job easier but also ensures a smooth and polished outcome. Here are some key tips to take into account when choosing your tools:
Invest in Quality: Opt for high-quality tools that are durable and provide precise results. Quality tools will last longer and give you better results in your drywall finishing projects.
Tool Maintenance: Regularly clean and maintain your tools to make sure they function properly. Proper maintenance can extend the lifespan of your tools and keep them in top condition for a flawless finish.
Tool Storage: Store your tools in a dry and organized manner to prevent damage and misplacement. Having a designated storage area for your drywall tools will help you access them easily when needed.
Choose the Right Size: Select tools that are appropriate for the size of your project. Using tools that are too small or too large can lead to uneven finishes and make the job more challenging.
Comfort is Key: Pick tools that are comfortable to use for long periods. Ergonomic handles and lightweight materials can reduce fatigue and make the finishing process more enjoyable.
Sealing Drywall Seams
Ensure the seams are properly sealed for a flawless finish on your drywall project. Sealing techniques play a pivotal role in moisture prevention and impeccable drywall finishing. After the drywall installation, it’s essential to inspect each seam for any gaps, holes, or imperfections. Use a bright light to scan the seams, as any irregularities will be highlighted.
Next, lightly sand the seams before applying any joint compound to ensure a smooth surface for the compound to adhere to. Once sanded, apply a thin layer of joint compound using a drywall knife, pressing firmly to fill in any gaps. Make sure to feather the edges to blend the compound seamlessly with the drywall.
After the compound has dried, lightly sand the area again to remove any excess compound and create a flush surface. Repeat the process with a second and potentially third layer of joint compound, ensuring each layer is progressively wider than the last for a smooth finish.
Lastly, once the final layer has dried and been sanded, inspect the seams for any imperfections. Touch up as needed before priming and painting your drywall for a professional and polished look. By following these sealing techniques meticulously, you’ll achieve a flawless finish that will stand the test of time.
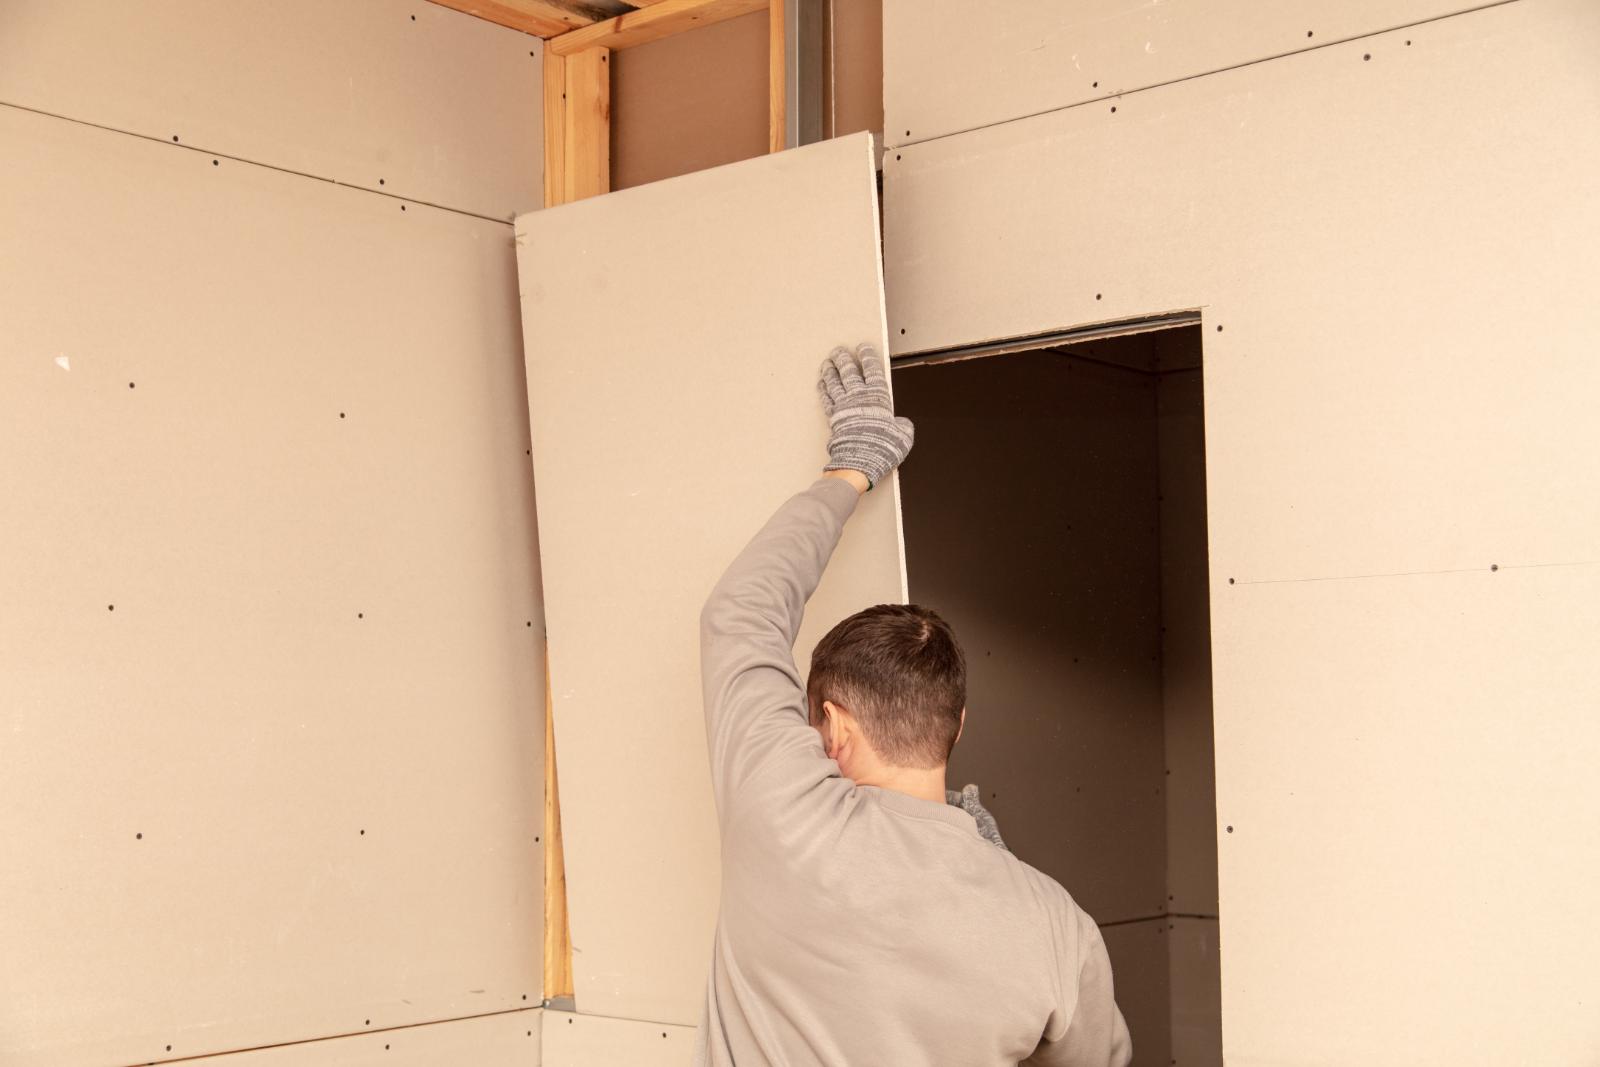
Corner Bead Installation
To ensure a professional finish, begin by aligning the corner bead perfectly with the edge of the drywall.
Apply joint compound evenly along the edges of the corner bead to secure it in place and create a smooth connection between the walls.
Proper Corner Bead Alignment
How can you ensure precise alignment when installing corner beads on drywall? Proper corner bead alignment is essential for achieving a professional finish. To ensure your corner bead installation is flawless, follow these expert tips:
Measure Twice, Cut Once: Take accurate measurements of the corner before cutting the corner bead to size.
Use a Level: Align the corner bead with a spirit level to make sure it’s perfectly vertical or horizontal.
Secure Properly: Use drywall screws or nails to secure the corner bead every 6 inches.
Apply Adequate Pressure: Press the corner bead firmly into place to prevent any gaps between the bead and the drywall.
Check Alignment: Double-check the alignment of the corner bead before the mud dries to make any necessary adjustments.
Applying Joint Compound
Apply the joint compound with precision and attention to detail over the installed corner bead to achieve a smooth and flawless finish. Before starting, consider the color selection of the joint compound to match your wall for a cohesive look. Use the appropriate finishing tools, such as a taping knife, to spread the compound evenly over the corner bead, ensuring a smooth integration.
Once applied, allow the joint compound to dry completely according to the manufacturer’s instructions. This critical drying time is essential for the compound to set properly before moving on to the next step.
When the compound is fully dry, employ effective sanding techniques using fine-grit sandpaper to smooth out any imperfections and create a uniform surface. Pay close attention to the edges of the corner bead to achieve a professional finish.
Texture Application Methods
Consider utilizing various texture application methods to enhance the visual appeal of your drywall finishing project. Achieving the perfect texture consistency and incorporating creative designs can elevate your walls’ overall look.
Exploring unique finishes can add depth and character to your space when it comes to alternative texture methods. Here are some expert tips to help you master texture application for your DIY drywall project:
Skip Trowel Technique: Create a textured finish by using a trowel to apply joint compound in a skipping motion, resulting in a subtle and elegant texture.
Knockdown Texture: Apply the joint compound with a roller, then flatten it with a trowel to achieve a textured surface with a smooth finish.
Orange Peel Texture: Spray the joint compound onto the wall and then lightly drag a trowel over it to create a texture resembling an orange peel.
Slap Brush Texture: Use a slap brush to create a unique pattern by slapping the brush onto the wet joint compound.
Stippling Technique: Dab a stipple brush onto the surface to create a textured finish that adds visual interest and depth to your walls.
Experimenting with these texture application methods can help you achieve a professional-looking finish that will make your drywall project stand out.
Priming for Paint
Prepare your drywall surface for painting by applying a high-quality primer to ensure excellent adhesion and a smooth finish. Proper surface preparation is vital to make sure that the paint adheres well and results in a professional-looking outcome. Before priming, make sure the drywall is clean and free of dust and debris. Use a damp cloth to wipe down the walls and allow them to dry completely before starting the priming process.
When selecting a primer, opt for one specifically designed for drywall to promote paint adhesion and enhance the finish. Choose a primer that matches the type of paint you’ll be using, whether it’s latex or oil-based. Additionally, consider tinting the primer to a shade close to your paint color to help with coverage, especially if you’re shifting between dark and light colors.
Apply the primer evenly using a paint roller, starting from the top of the wall and working your way down in smooth, overlapping strokes. Allow the primer to dry completely as per the manufacturer’s instructions before applying the paint.
Repairing Imperfections
Address any imperfections by carefully repairing them before proceeding with painting to ensure a flawless finish on your drywall. When patching holes, you must make sure that the patch material is firmly secured and smoothed out to blend seamlessly with the surrounding wall.
Covering dents requires precision – use a putty knife to apply joint compound over the dent, feathering the edges for a smooth integration.
Here are some expert tips to help you repair imperfections effectively:
Choose the Right Patch Material: Select the appropriate patch material based on the size and type of imperfection to achieve a durable repair.
Sand Gently and Gradually: Gradually sand the patched areas using fine-grit sandpaper to achieve a smooth and even surface.
Use Proper Lighting: Adequate lighting is essential for spotting imperfections – inspect the repaired areas under different angles to make sure a flawless finish.
Apply Multiple Thin Layers: Instead of one thick layer, apply multiple thin layers of joint compound when covering dents for a smoother result.
Practice Patience: Allow sufficient drying time between each repair step to avoid compromising the quality of the final finish.
Cleaning and Maintenance
Proper cleaning and maintenance of your drywall surfaces are vital for preserving their appearance and longevity. When it comes to cleaning tools, opt for a soft-bristled brush or a vacuum with a brush attachment to remove dust and dirt from the surface. Avoid using abrasive materials that can scratch or damage the drywall. For tougher stains, a mild detergent solution and a soft cloth can be used, making sure not to oversaturate the drywall.
Establishing a maintenance schedule is essential to keep your drywall in top condition. Consider inspecting your walls regularly for any signs of damage, such as cracks, dents, or water stains. Addressing these issues promptly can prevent further deterioration and costly repairs down the line. Additionally, schedule an annual deep cleaning session to remove built-up grime and maintain the fresh look of your drywall.
Investing in high-quality cleaning tools won’t only make the maintenance process easier but also extend the lifespan of your drywall. By following a consistent maintenance schedule, you can ensure that your walls remain pristine for years.
Final Thoughts
You’ve mastered the art of DIY drywall finishing with these top 10 tips.
You can achieve a flawless result by using the right tools and taking your time to sand corners, edges, and larger areas.
Keep honing your skills and applying these tips for professional-quality drywall projects every time.