Contents
When facing a water-damaged drywall situation, imagine discovering a hidden leak behind a wall that has caused extensive damage to the surrounding area. As you navigate through the complex process of restoration, keep in mind that mastering expert drywall techniques requires attention to detail and precision. By understanding the key steps involved in this elaborate process, you can elevate your skills to achieve flawless results that stand the test of time.
Assessing the Water Damage
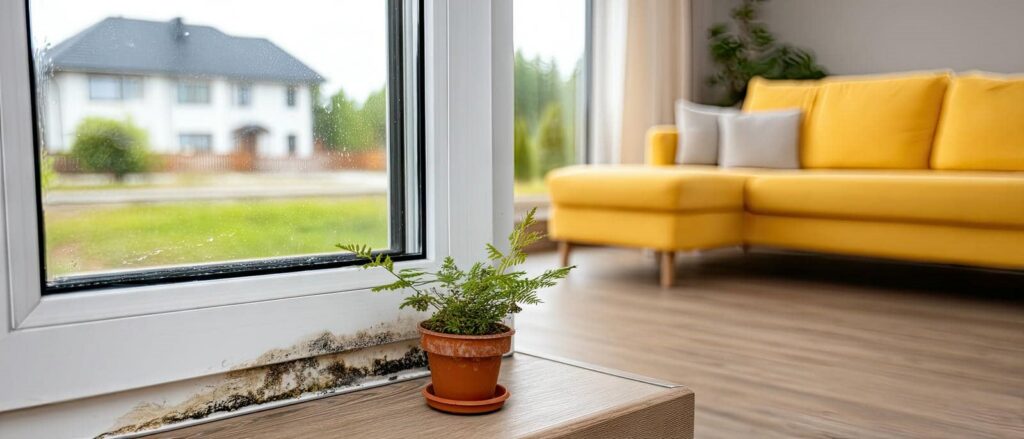
When evaluating water damage on drywall, the first step is to thoroughly examine the affected area. Begin by checking for any signs of discoloration, warping, or soft spots on the drywall surface. Use a flashlight to illuminate hidden areas like corners and behind furniture to make sure no damage goes unnoticed. Look for any water stains or peeling paint, which could indicate moisture seeping into the drywall.
Next, evaluate the extent of the damage by gently pressing on the affected areas. If the drywall feels soft or spongy to the touch, it likely has absorbed a significant amount of water and will require immediate attention. Additionally, a moisture meter should be used to measure the moisture content of the drywall accurately. This tool will help determine the severity of the water damage and guide the restoration process.
Inspect the surrounding areas for any signs of mold or mildew growth, as prolonged exposure to moisture can promote their development. Take note of any musty odors, as they can also indicate mold presence, even if it’s not visible.
Document the damage with photos and notes to keep track of the evaluation for insurance purposes and future reference. By meticulously evaluating the water damage on drywall, you can effectively plan the restoration process and prevent further issues.
Safety Precautions During Restoration
Proper safety precautions are essential to ensure a safe and efficient drywall restoration process. When restoring drywall after water damage, ensuring your safety and that of others is crucial. Here are some essential safety tips to keep in mind:
Protective Gear: Always wear appropriate personal protective equipment (PPE) such as gloves, goggles, and a mask to shield yourself from potential hazards like mold spores or dust particles.
Electricity Check: Before starting any restoration work, verify that the electricity in the affected area is turned off to prevent the risk of electric shock.
Ventilation: Adequate ventilation is key. Open windows and use fans to improve air circulation and prevent the buildup of harmful fumes or airborne particles.
Ladder Safety: If working at heights, make sure to use a sturdy ladder and follow proper ladder safety guidelines to avoid falls or injuries.
Chemical Awareness: Be cautious when using cleaning agents or chemicals. Read and follow the manufacturer’s instructions carefully, and store them in a safe place away from children and pets.
Drying Out the Affected Area
To effectively dry out the affected area, focus on efficient moisture removal by using dehumidifiers and fans.
Guarantee proper ventilation to aid in the drying process, opening windows and using exhaust fans when possible.
To speed up drying, consider using specialized drying equipment and regularly monitor the moisture levels to track progress accurately.
Efficient Moisture Removal
Effectively drying out a moisture-affected area is crucial in the process of drywall restoration. To efficiently eliminate moisture from the affected area, follow these expert tips:
Assess the extent of moisture: Utilize a moisture meter to determine the level of moisture saturation in the affected area.
Remove standing water: If standing water is present, use a wet/dry vacuum to eliminate it before proceeding with the drying process.
Increase air circulation: Utilize fans and open windows to enhance airflow in the room, aiding in the evaporation of moisture.
Utilize dehumidifiers: Dehumidifiers help extract excess moisture from the air, speeding up the drying process significantly.
Monitor progress: Regularly check the moisture levels in the affected area to make sure that it’s drying properly and to prevent any further damage.
Ventilation for Drying
Proper airflow plays a crucial role in expediting the drying process of moisture-affected areas during drywall restoration. When addressing ventilation, make sure that the affected area is well-ventilated to speed up the evaporation of moisture. Open windows and doors to allow fresh air to circulate throughout the space.
Additionally, consider using fans to improve air movement and accelerate the drying process further. Positioning fans strategically can help direct airflow toward damp areas, promoting faster drying.
In cases where natural ventilation is insufficient, dehumidifiers can be a valuable tool. Dehumidifiers help remove excess moisture from the air, reducing humidity levels and assisting in the drying of wet surfaces like drywall. Place the dehumidifier in the center of the affected area for best results.
Speed up Drying
Improving the speed of drying out the affected area is key to successful drywall restoration. To speed up the drying process effectively, consider the following:
Increase Airflow: Use fans strategically to circulate air and aid in drying out the damp areas faster.
Dehumidify the Space: Utilize dehumidifiers to remove excess moisture from the air, helping to dry the affected area quicker.
Apply Heat: Using heaters can expedite the drying process by raising the temperature in the room.
Remove Wet Materials: Take out any wet insulation, carpets, or furniture that may be hindering the drying process.
Use Drywall Repair Tools: Employ specialized tools like drywall moisture meters to monitor the drying progress accurately.
Removing Damaged Drywall
When it comes to removing damaged drywall, the first step is to assess the extent of the damage, identifying areas with holes and cracks.
Once you’ve pinpointed the damaged sections, the next task is repairing these imperfections to ensure a smooth surface.
Assessing Damaged Drywall
Examining damaged drywall is a crucial step in the restoration process. When evaluating damaged drywall, follow these key tips:
Determine the extent of the damage: Carefully inspect the affected areas to ascertain the scale of the damage, whether it’s a small crack or a larger hole.
Look for signs of moisture: Search for any indications of water damage, such as staining, blistering, or tender areas, which could suggest underlying problems.
Survey the surrounding area: Examine the neighboring areas for any concealed damage that may have been triggered by the initial problem.
Test the structural strength: Apply slight pressure on the damaged area to verify any tenderness or fragility that could jeopardize the drywall’s durability.
Take the location into consideration: Factor in the location of the damage, as repairs in heavily used areas or corners may necessitate additional reinforcement.
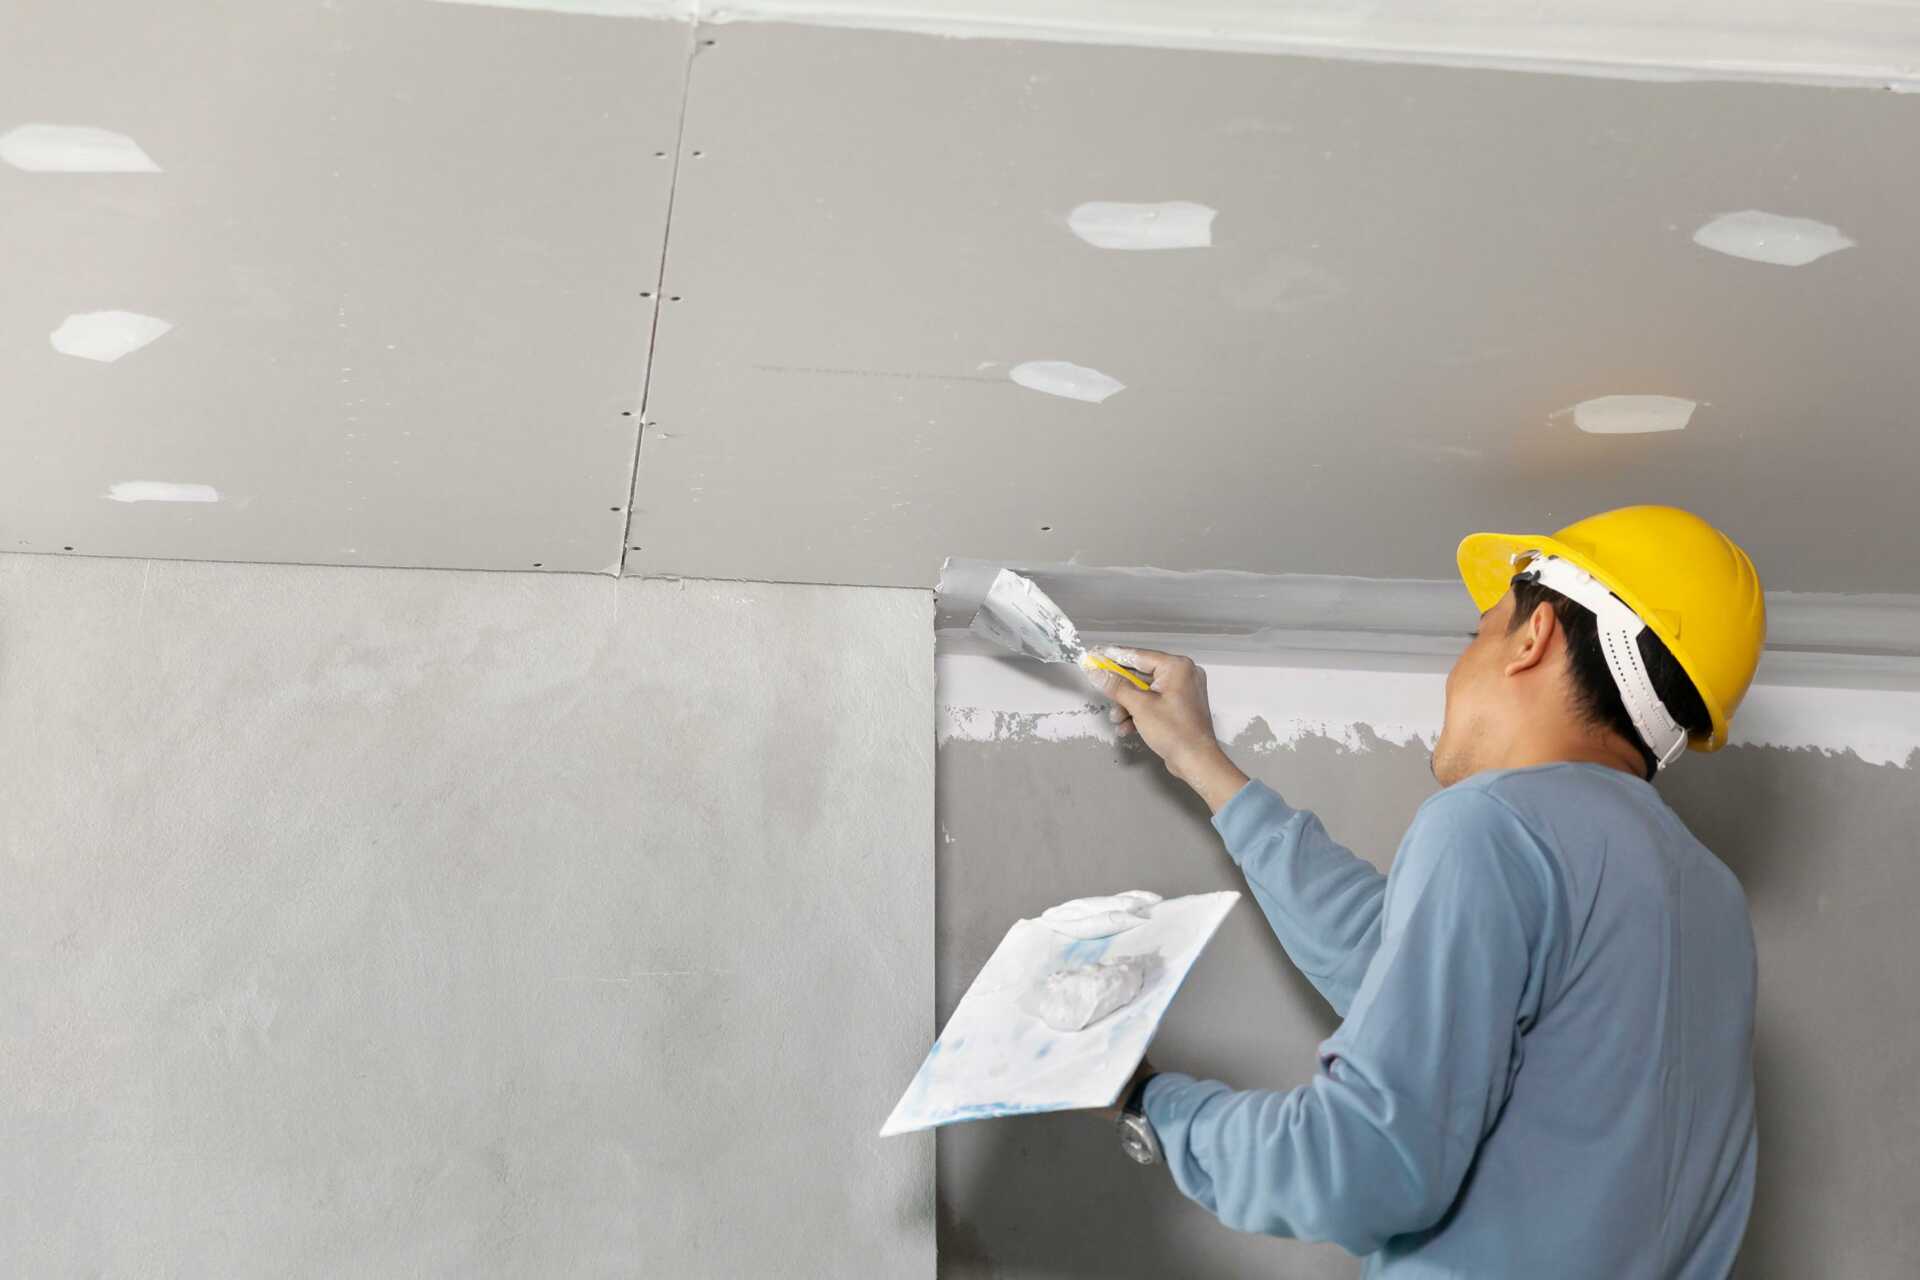
Repairing Holes and Cracks
Regularly coming across holes and cracks in drywall is a common situation for many homeowners. To repair these imperfections effectively, start by removing any damaged drywall material around the hole or crack. Utilize a utility knife to cut out the damaged area in a square or rectangular shape, maintaining clean edges for a smooth patch. Be careful not to cut too deeply into the drywall, as this may necessitate additional repair work.
Once the damaged section is removed, measure the hole and cut a replacement piece of drywall to fit snugly into the opening. Secure the new piece in place using drywall screws or nails, ensuring it’s flush with the surrounding wall surface.
After securing the replacement piece, apply joint compound over the seams to blend the patch with the existing drywall. Utilize a drywall knife to smooth the compound, feathering the edges to create a flawless finish. Allow the compound to dry completely before sanding and applying additional layers as needed to achieve a smooth, uniform surface ready for painting or finishing. Remember to prime the repaired area before painting to ensure a consistent appearance across the wall.
Preparing Surface for Repair
To effectively prepare the surface for repairing damaged drywall, begin by focusing on the area surrounding the imperfections. This step is pivotal as it sets the foundation for a successful repair job. Here are some expert tips to help you remove damaged drywall effectively:
Assess the extent of the damage: Before starting the repair process, carefully inspect the damaged area to understand the scope of the issue.
Clear the surrounding area: Remove any furniture, decorations, or obstacles near the damaged drywall to create a clear working space.
Protect floors and furniture: Cover the floors and nearby furniture with a drop cloth or plastic sheeting to prevent dust and debris from causing additional damage.
Use proper tools: Equip yourself with the necessary tools, such as a utility knife, drywall saw, and a putty knife, to efficiently remove the damaged drywall.
Work with caution: Handle the removal process with care to avoid causing further damage to the surrounding drywall or structure.
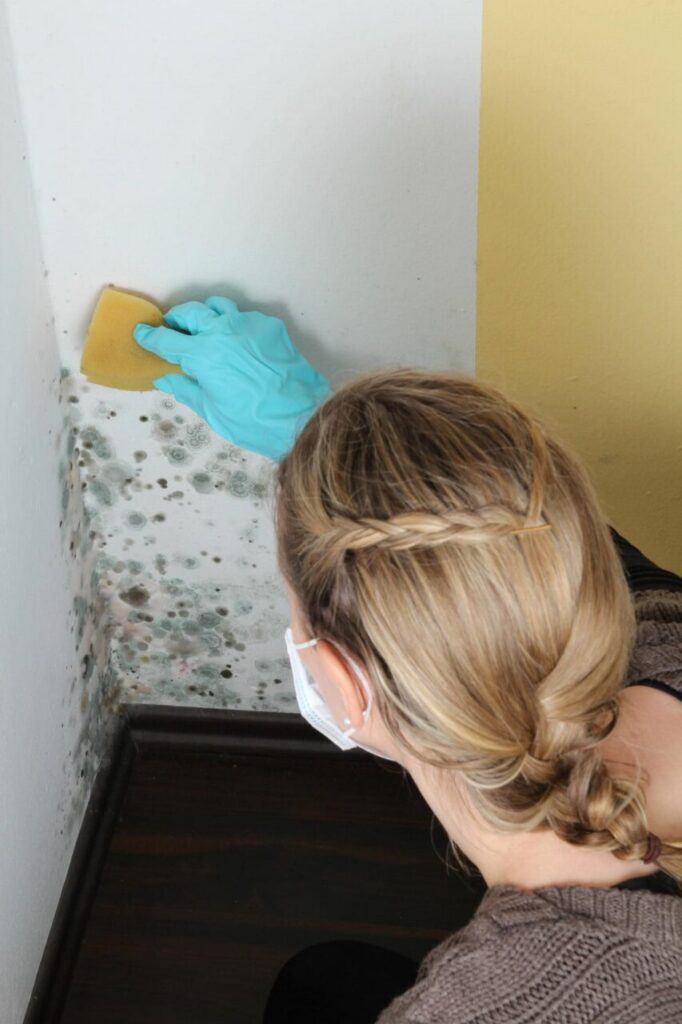
Mold Prevention and Treatment
To effectively prevent and treat mold in drywall restoration projects, it’s important to implement proactive measures throughout the process. Mold can be a common issue in areas where moisture is present, making it vital to address it promptly.
Before commencing any restoration work, make certain that the affected area is thoroughly dried out to prevent further mold growth. Use dehumidifiers and fans to assist in the drying process, and dispose of any materials that can’t be salvaged.
Once the area is dry, examine the drywall for any visible mold. If mold is present, wear protective gear such as gloves and a mask to avoid exposure. Use a mixture of water and detergent to scrub the affected area thoroughly. After cleaning, apply a mold inhibitor to prevent regrowth. It’s indispensable to address any water leaks or moisture sources that may have caused the mold growth to prevent future issues.
In cases where mold has deeply penetrated the drywall and cleaning isn’t effective, it may be necessary to remove and replace the affected sections. Remember to seal off the work area to prevent the spread of mold spores to other parts of the property. By taking these preventative measures, you can effectively prevent and treat mold during your drywall restoration project.
Proper Insulation Installation
Proper insulation installation plays a pivotal role in maintaining energy efficiency and preventing moisture-related issues in drywall restoration. Understanding the importance of insulation, following the correct installation steps, and avoiding common mistakes are key to ensuring a successful restoration project. By paying attention to these details, you can enhance the functionality and longevity of your drywall while creating a comfortable living environment.
Insulation Importance
Proper insulation installation plays a crucial role in your drywall restoration project’s overall effectiveness and efficiency. Ensuring the insulation is correctly installed not only aids in maintaining ideal temperature levels but also contributes to soundproofing and energy efficiency. Here are five key points to ponder for the significance of insulation:
Energy Efficiency: Proper insulation prevents heat loss in the winter and keeps the cool air inside during the summer, reducing the burden on your HVAC system.
Soundproofing: Insulation helps in reducing noise transfer between rooms, providing a quieter and more serene environment.
Moisture Control: Insulation acts as a barrier against moisture, preventing mold and mildew growth that could harm your drywall.
Comfort: A well-insulated space maintains a consistent temperature, ensuring a cozy living or working environment.
Cost Savings: By enhancing energy efficiency, insulation can lead to lower energy bills over time, saving you money in the long haul.
Installation Steps
Throughout the process of drywall restoration, the installation of insulation holds a pivotal role in ensuring the efficiency and effectiveness of your project. Proper insulation installation is vital for maintaining a comfortable environment in your home while also reducing energy costs. Here are the essential steps for correctly installing insulation:
| Installation Steps | Description |
|---|---|
| 1. Measure | Accurately measure the area where insulation will be installed. |
| 2. Cut | Use a utility knife to cut the insulation material to fit the space. |
| 3. Fit | Fit the insulation snugly into the designated area, filling gaps. |
| 4. Seal | Seal any openings or gaps with caulk or foam to prevent air leakage. |
| 5. Secure | Secure the insulation in place using staples, wires, or adhesive as needed. |
Common Mistakes
To ensure the successful installation of insulation during your drywall restoration project, it’s essential to be aware of common errors that can compromise the effectiveness of your efforts. Proper insulation installation plays an important role in maintaining energy efficiency and comfort in your space. Avoid these common mistakes to ensure your insulation serves its purpose effectively:
Incorrect Placement: Placing insulation in the wrong locations can lead to thermal bridging and reduced performance.
Gaps and Voids: Failing to seal all gaps and voids can allow air leakage, reducing the insulation’s efficiency.
Compression: Over-compressing insulation material diminishes its ability to trap air and insulate effectively.
Moisture Issues: Installing insulation in damp areas or without proper vapor barriers can lead to mold growth and reduced insulation effectiveness.
Mismatched R-Values: Using insulation with different R-values in the same area can result in uneven temperature distribution and energy loss.
Matching Texture and Paint
When restoring drywall, the challenge of matching texture and paint can often be a detailed process. Achieving a smooth blend between the repaired area and the existing wall surface is essential for a professional finish. To begin, assess the texture of your drywall. Is it smooth, orange peel, knockdown, or popcorn? Identifying the type of texture will guide your approach to recreating it.
For matching paint, start by determining the color code or name of the existing paint. If this information is unavailable, scrape off a small sample of the paint and take it to your local hardware store for color matching. Once you have the right color, test it on a small, inconspicuous area to make sure it matches under different lighting conditions.
Next, recreate the texture. For smooth walls, sand the repaired area until it blends smoothly with the rest of the wall. Orange peel textures can be achieved using a spray gun or a roller with a stippling brush. Knockdown textures require a slight trowel application followed by flattening with a drywall knife. Popcorn textures can be replicated using a specialized spray.
Remember to feather the edges of both the texture and paint to blend them with the surrounding surface. By carefully matching texture and paint, your drywall restoration will result in a flawless finish that seamlessly integrates with the rest of your wall.
Finishing and Sanding Techniques
As you proceed with the drywall restoration process, mastering effective finishing and sanding techniques is essential to achieving a polished outcome. Proper finishing and sanding are critical steps that can make a significant difference in the final look of your drywall. Here are some essential tips to help you perfect your finishing and sanding techniques:
Use the right tools: Make sure you have high-quality sandpaper, sanding blocks, and taping knives for a smooth finish.
Start with a good foundation: Fill in any gaps or holes with joint compound before sanding to create a smooth surface.
Work in multiple directions: When sanding, alternate between horizontal and vertical strokes to avoid visible sanding marks.
Check for imperfections: Use a light source at a low angle to identify any remaining flaws that need further attention.
Finish with fine grit: Use fine-grit sandpaper to achieve a smooth and flawless finish before priming and painting.
Prime and Paint for Protection
For the best protection and a professional finish, the next significant step in your drywall restoration project is priming and painting. After finishing and sanding your drywall, priming is vital to make sure that the paint adheres properly and provides long-lasting protection. Choose a high-quality primer suited for your specific drywall type and the paint you’ll be using. Apply the primer evenly using a roller or brush, making sure to cover the entire surface. Allow the primer to dry completely before moving on to painting.
When it comes to painting, select a paint color that complements your space and use a paint that’s durable and easy to clean. Satin or semi-gloss finishes are ideal for walls as they’re easier to wipe clean compared to flat finishes. Stir the paint thoroughly before applying, and use a high-quality brush or roller for a smooth and professional-looking finish. Apply the paint in even strokes, starting from the top and working your way down. Multiple coats may be necessary for full coverage, so be patient and allow each coat to dry completely before applying the next.
Priming and painting enhance the aesthetic appeal of your drywall and provide a protective barrier against moisture and everyday wear and tear. By following these steps meticulously, you can achieve a flawless finish that will endure the test of time.
Final Inspection and Touch-Ups
To ensure your drywall restoration project is completed to perfection, the final inspection and touch-ups phase plays an essential role. This phase ensures that every detail is meticulously checked and any imperfections are addressed before considering the project complete.
Top Tips for Final Inspection and Touch-Ups
Lighting Matters: Use proper lighting to inspect the surface for any visible imperfections like dents, bumps, or uneven paint.
Feel for Smoothness: Run your hand over the drywall surface to detect rough areas that might need sanding and smoothing out.
Check for Color Consistency: Ensure the paint color is consistent throughout the entire wall or room by comparing different sections under various lighting conditions.
Focus on Corners and Edges: Pay extra attention to corners and edges where imperfections are more likely to occur, such as uneven seams or paint lines.
Have the Right Tools Handy: Keep touch-up paint, sandpaper, putty knives, and other necessary tools nearby to quickly fix any flaws you come across during the inspection.
Recap
Congratulations on mastering the art of drywall restoration! Remember, the key to success is not just fixing the surface damage, but addressing the underlying issues. Stay vigilant against water leaks and mold growth, and always prioritize safety. With these expert techniques in your toolbox, your drywall will be looking flawless in no time. Keep up the great work, and happy restoring!