Contents
Have you ever wondered what rough-in plumbing looks like? What is a basic plumbing rough in? Well, get ready to find out!
In this article, we’ll show you the basic components, tools, and steps needed for a successful rough-in plumbing installation.
We’ll also give you some common mistakes to avoid and helpful tips to ensure that your plumbing project goes smoothly.
So, let’s dive in and discover the world of rough-in plumbing together!
Key Takeaways
- Rough-in plumbing involves the installation of pipes, fittings, and tools such as copper pipes, PVC pipes, couplings, elbows, tees, valves, pipe cutter, wrenches, tape measure, and pliers.
- The steps for installing rough-in plumbing include planning the layout, marking the locations, installing and securing the pipes, and connecting them to the main supply lines.
- Common mistakes to avoid in rough-in plumbing include incorrect measurements, poor pipe placement, inadequate ventilation, improper slope, and neglecting to test the system.
- To ensure a successful rough-in plumbing installation, attention to detail, the use of quality materials, proper pipe slope, secure pipe installation, and testing the plumbing system are essential.
Basic Components of Rough-In Plumbing
The basic components of rough-in plumbing include pipes, fittings, and fixtures. When it comes to serving others and providing the best plumbing services, it’s essential to understand these components and their importance in the rough-in plumbing process.
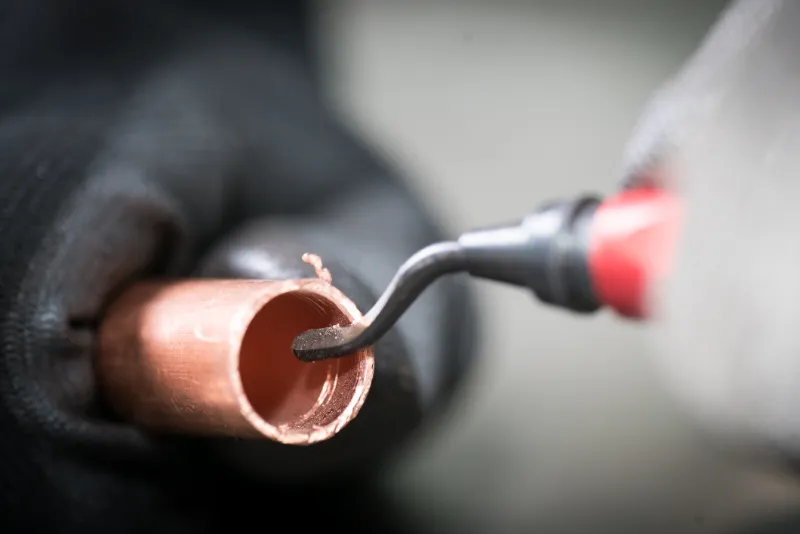
Pipes are the backbone of any plumbing system. They carry water, waste, and gas from one place to another. Copper pipes are commonly used for water supply lines due to their durability and resistance to corrosion. PVC pipes, on the other hand, are often used for waste and vent systems because of their affordability and ease of installation.
Fittings are the connectors that join pipes together and ensure a leak-free system. They come in various shapes and sizes to accommodate different pipe diameters and angles. Common types of fittings include couplings, elbows, tees, and valves. Each fitting serves a specific purpose and must be carefully chosen and installed to maintain the integrity of the plumbing system.
Fixtures refer to the devices that provide water supply and drainage in a building, such as sinks, toilets, showers, and bathtubs. These fixtures are connected to the rough-in plumbing system through pipes and fittings. It’s crucial to install fixtures correctly to ensure proper water flow, prevent leaks, and maintain functionality.
Understanding the basic components of rough-in plumbing is essential for any plumbing professional. By having a solid knowledge of pipes, fittings, and fixtures, you can provide efficient and reliable plumbing services. Remember, serving others means delivering quality workmanship and ensuring customer satisfaction in every plumbing project.
Tools and Materials Needed for Rough-In Plumbing
To successfully carry out rough-in plumbing, you’ll need a variety of tools and materials. These essential items will help you complete the job efficiently and effectively, ensuring that the plumbing system is installed correctly. Here are the tools and materials you’ll need:
- Pipe Cutter: This tool is essential for cutting pipes to the desired length. It creates clean, precise cuts, making it easier to connect pipes together.
- Wrenches: You’ll need a variety of wrenches, including adjustable wrenches and pipe wrenches, to tighten and loosen fittings. These tools provide the necessary grip and leverage to secure pipes and fittings in place.
- Tape Measure: Accurate measurements are crucial in rough-in plumbing. A tape measure will help you determine the correct length and placement of pipes, ensuring a proper fit.
- Pliers: Pliers are versatile tools that come in handy for various tasks, such as tightening or loosening nuts and bolts. They also help with gripping and holding small parts in place.
- Pipe Fittings: These include elbows, tees, couplings, and adapters. They’re used to connect pipes and redirect the flow of water. Make sure to choose fittings that are compatible with the type and size of pipes you’re working with.
- PVC or Copper Pipes: Depending on the plumbing system, you’ll need either PVC or copper pipes. PVC pipes are commonly used for drainage systems, while copper pipes are preferred for water supply lines.
- Pipe Insulation: To prevent heat loss and condensation, it’s important to insulate exposed pipes. Pipe insulation helps maintain water temperature and protects against freezing.
Steps for Installing Rough-In Plumbing
Now let’s dive into the steps involved in installing rough-in plumbing. When it comes to rough-in plumbing, there are several key steps that need to be followed to ensure a successful installation. By understanding these steps, you can confidently tackle your own rough-in plumbing project.
To make it easier for you to follow along, here’s a table outlining the steps involved in installing rough-in plumbing:
| Step | Description | Tips |
|---|---|---|
| 1 | Plan the layout | Ensure proper placement of fixtures and pipes. Consider future needs and local building codes. |
| 2 | Mark the locations | Use a pencil to mark the spots where the pipes will go. Double-check measurements for accuracy. |
| 3 | Install the pipes | Start by cutting and fitting the pipes according to your layout. Use appropriate connectors and fittings. Ensure proper slope for drainage. |
| 4 | Secure the pipes | Use pipe straps or hangers to secure the pipes to the framing. This prevents movement and potential leaks. |
| 5 | Connect to main supply lines | Connect the pipes to the main water supply and sewer lines. Use appropriate connectors and fittings. |
| 6 | Pressure test | Before closing up the walls, perform a pressure test to check for any leaks. Fix any issues before proceeding. |
| 7 | Insulate and protect | Insulate the pipes to prevent heat loss and protect them from freezing. Use insulation sleeves or tape. |
| 8 | Prepare for inspection | Notify the local building department for inspection. Ensure everything meets the required codes and regulations. |
Common Mistakes to Avoid in Rough-In Plumbing
To avoid common mistakes in rough-in plumbing, it’s important that you carefully plan and execute each step. Here are three common mistakes to avoid:
- Incorrect measurements: One of the most crucial aspects of rough-in plumbing is ensuring accurate measurements. Failure to measure correctly can lead to pipes that are either too long or too short, causing leaks or blockages. Take the time to measure everything precisely before cutting and fitting pipes.
- Poor pipe placement: Another common mistake is improper pipe placement. It’s essential to plan the layout of your pipes carefully, considering factors such as water flow, accessibility, and future renovations. Avoid placing pipes too close to electrical wiring or in areas that make repairs or maintenance difficult.
- Inadequate ventilation: Proper ventilation is crucial for preventing odors and maintaining the health of your plumbing system. Failing to provide adequate ventilation can lead to a buildup of gases and unpleasant smells. Make sure to install proper vents and ensure they’re correctly sized and located for optimal airflow.
Tips for Ensuring a Successful Rough-In Plumbing Installation
Ensure a successful rough-in plumbing installation by carefully following these tips.
When it comes to rough-in plumbing, attention to detail is key. Start by carefully planning the layout of your plumbing system. Take the time to measure and mark the locations for pipes, drains, and fixtures. This will help ensure that everything fits properly and avoids any unnecessary rework later on.
Next, make sure to use quality materials. Investing in high-quality pipes, fittings, and fixtures won’t only prevent leaks but also ensure the longevity of your plumbing system. Don’t cut corners when it comes to materials, as it can lead to costly repairs down the line.
Properly slope your pipes to ensure efficient drainage. Gravity is your friend when it comes to plumbing, so make sure that your pipes have the correct slope to allow for proper water flow. This will prevent any standing water or clogs from occurring.
Take the time to secure your pipes properly. Use appropriate hangers and supports to secure your pipes in place. This will prevent any unnecessary movement or noise when water is running through the system.
Lastly, don’t forget to test your plumbing system before closing up the walls. Run water through all the fixtures and check for any leaks or issues. It’s much easier to fix any problems now than after the walls are closed up.
Conclusion
In conclusion, rough-in plumbing is an essential step in the construction or renovation process of a building. It involves installing the basic components of a plumbing system, such as pipes and fittings, before the walls and floors are finished.
By following the correct steps and avoiding common mistakes, you can ensure a successful rough-in plumbing installation. With the right tools and materials, you can create a solid foundation for the rest of the plumbing system to be built upon.