Contents
When it comes to achieving the best residential drywall installation, the walls of your home are not just barriers but reflections of care and precision. Imagine a smooth surface that whispers of expertise and craftsmanship. But how can you ensure that level of perfection? By comprehending the intricacies of drywall materials, adopting techniques that promise longevity, and entrusting skilled professionals with the task. The key lies in the details—details that can make or break the integrity of your living space.
Types of Drywall Materials
When it comes to residential drywall installation, selecting the appropriate drywall material is crucial for achieving a successful outcome.
The two most common types of drywall used in homes are traditional drywall and moisture-resistant greenboard.
Traditional drywall, also known as white board, is suitable for most indoor areas where moisture levels are low, such as living rooms and bedrooms.
Conversely, the green board is specifically designed to resist moisture and is ideal for areas with higher humidity, like bathrooms and kitchens.
Areas that may be exposed to water, such as basements, cement boards, or fiberglass-faced gypsum boards, are excellent choices as they’re highly resistant to moisture and mold.
These types of drywall materials ensure a durable and long-lasting finish in spaces prone to dampness.
Moreover, soundproof drywall can be used in rooms where noise reduction is desired, such as home theaters or bedrooms.
When selecting drywall for your home, consider factors like the room’s purpose, location, and potential exposure to moisture.
Factors Affecting Installation Cost
To accurately estimate the cost of residential drywall installation, various factors come into play that can have a significant impact on the overall expenses. One key factor is the size of the project. Larger areas will naturally require more materials and labor, increasing the overall cost.
The complexity of the installation also plays an important role. Intricate designs or hard-to-reach areas may require more time and skill, leading to higher costs.
Another important consideration is the type of drywall material being used. Different materials come at varying price points, affecting the overall installation cost. Additionally, the quality of the drywall finish desired will impact expenses. Higher-end finishes or special textures will require more expertise and labor, increasing the overall cost of installation.
The condition of the existing walls is also a significant factor affecting installation costs. If repairs or modifications are needed before installation can begin, this will add to the overall expenses. Moreover, the location of the project can influence costs, as labor rates and material availability can vary from region to region.
Importance of Proper Installation Techniques
Proper setup methods are vital in ensuring the longevity and durability of residential drywall. When it comes to setting up drywall in your home, following the appropriate procedures is key to achieving a high-quality finish that will withstand the test of time. Here are three important reasons why proper setup methods are of utmost importance:
Preventing Cracks and Gaps: By using the right tools and techniques during setup, you can significantly decrease the chances of unsightly cracks and gaps appearing in your drywall over time. Securely attaching the drywall sheets, mudding and taping seams correctly, and sanding down imperfections are all essential steps in preventing these issues.
Ensuring Structural Strength: Properly set up drywall contributes to the overall structural strength of your home. By following correct setup methods, such as securely and evenly attaching the drywall to the studs, you can ensure that your walls are strong and stable.
Enhancing Aesthetic Appeal: Implementing proper setup techniques results in a smooth and flawless finish that enhances the overall appearance of your living space. By taking the time to set up drywall correctly, you can achieve a professional look that adds value to your home and instills a sense of pride in your living environment.
Evaluating Local Drywall Contractors
Setting up drywall in your home demands attention to detail and expertise to ensure a lasting and aesthetically pleasing finish. When assessing local drywall contractors, there are key factors to ponder to ensure you find the right fit for your project. Begin by seeking recommendations from friends, family, or neighbors who’ve had positive experiences with local contractors. Personal referrals can offer valuable insights into the contractor’s work ethic and quality of service.
Furthermore, research online reviews and ratings to get a sense of the contractor’s reputation within the community. Look for contractors who have a proven track record of completing projects on time and within budget while upholding high standards of craftsmanship. It’s also crucial to verify that the contractor is licensed, insured, and bonded to safeguard both parties in case of any unforeseen issues during the project.
When reaching out to potential contractors, ask for references and examples of past projects similar to yours. This will give you a better understanding of the contractor’s capabilities and the quality of their work.
Understanding Drywall Repair Services
When it comes to drywall repair services, it’s important to understand the common techniques used to fix issues like cracks, holes, and water damage. By knowing these techniques, you can make informed decisions on the most cost-effective solutions for your specific repair needs.
Hiring a professional for your drywall repairs helps ensure a high-quality finish and also saves you time and effort in the long run.
Common Repair Techniques
Understanding common repair techniques for drywall is essential for maintaining the integrity and appearance of your walls. Here are three practical tips to help you tackle common drywall repairs effectively:
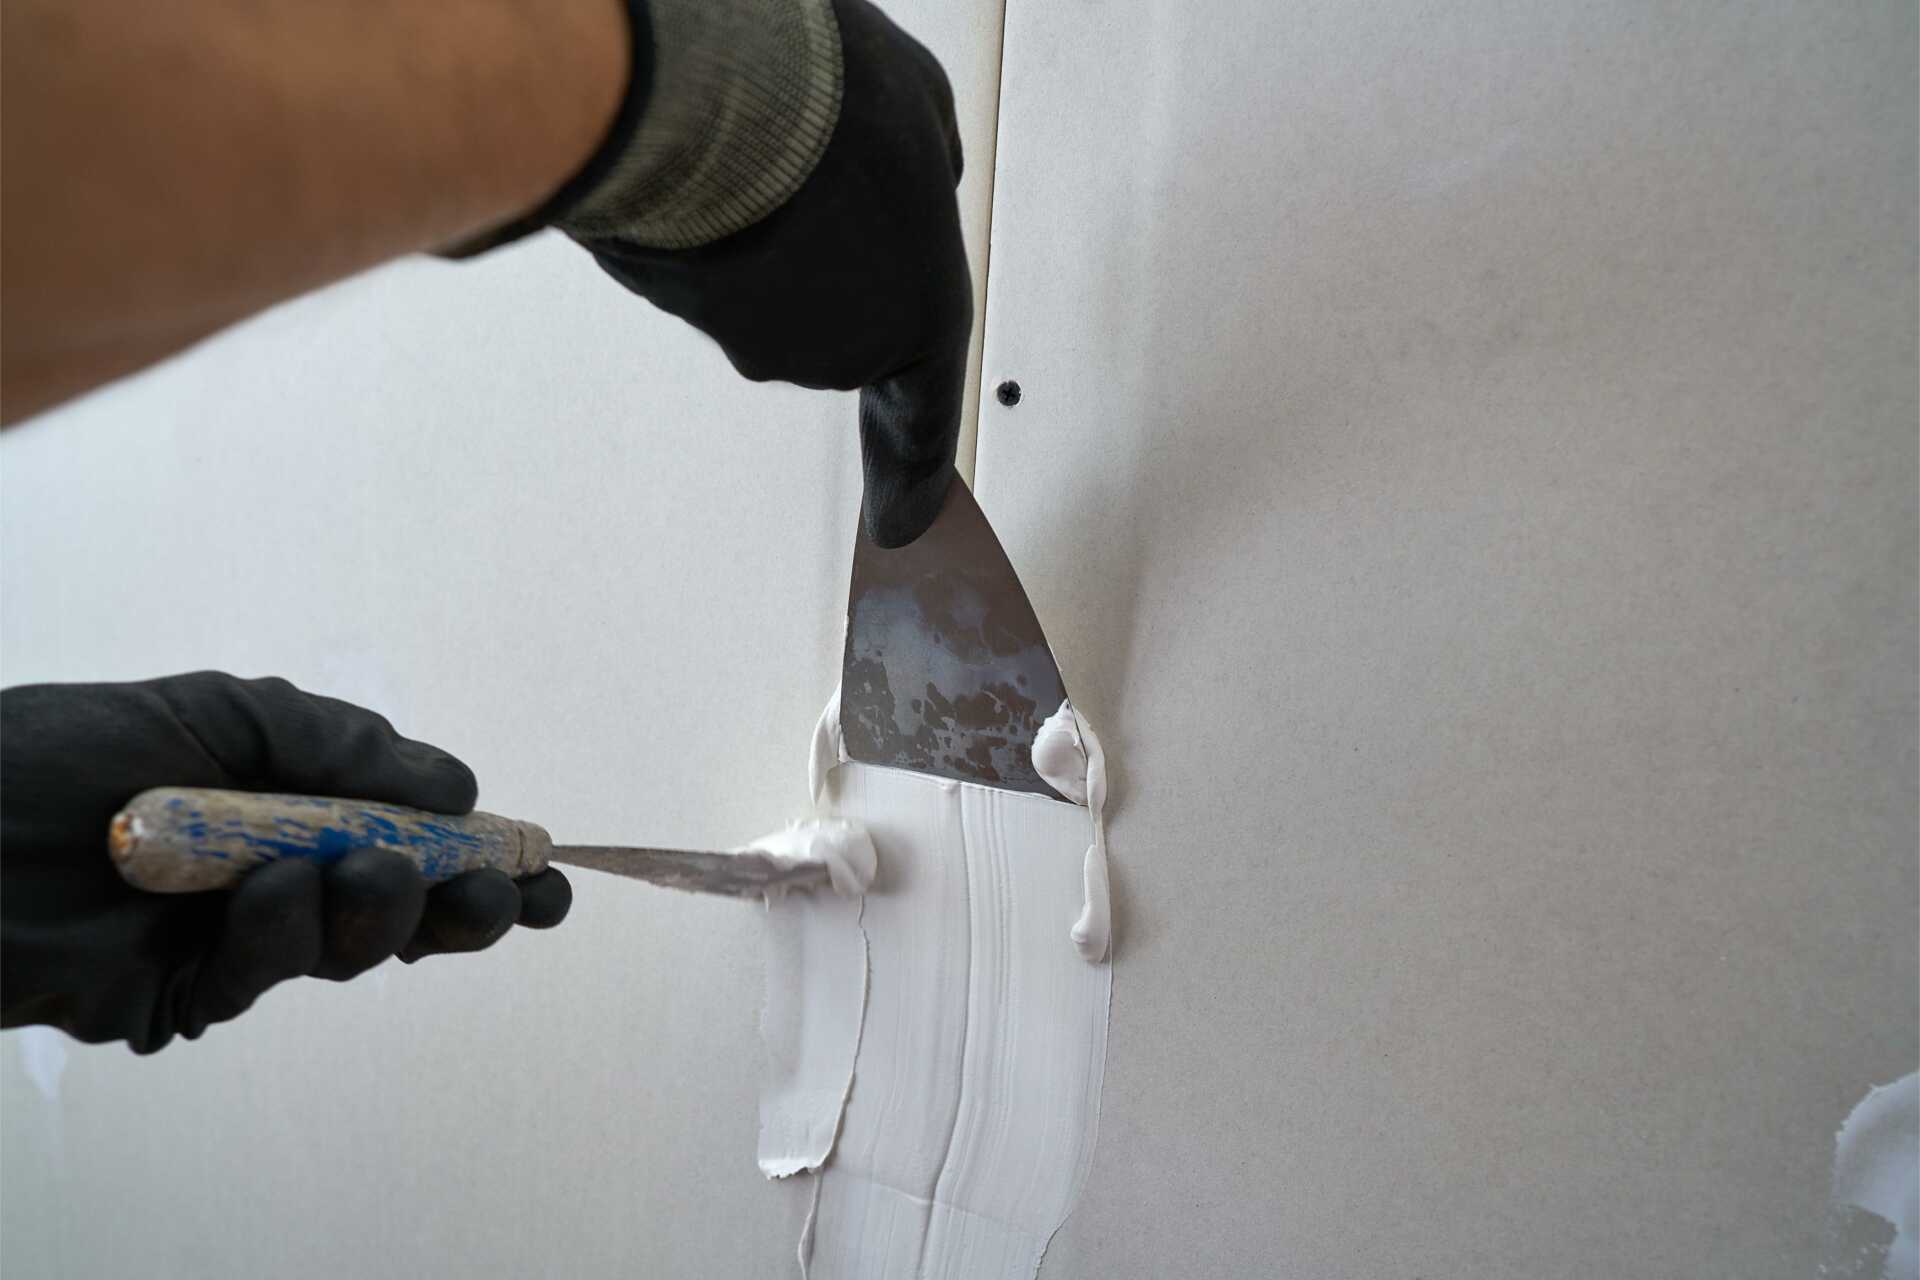
Patch and Paint: For small holes or dents in your drywall, start by cleaning the area and applying a patching compound. Once dry, sand the patch smooth and then paint to match the rest of the wall smoothly.
Crack Repair: To fix cracks in drywall, widen the crack slightly, fill it with joint compound, and smooth it out. After drying, sand the area and repaint it for a flawless finish.
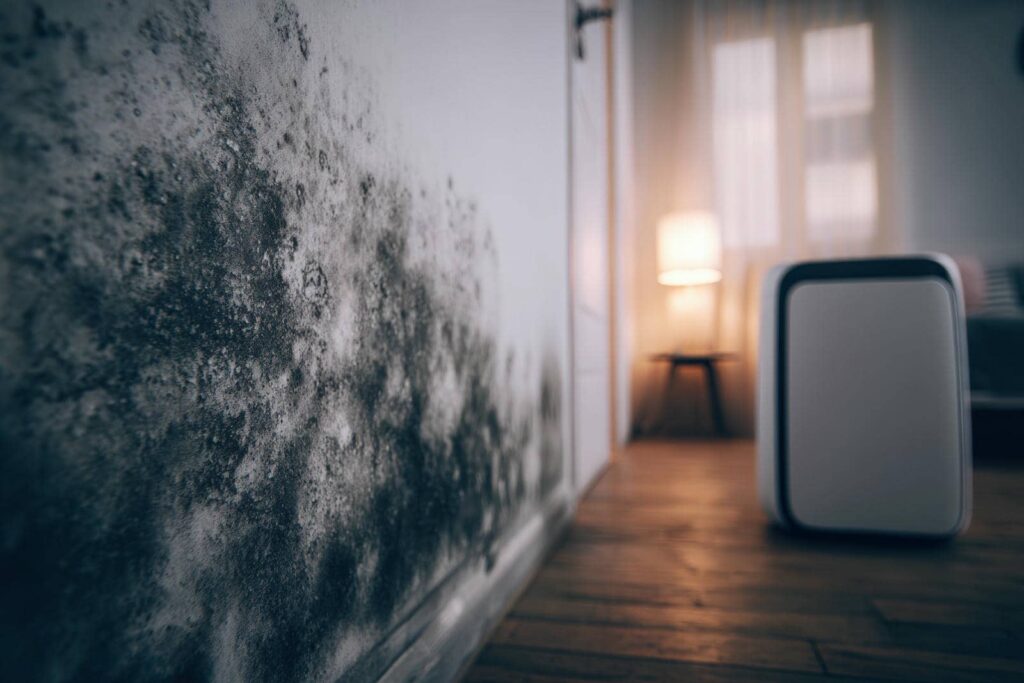
Water Damage Restoration: If your drywall has been affected by water damage, it’s important to address it promptly. Cut out the damaged section, make sure the area is dry, and replace it with new drywall, tape, mud, sand, and paint to blend it in with the rest of the wall.
Cost-Effective Solutions
To effectively manage the maintenance of your drywall, understanding cost-efficient solutions for repairs is crucial. When it comes to caring for your home, minor drywall damages are unavoidable.
One economical option for fixing small holes or cracks is utilizing a DIY drywall repair kit. These kits come with all the necessary tools and materials, making the repair process straightforward and budget-friendly.
Another cost-saving solution is to blend leftover paint to touch up patches instead of repainting entire walls. This approach not only saves money but also ensures a smooth finish.
For larger repairs, consider using joint compound and mesh tape, which are affordable and efficient for covering bigger imperfections. Additionally, mastering basic drywall repair techniques can save you money when hiring professionals for minor fixes.
Professional Repair Benefits
Exploring the world of professional drywall repair services can offer numerous benefits for homeowners seeking efficient solutions to their drywall issues. When considering professional repair services, you aren’t just fixing the visible damage but also enhancing the longevity and structural integrity of your home.
Here are three key advantages of opting for professional drywall repair:
Expertise: Professional repair technicians have the knowledge and experience to assess the extent of the damage accurately. Their proficiency allows them to recommend the most effective solutions customized to your specific needs.
Quality Materials: Professional repair services often use high-grade materials that aren’t only long-lasting but also ensure a smooth finish. This attention to detail results in a repair that blends in harmoniously with the rest of your walls.
Time and Cost-Efficiency: By hiring professionals, you can save time and money in the long run. Their efficient work processes and access to tools enable them to complete the repairs promptly and effectively, minimizing any inconvenience to you.
Benefits of Professional Installation
When it comes to residential drywall installation, opting for professional services provides that you benefit from the expertise in drywalling that professionals bring to the table.
With their experience and skills, you can trust that the quality workmanship provided by professionals assures a finished product that meets high standards.
Hiring professionals for your drywall installation needs can give you peace of mind, knowing that your project will be completed efficiently and with exceptional results.
Expertise in Drywalling
With residential drywall installation, having expertise in drywalling can make a significant difference in the final outcome of your project. When it comes to the intricate process of drywall installation, relying on professionals with specialized skills can ensure a flawless finish that enhances the overall aesthetic of your home.
The Benefits of Expertise in Drywalling:
Precision Cutting and Fitting: Expert drywallers have the knowledge and experience to accurately measure, cut, and fit drywall sheets, minimizing gaps and creating smooth walls.
Seamless Joint Finishing: Professionals excel in taping, mudding, and sanding drywall joints to perfection, resulting in smooth, invisible seams that contribute to a polished look.
Efficient Problem-Solving: Experienced drywallers can quickly identify and address any issues that may arise during the installation process, ensuring a timely and successful project completion.
Quality Workmanship Guaranteed
Ensuring quality workmanship is a fundamental aspect of professional drywall installation. When you opt for professional services, you secure an assurance of superior craftsmanship that transforms your space. Here’s a breakdown of the benefits of choosing expert installation:
| Benefits of Professional Installation | Description |
|---|---|
| 1. Expertise | Professionals possess advanced skills and knowledge in drywall installation, ensuring precision and durability. |
| 2. Efficient Work | Professional installers work efficiently, completing the project in a timely manner without compromising quality. |
| 3. Attention to Detail | Every aspect of the installation, from measurements to finishing touches, is meticulously executed with a focus on perfection. |
| 4. Reliable Results | With professional installation, you can trust that the end result will be flawless, enhancing the aesthetics and value of your home. |
Comparing Drywall Installation Methods
To effectively compare drywall installation methods, it’s essential to take into consideration various factors that can influence the efficiency and quality of the finished project. Here are three key aspects to keep in mind when evaluating different methods:
Installation Speed: One significant factor to ponder is how quickly a specific method allows for the completion of the drywall installation. Some methods, like using drywall adhesive, can be swifter than traditional screwing but may require more expertise to ensure a secure attachment.
Cost Effectiveness: Another vital aspect is the overall cost associated with each installation method. While some techniques may require more pricey tools or materials initially, they could save money in the long run due to reduced labor costs or fewer necessary repairs.
Quality of Finish: The final appearance and durability of the drywall depend on the installation method chosen. Methods that offer a smoother finish or better insulation properties may be preferred based on the specific requirements of the project.
Taking these aspects into account will help you make an informed decision when selecting the best drywall installation method for your residential project.
Eco-Friendly Drywall Options
Occasionally, when contemplating residential drywall installation, choosing environmentally friendly drywall options can significantly lessen your environmental impact. Opting for eco-conscious drywall is a fantastic way to positively contribute to the environment while creating a healthy living space for you and your family.
One popular choice is recycled drywall, which is made from reclaimed materials, reducing the reliance on new resources. This kind of drywall is durable and performs just as effectively as traditional drywall.
Another green option is FSC-certified wood drywall. This type of drywall is crafted from wood obtained from responsibly managed forests, ensuring responsible practices. By selecting FSC-certified wood drywall, you’re endorsing forest conservation efforts and advocating for the use of renewable resources.
Furthermore, there are environmentally friendly drywall options that contain minimal to zero volatile organic compounds (VOCs). These substances can be detrimental to both your well-being and the environment. Choosing low-VOC or VOC-free drywall can enhance indoor air quality and lessen your carbon footprint.
When choosing environmentally friendly drywall options, consider the materials utilized in the production process, their impact on the environment, and their overall eco-friendliness. Making environmentally conscious decisions for your residential drywall installation benefits the planet and establishes a safe and healthy home for you and your loved ones.
Tips for DIY Drywall Installation
When tackling DIY drywall installation, having essential tools like a utility knife, drywall saw, and T-square is vital.
Remove any old drywall, fix structural issues, and apply a coat of primer to ensure proper wall preparation.
Master finishing techniques such as taping, mudding, sanding, and texturing to achieve a smooth and professional-looking surface.
Essential DIY Tools
Equipping yourself with the appropriate tools is necessary for successful DIY drywall installation. Here are three must-have tools to ensure your project progresses smoothly:
Drywall Saw: A pivotal tool for cutting drywall to fit around obstacles like outlets, switches, and corners. Its sharp blade ensures clean cuts without harming the surrounding areas.
Tape Measure: Accurate measurements are essential for achieving a professional finish. A high-quality tape measure helps you precisely cut drywall pieces to the correct size, minimizing errors during installation.
Drywall Screw Gun: This specialized tool makes fastening drywall to studs quick and effective. It assists in driving screws flush with the surface without tearing the paper, ensuring a secure and smooth installation.
Having these necessary tools at your disposal will make your DIY drywall project much simpler and more successful. Remember, the appropriate tools save you time and contribute to a refined and professional-looking end result.
Proper Wall Preparation
Before beginning your DIY drywall installation project, confirm proper wall preparation for a successful outcome. Start by inspecting the walls for damage, such as cracks or holes, and repair them before beginning. Wipe down the walls with a damp cloth to make certain they are clean and free of dust and debris.
It’s also important to remove any old wallpaper or peeling paint to ensure a smooth surface to which the drywall can adhere.
Next, check the walls for any protruding nails or screws and either remove them or drive them in so they’re flush with the surface. Use a stud finder to locate the wall studs and mark their positions to guide you during the installation process.
Additionally, consider applying a coat of primer to the walls before installing the drywall to improve adhesion and ensure a professional finish.
Finishing Techniques
To achieve a professional finish for your DIY drywall installation project, mastering essential finishing techniques is vital. Here are three key tips to help you achieve a flawless outcome:
Proper Sanding Technique: After applying joint compound to seams and screws, allow it to dry completely. Use fine-grit sandpaper to smooth the surface gently. Avoid excessive sanding to prevent damaging the drywall paper.
Applying Multiple Thin Layers: Instead of trying to cover imperfections with one thick layer of joint compound, apply multiple thin layers. This method allows for better control and smoother results. Remember to feather the edges to blend them seamlessly with the surrounding wall.
Priming Before Painting: Before painting your drywall, make sure you prime the surface. Primer helps seal the drywall and creates a smooth base for paint application. It also improves paint adhesion, leading to a more durable and polished finish.
Mastering these finishing techniques will enhance the quality of your DIY drywall project, giving you results that rival those of a seasoned professional.
Common Mistakes to Avoid
When tackling a residential drywall installation project, it’s important to be aware of common errors that can easily be avoided. One prevalent mistake is neglecting to accurately measure and cut the drywall sheets to fit the space. Remember, measure twice and cut once to prevent unnecessary waste and rework.
Additionally, failing to securely attach the drywall properly to the studs can lead to sagging or cracking over time. Make sure to use an adequate number of screws or nails and position them evenly to provide solid support.
Another common mistake isn’t properly applying joint compound and tape. This can result in visible seams and uneven surfaces once painted. Take your time to feather out the compound and make sure the tape is properly embedded for a smooth finish.
Besides, rushing the sanding process can leave behind rough patches and imperfections. Use a fine-grit sandpaper and sand in various directions to achieve a polished surface ready for painting.
Lastly, overlooking the significance of priming before painting can lead to uneven paint absorption and a blotchy finish. Invest in a high-quality primer and apply it evenly for professional-looking results. By being mindful of these common errors and taking the time to do the job correctly, you can achieve a flawless residential drywall installation that you can be proud of.
Wrap-Up
Now that you have all the information on the best residential drywall installation don’t settle for anything less than perfection. Remember, a well-installed drywall adds value to your home and creates a sense of security and comfort. So, choose the right materials, hire skilled professionals, and ensure meticulous installation techniques to achieve a flawless finish that will stand the test of time. Your home deserves nothing but the best.